mirror of
https://github.com/huggingface/diffusers.git
synced 2026-02-22 10:50:35 +08:00
Compare commits
83 Commits
v0.13.1-pa
...
multi_cont
| Author | SHA1 | Date | |
|---|---|---|---|
|
|
6b2d9e6acd | ||
|
|
78507bda24 | ||
|
|
d2a5247a1f | ||
|
|
309d8cf9ab | ||
|
|
b285d94e10 | ||
|
|
55660cfb6d | ||
|
|
46bef6e31d | ||
|
|
22a31760c4 | ||
|
|
f0b661b8fb | ||
|
|
8552fd7efa | ||
|
|
e09a7d01c8 | ||
|
|
d3ce6f4b1e | ||
|
|
ff91f154ee | ||
|
|
62bea2df36 | ||
|
|
9136be14a7 | ||
|
|
7004ff55d5 | ||
|
|
ca7ca11bcd | ||
|
|
c7da8fd233 | ||
|
|
b8bfef2ab9 | ||
|
|
f3f626d556 | ||
|
|
b7b4683bdc | ||
|
|
56958e1177 | ||
|
|
ec021923d2 | ||
|
|
1598a57958 | ||
|
|
63805f8af7 | ||
|
|
9920c333c6 | ||
|
|
f38e3626cd | ||
|
|
5f826a35fb | ||
|
|
f7278638e4 | ||
|
|
b36cbd4fba | ||
|
|
2e3541d7f4 | ||
|
|
2b4f849db9 | ||
|
|
e4c356d3f6 | ||
|
|
2ea1da89ab | ||
|
|
fa6d52d594 | ||
|
|
a72a057d62 | ||
|
|
2f489571a7 | ||
|
|
e75eae3711 | ||
|
|
5e5ce13e2f | ||
|
|
7f0f7e1e91 | ||
|
|
3d2648d743 | ||
|
|
1f4deb697f | ||
|
|
f20c8f5a1a | ||
|
|
5b6582cf73 | ||
|
|
4f0141a67d | ||
|
|
1021929313 | ||
|
|
8f21a9f0e2 | ||
|
|
d9b9533c7e | ||
|
|
801484840a | ||
|
|
8dfff7c015 | ||
|
|
1a6fa69ab6 | ||
|
|
664b4de9e2 | ||
|
|
e4a9fb3b74 | ||
|
|
eadf0e2555 | ||
|
|
856dad57bb | ||
|
|
a75ac3fa8d | ||
|
|
477aaa96d0 | ||
|
|
e3a2c7f02c | ||
|
|
1586186eea | ||
|
|
42beaf1d23 | ||
|
|
824cb538b1 | ||
|
|
a0549fea44 | ||
|
|
1c36a1239e | ||
|
|
48a2eb33f9 | ||
|
|
0e975e5ff6 | ||
|
|
7f43f65235 | ||
|
|
6960e72225 | ||
|
|
5de4347663 | ||
|
|
54bc882d96 | ||
|
|
589faa8c88 | ||
|
|
39a3c77e0d | ||
|
|
17ecf72d44 | ||
|
|
f3fac68c55 | ||
|
|
8f1fe75b4c | ||
|
|
2ab4fcdb43 | ||
|
|
d7cfa0baa2 | ||
|
|
4135558a78 | ||
|
|
45572c2485 | ||
|
|
5f65ef4d0a | ||
|
|
c85efbb9ff | ||
|
|
1e5eaca754 | ||
|
|
55de50921f | ||
|
|
3231712b7d |
1
.github/workflows/build_documentation.yml
vendored
1
.github/workflows/build_documentation.yml
vendored
@@ -13,6 +13,7 @@ jobs:
|
||||
with:
|
||||
commit_sha: ${{ github.sha }}
|
||||
package: diffusers
|
||||
notebook_folder: diffusers_doc
|
||||
languages: en ko
|
||||
secrets:
|
||||
token: ${{ secrets.HUGGINGFACE_PUSH }}
|
||||
|
||||
1
.github/workflows/pr_quality.yml
vendored
1
.github/workflows/pr_quality.yml
vendored
@@ -47,3 +47,4 @@ jobs:
|
||||
run: |
|
||||
python utils/check_copies.py
|
||||
python utils/check_dummies.py
|
||||
make deps_table_check_updated
|
||||
|
||||
@@ -1,5 +1,5 @@
|
||||
<!---
|
||||
Copyright 2022 The HuggingFace Team. All rights reserved.
|
||||
Copyright 2023 The HuggingFace Team. All rights reserved.
|
||||
|
||||
Licensed under the Apache License, Version 2.0 (the "License");
|
||||
you may not use this file except in compliance with the License.
|
||||
|
||||
@@ -467,12 +467,12 @@ image.save("ddpm_generated_image.png")
|
||||
- [Unconditional Diffusion with continuous scheduler](https://huggingface.co/google/ncsnpp-ffhq-1024)
|
||||
|
||||
**Other Image Notebooks**:
|
||||
* [image-to-image generation with Stable Diffusion](https://colab.research.google.com/github/huggingface/notebooks/blob/main/diffusers/image_2_image_using_diffusers.ipynb) ,
|
||||
* [tweak images via repeated Stable Diffusion seeds](https://colab.research.google.com/github/pcuenca/diffusers-examples/blob/main/notebooks/stable-diffusion-seeds.ipynb) ,
|
||||
|
||||
**Diffusers for Other Modalities**:
|
||||
* [Molecule conformation generation](https://colab.research.google.com/github/huggingface/notebooks/blob/main/diffusers/geodiff_molecule_conformation.ipynb) ,
|
||||
* [Model-based reinforcement learning](https://colab.research.google.com/github/huggingface/notebooks/blob/main/diffusers/reinforcement_learning_with_diffusers.ipynb) ,
|
||||
|
||||
### Web Demos
|
||||
If you just want to play around with some web demos, you can try out the following 🚀 Spaces:
|
||||
|
||||
@@ -1,5 +1,5 @@
|
||||
<!---
|
||||
Copyright 2022- The HuggingFace Team. All rights reserved.
|
||||
Copyright 2023- The HuggingFace Team. All rights reserved.
|
||||
|
||||
Licensed under the Apache License, Version 2.0 (the "License");
|
||||
you may not use this file except in compliance with the License.
|
||||
|
||||
9
docs/source/_config.py
Normal file
9
docs/source/_config.py
Normal file
@@ -0,0 +1,9 @@
|
||||
# docstyle-ignore
|
||||
INSTALL_CONTENT = """
|
||||
# Diffusers installation
|
||||
! pip install diffusers transformers datasets accelerate
|
||||
# To install from source instead of the last release, comment the command above and uncomment the following one.
|
||||
# ! pip install git+https://github.com/huggingface/diffusers.git
|
||||
"""
|
||||
|
||||
notebook_first_cells = [{"type": "code", "content": INSTALL_CONTENT}]
|
||||
@@ -8,6 +8,10 @@
|
||||
- local: installation
|
||||
title: Installation
|
||||
title: Get started
|
||||
- sections:
|
||||
- local: tutorials/basic_training
|
||||
title: Train a diffusion model
|
||||
title: Tutorials
|
||||
- sections:
|
||||
- sections:
|
||||
- local: using-diffusers/loading
|
||||
@@ -44,6 +48,8 @@
|
||||
title: How to contribute a Pipeline
|
||||
- local: using-diffusers/using_safetensors
|
||||
title: Using safetensors
|
||||
- local: using-diffusers/weighted_prompts
|
||||
title: Weighting Prompts
|
||||
title: Pipelines for Inference
|
||||
- sections:
|
||||
- local: using-diffusers/rl
|
||||
@@ -78,11 +84,11 @@
|
||||
- local: training/text_inversion
|
||||
title: Textual Inversion
|
||||
- local: training/dreambooth
|
||||
title: Dreambooth
|
||||
title: DreamBooth
|
||||
- local: training/text2image
|
||||
title: Text-to-image fine-tuning
|
||||
title: Text-to-image
|
||||
- local: training/lora
|
||||
title: LoRA Support in Diffusers
|
||||
title: Low-Rank Adaptation of Large Language Models (LoRA)
|
||||
title: Training
|
||||
- sections:
|
||||
- local: conceptual/philosophy
|
||||
@@ -165,6 +171,8 @@
|
||||
title: Self-Attention Guidance
|
||||
- local: api/pipelines/stable_diffusion/panorama
|
||||
title: MultiDiffusion Panorama
|
||||
- local: api/pipelines/stable_diffusion/controlnet
|
||||
title: Text-to-Image Generation with ControlNet Conditioning
|
||||
title: Stable Diffusion
|
||||
- local: api/pipelines/stable_diffusion_2
|
||||
title: Stable Diffusion 2
|
||||
|
||||
@@ -1,4 +1,4 @@
|
||||
<!--Copyright 2022 The HuggingFace Team. All rights reserved.
|
||||
<!--Copyright 2023 The HuggingFace Team. All rights reserved.
|
||||
|
||||
Licensed under the Apache License, Version 2.0 (the "License"); you may not use this file except in compliance with
|
||||
the License. You may obtain a copy of the License at
|
||||
|
||||
@@ -1,4 +1,4 @@
|
||||
<!--Copyright 2022 The HuggingFace Team. All rights reserved.
|
||||
<!--Copyright 2023 The HuggingFace Team. All rights reserved.
|
||||
|
||||
Licensed under the Apache License, Version 2.0 (the "License"); you may not use this file except in compliance with
|
||||
the License. You may obtain a copy of the License at
|
||||
@@ -64,6 +64,12 @@ The models are built on the base class ['ModelMixin'] that is a `torch.nn.module
|
||||
## PriorTransformerOutput
|
||||
[[autodoc]] models.prior_transformer.PriorTransformerOutput
|
||||
|
||||
## ControlNetOutput
|
||||
[[autodoc]] models.controlnet.ControlNetOutput
|
||||
|
||||
## ControlNetModel
|
||||
[[autodoc]] ControlNetModel
|
||||
|
||||
## FlaxModelMixin
|
||||
[[autodoc]] FlaxModelMixin
|
||||
|
||||
|
||||
@@ -1,4 +1,4 @@
|
||||
<!--Copyright 2022 The HuggingFace Team. All rights reserved.
|
||||
<!--Copyright 2023 The HuggingFace Team. All rights reserved.
|
||||
|
||||
Licensed under the Apache License, Version 2.0 (the "License"); you may not use this file except in compliance with
|
||||
the License. You may obtain a copy of the License at
|
||||
|
||||
@@ -1,4 +1,4 @@
|
||||
<!--Copyright 2022 The HuggingFace Team. All rights reserved.
|
||||
<!--Copyright 2023 The HuggingFace Team. All rights reserved.
|
||||
|
||||
Licensed under the Apache License, Version 2.0 (the "License"); you may not use this file except in compliance with
|
||||
the License. You may obtain a copy of the License at
|
||||
@@ -46,6 +46,7 @@ available a colab notebook to directly try them out.
|
||||
|---|---|:---:|:---:|
|
||||
| [alt_diffusion](./alt_diffusion) | [**AltDiffusion**](https://arxiv.org/abs/2211.06679) | Image-to-Image Text-Guided Generation | -
|
||||
| [audio_diffusion](./audio_diffusion) | [**Audio Diffusion**](https://github.com/teticio/audio_diffusion.git) | Unconditional Audio Generation |
|
||||
| [controlnet](./api/pipelines/stable_diffusion/controlnet) | [**ControlNet with Stable Diffusion**](https://arxiv.org/abs/2302.05543) | Image-to-Image Text-Guided Generation | [](https://colab.research.google.com/github/huggingface/notebooks/blob/main/diffusers/controlnet.ipynb)
|
||||
| [cycle_diffusion](./cycle_diffusion) | [**Cycle Diffusion**](https://arxiv.org/abs/2210.05559) | Image-to-Image Text-Guided Generation |
|
||||
| [dance_diffusion](./dance_diffusion) | [**Dance Diffusion**](https://github.com/williamberman/diffusers.git) | Unconditional Audio Generation |
|
||||
| [ddpm](./ddpm) | [**Denoising Diffusion Probabilistic Models**](https://arxiv.org/abs/2006.11239) | Unconditional Image Generation |
|
||||
|
||||
@@ -1,4 +1,4 @@
|
||||
<!--Copyright 2022 The HuggingFace Team. All rights reserved.
|
||||
<!--Copyright 2023 The HuggingFace Team. All rights reserved.
|
||||
|
||||
Licensed under the Apache License, Version 2.0 (the "License"); you may not use this file except in compliance with
|
||||
the License. You may obtain a copy of the License at
|
||||
|
||||
@@ -32,7 +32,7 @@ Resources
|
||||
|
||||
| Pipeline | Tasks | Colab | Demo
|
||||
|---|---|:---:|:---:|
|
||||
| [pipeline_semantic_stable_diffusion_attend_and_excite.py](https://github.com/huggingface/diffusers/blob/main/src/diffusers/pipelines/stable_diffusion/pipeline_semantic_stable_diffusion_attend_and_excite) | *Text-to-Image Generation* | - | -
|
||||
| [pipeline_semantic_stable_diffusion_attend_and_excite.py](https://github.com/huggingface/diffusers/blob/main/src/diffusers/pipelines/stable_diffusion/pipeline_semantic_stable_diffusion_attend_and_excite) | *Text-to-Image Generation* | - | https://huggingface.co/spaces/AttendAndExcite/Attend-and-Excite
|
||||
|
||||
|
||||
### Usage example
|
||||
|
||||
167
docs/source/en/api/pipelines/stable_diffusion/controlnet.mdx
Normal file
167
docs/source/en/api/pipelines/stable_diffusion/controlnet.mdx
Normal file
@@ -0,0 +1,167 @@
|
||||
<!--Copyright 2023 The HuggingFace Team. All rights reserved.
|
||||
|
||||
Licensed under the Apache License, Version 2.0 (the "License"); you may not use this file except in compliance with
|
||||
the License. You may obtain a copy of the License at
|
||||
|
||||
http://www.apache.org/licenses/LICENSE-2.0
|
||||
|
||||
Unless required by applicable law or agreed to in writing, software distributed under the License is distributed on
|
||||
an "AS IS" BASIS, WITHOUT WARRANTIES OR CONDITIONS OF ANY KIND, either express or implied. See the License for the
|
||||
specific language governing permissions and limitations under the License.
|
||||
-->
|
||||
|
||||
# Text-to-Image Generation with ControlNet Conditioning
|
||||
|
||||
## Overview
|
||||
|
||||
[Adding Conditional Control to Text-to-Image Diffusion Models](https://arxiv.org/abs/2302.05543) by Lvmin Zhang and Maneesh Agrawala.
|
||||
|
||||
Using the pretrained models we can provide control images (for example, a depth map) to control Stable Diffusion text-to-image generation so that it follows the structure of the depth image and fills in the details.
|
||||
|
||||
The abstract of the paper is the following:
|
||||
|
||||
*We present a neural network structure, ControlNet, to control pretrained large diffusion models to support additional input conditions. The ControlNet learns task-specific conditions in an end-to-end way, and the learning is robust even when the training dataset is small (< 50k). Moreover, training a ControlNet is as fast as fine-tuning a diffusion model, and the model can be trained on a personal devices. Alternatively, if powerful computation clusters are available, the model can scale to large amounts (millions to billions) of data. We report that large diffusion models like Stable Diffusion can be augmented with ControlNets to enable conditional inputs like edge maps, segmentation maps, keypoints, etc. This may enrich the methods to control large diffusion models and further facilitate related applications.*
|
||||
|
||||
This model was contributed by the amazing community contributor [takuma104](https://huggingface.co/takuma104) ❤️ .
|
||||
|
||||
Resources:
|
||||
|
||||
* [Paper](https://arxiv.org/abs/2302.05543)
|
||||
* [Original Code](https://github.com/lllyasviel/ControlNet)
|
||||
|
||||
## Available Pipelines:
|
||||
|
||||
| Pipeline | Tasks | Demo
|
||||
|---|---|:---:|
|
||||
| [StableDiffusionControlNetPipeline](https://github.com/huggingface/diffusers/blob/main/src/diffusers/pipelines/stable_diffusion/pipeline_stable_diffusion_controlnet.py) | *Text-to-Image Generation with ControlNet Conditioning* | [Colab Example](https://colab.research.google.com/github/huggingface/notebooks/blob/main/diffusers/controlnet.ipynb)
|
||||
|
||||
## Usage example
|
||||
|
||||
In the following we give a simple example of how to use a *ControlNet* checkpoint with Diffusers for inference.
|
||||
The inference pipeline is the same for all pipelines:
|
||||
|
||||
* 1. Take an image and run it through a pre-conditioning processor.
|
||||
* 2. Run the pre-processed image through the [`StableDiffusionControlNetPipeline`].
|
||||
|
||||
Let's have a look at a simple example using the [Canny Edge ControlNet](https://huggingface.co/lllyasviel/sd-controlnet-canny).
|
||||
|
||||
```python
|
||||
from diffusers import StableDiffusionControlNetPipeline
|
||||
from diffusers.utils import load_image
|
||||
|
||||
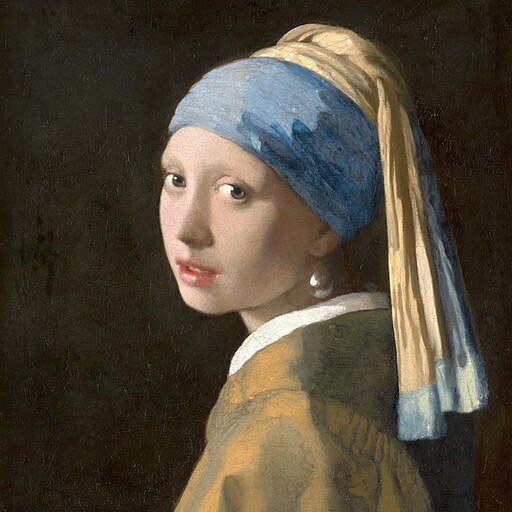
# Let's load the popular vermeer image
|
||||
image = load_image(
|
||||
"https://hf.co/datasets/huggingface/documentation-images/resolve/main/diffusers/input_image_vermeer.png"
|
||||
)
|
||||
```
|
||||
|
||||
|
||||
|
||||
Next, we process the image to get the canny image. This is step *1.* - running the pre-conditioning processor. The pre-conditioning processor is different for every ControlNet. Please see the model cards of the [official checkpoints](#controlnet-with-stable-diffusion-1.5) for more information about other models.
|
||||
|
||||
First, we need to install opencv:
|
||||
|
||||
```
|
||||
pip install opencv-contrib-python
|
||||
```
|
||||
|
||||
Next, let's also install all required Hugging Face libraries:
|
||||
|
||||
```
|
||||
pip install diffusers transformers git+https://github.com/huggingface/accelerate.git
|
||||
```
|
||||
|
||||
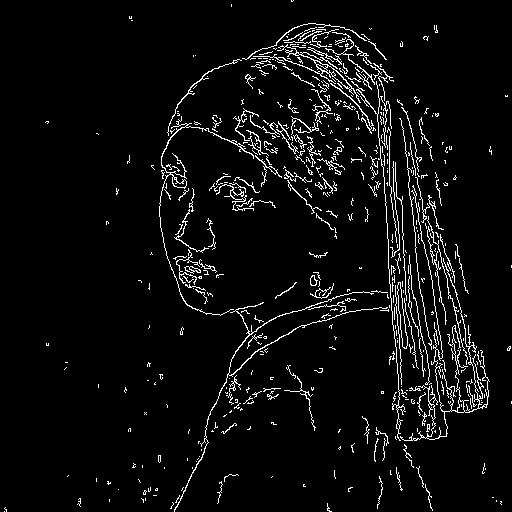
Then we can retrieve the canny edges of the image.
|
||||
|
||||
```python
|
||||
import cv2
|
||||
from PIL import Image
|
||||
import numpy as np
|
||||
|
||||
image = np.array(image)
|
||||
|
||||
low_threshold = 100
|
||||
high_threshold = 200
|
||||
|
||||
image = cv2.Canny(image, low_threshold, high_threshold)
|
||||
image = image[:, :, None]
|
||||
image = np.concatenate([image, image, image], axis=2)
|
||||
canny_image = Image.fromarray(image)
|
||||
```
|
||||
|
||||
Let's take a look at the processed image.
|
||||
|
||||
|
||||
|
||||
Now, we load the official [Stable Diffusion 1.5 Model](runwayml/stable-diffusion-v1-5) as well as the ControlNet for canny edges.
|
||||
|
||||
```py
|
||||
from diffusers import StableDiffusionControlNetPipeline, ControlNetModel
|
||||
import torch
|
||||
|
||||
controlnet = ControlNetModel.from_pretrained("lllyasviel/sd-controlnet-canny", torch_dtype=torch.float16)
|
||||
pipe = StableDiffusionControlNetPipeline.from_pretrained(
|
||||
"runwayml/stable-diffusion-v1-5", controlnet=controlnet, torch_dtype=torch.float16
|
||||
)
|
||||
```
|
||||
|
||||
To speed-up things and reduce memory, let's enable model offloading and use the fast [`UniPCMultistepScheduler`].
|
||||
|
||||
```py
|
||||
from diffusers import UniPCMultistepScheduler
|
||||
|
||||
pipe.scheduler = UniPCMultistepScheduler.from_config(pipe.scheduler.config)
|
||||
|
||||
# this command loads the individual model components on GPU on-demand.
|
||||
pipe.enable_model_cpu_offload()
|
||||
```
|
||||
|
||||
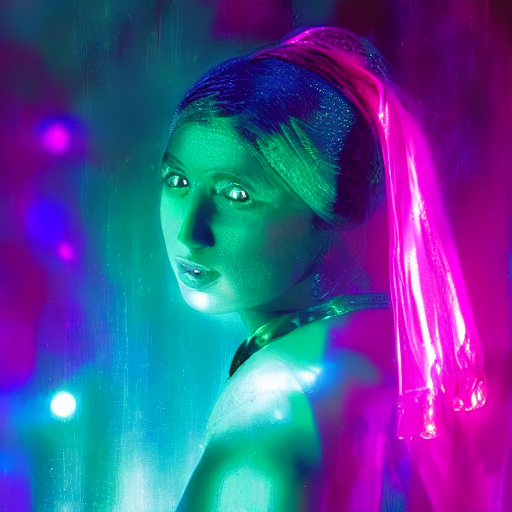
Finally, we can run the pipeline:
|
||||
|
||||
```py
|
||||
generator = torch.manual_seed(0)
|
||||
|
||||
out_image = pipe(
|
||||
"disco dancer with colorful lights", num_inference_steps=20, generator=generator, image=canny_image
|
||||
).images[0]
|
||||
```
|
||||
|
||||
This should take only around 3-4 seconds on GPU (depending on hardware). The output image then looks as follows:
|
||||
|
||||
|
||||
|
||||
|
||||
**Note**: To see how to run all other ControlNet checkpoints, please have a look at [ControlNet with Stable Diffusion 1.5](#controlnet-with-stable-diffusion-1.5)
|
||||
|
||||
<!-- TODO: add space -->
|
||||
|
||||
## Available checkpoints
|
||||
|
||||
ControlNet requires a *control image* in addition to the text-to-image *prompt*.
|
||||
Each pretrained model is trained using a different conditioning method that requires different images for conditioning the generated outputs. For example, Canny edge conditioning requires the control image to be the output of a Canny filter, while depth conditioning requires the control image to be a depth map. See the overview and image examples below to know more.
|
||||
|
||||
All checkpoints can be found under the authors' namespace [lllyasviel](https://huggingface.co/lllyasviel).
|
||||
|
||||
### ControlNet with Stable Diffusion 1.5
|
||||
|
||||
| Model Name | Control Image Overview| Control Image Example | Generated Image Example |
|
||||
|---|---|---|---|
|
||||
|[lllyasviel/sd-controlnet-canny](https://huggingface.co/lllyasviel/sd-controlnet-canny)<br/> *Trained with canny edge detection* | A monochrome image with white edges on a black background.|<a href="https://huggingface.co/takuma104/controlnet_dev/blob/main/gen_compare/control_images/converted/control_bird_canny.png"><img width="64" style="margin:0;padding:0;" src="https://huggingface.co/takuma104/controlnet_dev/resolve/main/gen_compare/control_images/converted/control_bird_canny.png"/></a>|<a href="https://huggingface.co/takuma104/controlnet_dev/resolve/main/gen_compare/output_images/diffusers/output_bird_canny_1.png"><img width="64" src="https://huggingface.co/takuma104/controlnet_dev/resolve/main/gen_compare/output_images/diffusers/output_bird_canny_1.png"/></a>|
|
||||
|[lllyasviel/sd-controlnet-depth](https://huggingface.co/lllyasviel/sd-controlnet-depth)<br/> *Trained with Midas depth estimation* |A grayscale image with black representing deep areas and white representing shallow areas.|<a href="https://huggingface.co/takuma104/controlnet_dev/blob/main/gen_compare/control_images/converted/control_vermeer_depth.png"><img width="64" src="https://huggingface.co/takuma104/controlnet_dev/resolve/main/gen_compare/control_images/converted/control_vermeer_depth.png"/></a>|<a href="https://huggingface.co/takuma104/controlnet_dev/resolve/main/gen_compare/output_images/diffusers/output_vermeer_depth_2.png"><img width="64" src="https://huggingface.co/takuma104/controlnet_dev/resolve/main/gen_compare/output_images/diffusers/output_vermeer_depth_2.png"/></a>|
|
||||
|[lllyasviel/sd-controlnet-hed](https://huggingface.co/lllyasviel/sd-controlnet-hed)<br/> *Trained with HED edge detection (soft edge)* |A monochrome image with white soft edges on a black background.|<a href="https://huggingface.co/takuma104/controlnet_dev/blob/main/gen_compare/control_images/converted/control_bird_hed.png"><img width="64" src="https://huggingface.co/takuma104/controlnet_dev/resolve/main/gen_compare/control_images/converted/control_bird_hed.png"/></a>|<a href="https://huggingface.co/takuma104/controlnet_dev/resolve/main/gen_compare/output_images/diffusers/output_bird_hed_1.png"><img width="64" src="https://huggingface.co/takuma104/controlnet_dev/resolve/main/gen_compare/output_images/diffusers/output_bird_hed_1.png"/></a> |
|
||||
|[lllyasviel/sd-controlnet-mlsd](https://huggingface.co/lllyasviel/sd-controlnet-mlsd)<br/> *Trained with M-LSD line detection* |A monochrome image composed only of white straight lines on a black background.|<a href="https://huggingface.co/takuma104/controlnet_dev/blob/main/gen_compare/control_images/converted/control_room_mlsd.png"><img width="64" src="https://huggingface.co/takuma104/controlnet_dev/resolve/main/gen_compare/control_images/converted/control_room_mlsd.png"/></a>|<a href="https://huggingface.co/takuma104/controlnet_dev/resolve/main/gen_compare/output_images/diffusers/output_room_mlsd_0.png"><img width="64" src="https://huggingface.co/takuma104/controlnet_dev/resolve/main/gen_compare/output_images/diffusers/output_room_mlsd_0.png"/></a>|
|
||||
|[lllyasviel/sd-controlnet-normal](https://huggingface.co/lllyasviel/sd-controlnet-normal)<br/> *Trained with normal map* |A [normal mapped](https://en.wikipedia.org/wiki/Normal_mapping) image.|<a href="https://huggingface.co/takuma104/controlnet_dev/blob/main/gen_compare/control_images/converted/control_human_normal.png"><img width="64" src="https://huggingface.co/takuma104/controlnet_dev/resolve/main/gen_compare/control_images/converted/control_human_normal.png"/></a>|<a href="https://huggingface.co/takuma104/controlnet_dev/resolve/main/gen_compare/output_images/diffusers/output_human_normal_1.png"><img width="64" src="https://huggingface.co/takuma104/controlnet_dev/resolve/main/gen_compare/output_images/diffusers/output_human_normal_1.png"/></a>|
|
||||
|[lllyasviel/sd-controlnet-openpose](https://huggingface.co/lllyasviel/sd-controlnet_openpose)<br/> *Trained with OpenPose bone image* |A [OpenPose bone](https://github.com/CMU-Perceptual-Computing-Lab/openpose) image.|<a href="https://huggingface.co/takuma104/controlnet_dev/blob/main/gen_compare/control_images/converted/control_human_openpose.png"><img width="64" src="https://huggingface.co/takuma104/controlnet_dev/resolve/main/gen_compare/control_images/converted/control_human_openpose.png"/></a>|<a href="https://huggingface.co/takuma104/controlnet_dev/resolve/main/gen_compare/output_images/diffusers/output_human_openpose_0.png"><img width="64" src="https://huggingface.co/takuma104/controlnet_dev/resolve/main/gen_compare/output_images/diffusers/output_human_openpose_0.png"/></a>|
|
||||
|[lllyasviel/sd-controlnet-scribble](https://huggingface.co/lllyasviel/sd-controlnet_scribble)<br/> *Trained with human scribbles* |A hand-drawn monochrome image with white outlines on a black background.|<a href="https://huggingface.co/takuma104/controlnet_dev/blob/main/gen_compare/control_images/converted/control_vermeer_scribble.png"><img width="64" src="https://huggingface.co/takuma104/controlnet_dev/resolve/main/gen_compare/control_images/converted/control_vermeer_scribble.png"/></a>|<a href="https://huggingface.co/takuma104/controlnet_dev/resolve/main/gen_compare/output_images/diffusers/output_vermeer_scribble_0.png"><img width="64" src="https://huggingface.co/takuma104/controlnet_dev/resolve/main/gen_compare/output_images/diffusers/output_vermeer_scribble_0.png"/></a> |
|
||||
|[lllyasviel/sd-controlnet-seg](https://huggingface.co/lllyasviel/sd-controlnet_seg)<br/>*Trained with semantic segmentation* |An [ADE20K](https://groups.csail.mit.edu/vision/datasets/ADE20K/)'s segmentation protocol image.|<a href="https://huggingface.co/takuma104/controlnet_dev/blob/main/gen_compare/control_images/converted/control_room_seg.png"><img width="64" src="https://huggingface.co/takuma104/controlnet_dev/resolve/main/gen_compare/control_images/converted/control_room_seg.png"/></a>|<a href="https://huggingface.co/takuma104/controlnet_dev/resolve/main/gen_compare/output_images/diffusers/output_room_seg_1.png"><img width="64" src="https://huggingface.co/takuma104/controlnet_dev/resolve/main/gen_compare/output_images/diffusers/output_room_seg_1.png"/></a> |
|
||||
|
||||
## StableDiffusionControlNetPipeline
|
||||
[[autodoc]] StableDiffusionControlNetPipeline
|
||||
- all
|
||||
- __call__
|
||||
- enable_attention_slicing
|
||||
- disable_attention_slicing
|
||||
- enable_vae_slicing
|
||||
- disable_vae_slicing
|
||||
- enable_xformers_memory_efficient_attention
|
||||
- disable_xformers_memory_efficient_attention
|
||||
@@ -1,4 +1,4 @@
|
||||
<!--Copyright 2022 The HuggingFace Team. All rights reserved.
|
||||
<!--Copyright 2023 The HuggingFace Team. All rights reserved.
|
||||
|
||||
Licensed under the Apache License, Version 2.0 (the "License"); you may not use this file except in compliance with
|
||||
the License. You may obtain a copy of the License at
|
||||
|
||||
@@ -1,4 +1,4 @@
|
||||
<!--Copyright 2022 The HuggingFace Team. All rights reserved.
|
||||
<!--Copyright 2023 The HuggingFace Team. All rights reserved.
|
||||
|
||||
Licensed under the Apache License, Version 2.0 (the "License"); you may not use this file except in compliance with
|
||||
the License. You may obtain a copy of the License at
|
||||
@@ -20,6 +20,9 @@ The original codebase can be found here: [CampVis/stable-diffusion](https://gith
|
||||
|
||||
[`StableDiffusionImg2ImgPipeline`] is compatible with all Stable Diffusion checkpoints for [Text-to-Image](./text2img)
|
||||
|
||||
The pipeline uses the diffusion-denoising mechanism proposed by SDEdit ([SDEdit: Guided Image Synthesis and Editing with Stochastic Differential Equations](https://arxiv.org/abs/2108.01073)
|
||||
proposed by Chenlin Meng, Yutong He, Yang Song, Jiaming Song, Jiajun Wu, Jun-Yan Zhu, Stefano Ermon).
|
||||
|
||||
[[autodoc]] StableDiffusionImg2ImgPipeline
|
||||
- all
|
||||
- __call__
|
||||
|
||||
@@ -1,4 +1,4 @@
|
||||
<!--Copyright 2022 The HuggingFace Team. All rights reserved.
|
||||
<!--Copyright 2023 The HuggingFace Team. All rights reserved.
|
||||
|
||||
Licensed under the Apache License, Version 2.0 (the "License"); you may not use this file except in compliance with
|
||||
the License. You may obtain a copy of the License at
|
||||
|
||||
@@ -60,7 +60,7 @@ def download_image(url):
|
||||
image = download_image(url)
|
||||
|
||||
prompt = "make the mountains snowy"
|
||||
edit = pipe(prompt, image=image, num_inference_steps=20, image_guidance_scale=1.5, guidance_scale=7).images[0]
|
||||
images = pipe(prompt, image=image, num_inference_steps=20, image_guidance_scale=1.5, guidance_scale=7).images
|
||||
images[0].save("snowy_mountains.png")
|
||||
```
|
||||
|
||||
|
||||
@@ -25,6 +25,7 @@ Resources:
|
||||
* [Project Page](https://pix2pixzero.github.io/).
|
||||
* [Paper](https://arxiv.org/abs/2302.03027).
|
||||
* [Original Code](https://github.com/pix2pixzero/pix2pix-zero).
|
||||
* [Demo](https://huggingface.co/spaces/pix2pix-zero-library/pix2pix-zero-demo).
|
||||
|
||||
## Tips
|
||||
|
||||
@@ -41,12 +42,13 @@ the above example, a valid input prompt would be: "a high resolution painting of
|
||||
* Change the input prompt to include "dog".
|
||||
* To learn more about how the source and target embeddings are generated, refer to the [original
|
||||
paper](https://arxiv.org/abs/2302.03027). Below, we also provide some directions on how to generate the embeddings.
|
||||
* Note that the quality of the outputs generated with this pipeline is dependent on how good the `source_embeds` and `target_embeds` are. Please, refer to [this discussion](#generating-source-and-target-embeddings) for some suggestions on the topic.
|
||||
|
||||
## Available Pipelines:
|
||||
|
||||
| Pipeline | Tasks | Demo
|
||||
|---|---|:---:|
|
||||
| [StableDiffusionPix2PixZeroPipeline](https://github.com/huggingface/diffusers/blob/main/src/diffusers/pipelines/stable_diffusion/pipeline_stable_diffusion_pix2pix_zero.py) | *Text-Based Image Editing* | [🤗 Space] (soon) |
|
||||
| [StableDiffusionPix2PixZeroPipeline](https://github.com/huggingface/diffusers/blob/main/src/diffusers/pipelines/stable_diffusion/pipeline_stable_diffusion_pix2pix_zero.py) | *Text-Based Image Editing* | [🤗 Space](https://huggingface.co/spaces/pix2pix-zero-library/pix2pix-zero-demo) |
|
||||
|
||||
<!-- TODO: add Colab -->
|
||||
|
||||
@@ -74,7 +76,7 @@ pipeline = StableDiffusionPix2PixZeroPipeline.from_pretrained(
|
||||
pipeline.scheduler = DDIMScheduler.from_config(pipeline.scheduler.config)
|
||||
pipeline.to("cuda")
|
||||
|
||||
prompt = "a high resolution painting of a cat in the style of van gough"
|
||||
prompt = "a high resolution painting of a cat in the style of van gogh"
|
||||
src_embs_url = "https://github.com/pix2pixzero/pix2pix-zero/raw/main/assets/embeddings_sd_1.4/cat.pt"
|
||||
target_embs_url = "https://github.com/pix2pixzero/pix2pix-zero/raw/main/assets/embeddings_sd_1.4/dog.pt"
|
||||
|
||||
|
||||
@@ -1,4 +1,4 @@
|
||||
<!--Copyright 2022 The HuggingFace Team. All rights reserved.
|
||||
<!--Copyright 2023 The HuggingFace Team. All rights reserved.
|
||||
|
||||
Licensed under the Apache License, Version 2.0 (the "License"); you may not use this file except in compliance with
|
||||
the License. You may obtain a copy of the License at
|
||||
@@ -36,4 +36,6 @@ Available Checkpoints are:
|
||||
- enable_vae_slicing
|
||||
- disable_vae_slicing
|
||||
- enable_xformers_memory_efficient_attention
|
||||
- disable_xformers_memory_efficient_attention
|
||||
- disable_xformers_memory_efficient_attention
|
||||
- enable_vae_tiling
|
||||
- disable_vae_tiling
|
||||
|
||||
@@ -1,4 +1,4 @@
|
||||
<!--Copyright 2022 The HuggingFace Team. All rights reserved.
|
||||
<!--Copyright 2023 The HuggingFace Team. All rights reserved.
|
||||
|
||||
Licensed under the Apache License, Version 2.0 (the "License"); you may not use this file except in compliance with
|
||||
the License. You may obtain a copy of the License at
|
||||
|
||||
@@ -1,4 +1,4 @@
|
||||
<!--Copyright 2022 The HuggingFace Team. All rights reserved.
|
||||
<!--Copyright 2023 The HuggingFace Team. All rights reserved.
|
||||
Licensed under the Apache License, Version 2.0 (the "License"); you may not use this file except in compliance with
|
||||
the License. You may obtain a copy of the License at
|
||||
http://www.apache.org/licenses/LICENSE-2.0
|
||||
|
||||
@@ -1,4 +1,4 @@
|
||||
<!--Copyright 2022 The HuggingFace Team. All rights reserved.
|
||||
<!--Copyright 2023 The HuggingFace Team. All rights reserved.
|
||||
|
||||
Licensed under the Apache License, Version 2.0 (the "License"); you may not use this file except in compliance with
|
||||
the License. You may obtain a copy of the License at
|
||||
|
||||
@@ -1,4 +1,4 @@
|
||||
<!--Copyright 2022 The HuggingFace Team. All rights reserved.
|
||||
<!--Copyright 2023 The HuggingFace Team. All rights reserved.
|
||||
|
||||
Licensed under the Apache License, Version 2.0 (the "License"); you may not use this file except in compliance with
|
||||
the License. You may obtain a copy of the License at
|
||||
@@ -36,6 +36,7 @@ available a colab notebook to directly try them out.
|
||||
|---|---|:---:|:---:|
|
||||
| [alt_diffusion](./api/pipelines/alt_diffusion) | [**AltDiffusion**](https://arxiv.org/abs/2211.06679) | Image-to-Image Text-Guided Generation |
|
||||
| [audio_diffusion](./api/pipelines/audio_diffusion) | [**Audio Diffusion**](https://github.com/teticio/audio-diffusion.git) | Unconditional Audio Generation | [](https://colab.research.google.com/github/teticio/audio-diffusion/blob/master/notebooks/audio_diffusion_pipeline.ipynb)
|
||||
| [controlnet](./api/pipelines/stable_diffusion/controlnet) | [**ControlNet with Stable Diffusion**](https://arxiv.org/abs/2302.05543) | Image-to-Image Text-Guided Generation | [
|
||||
| [cycle_diffusion](./api/pipelines/cycle_diffusion) | [**Cycle Diffusion**](https://arxiv.org/abs/2210.05559) | Image-to-Image Text-Guided Generation |
|
||||
| [dance_diffusion](./api/pipelines/dance_diffusion) | [**Dance Diffusion**](https://github.com/williamberman/diffusers.git) | Unconditional Audio Generation |
|
||||
| [ddpm](./api/pipelines/ddpm) | [**Denoising Diffusion Probabilistic Models**](https://arxiv.org/abs/2006.11239) | Unconditional Image Generation |
|
||||
|
||||
@@ -1,4 +1,4 @@
|
||||
<!--Copyright 2022 The HuggingFace Team. All rights reserved.
|
||||
<!--Copyright 2023 The HuggingFace Team. All rights reserved.
|
||||
|
||||
Licensed under the Apache License, Version 2.0 (the "License"); you may not use this file except in compliance with
|
||||
the License. You may obtain a copy of the License at
|
||||
|
||||
@@ -1,4 +1,4 @@
|
||||
<!--Copyright 2022 The HuggingFace Team. All rights reserved.
|
||||
<!--Copyright 2023 The HuggingFace Team. All rights reserved.
|
||||
|
||||
Licensed under the Apache License, Version 2.0 (the "License"); you may not use this file except in compliance with
|
||||
the License. You may obtain a copy of the License at
|
||||
@@ -133,6 +133,34 @@ images = pipe([prompt] * 32).images
|
||||
You may see a small performance boost in VAE decode on multi-image batches. There should be no performance impact on single-image batches.
|
||||
|
||||
|
||||
## Tiled VAE decode and encode for large images
|
||||
|
||||
Tiled VAE processing makes it possible to work with large images on limited VRAM. For example, generating 4k images in 8GB of VRAM. Tiled VAE decoder splits the image into overlapping tiles, decodes the tiles, and blends the outputs to make the final image.
|
||||
|
||||
You want to couple this with [`~StableDiffusionPipeline.enable_attention_slicing`] or [`~StableDiffusionPipeline.enable_xformers_memory_efficient_attention`] to further minimize memory use.
|
||||
|
||||
To use tiled VAE processing, invoke [`~StableDiffusionPipeline.enable_vae_tiling`] in your pipeline before inference. For example:
|
||||
|
||||
```python
|
||||
import torch
|
||||
from diffusers import StableDiffusionPipeline, UniPCMultistepScheduler
|
||||
|
||||
pipe = StableDiffusionPipeline.from_pretrained(
|
||||
"runwayml/stable-diffusion-v1-5",
|
||||
torch_dtype=torch.float16,
|
||||
)
|
||||
pipe.scheduler = UniPCMultistepScheduler.from_config(pipe.scheduler.config)
|
||||
pipe = pipe.to("cuda")
|
||||
prompt = "a beautiful landscape photograph"
|
||||
pipe.enable_vae_tiling()
|
||||
pipe.enable_xformers_memory_efficient_attention()
|
||||
|
||||
image = pipe([prompt], width=3840, height=2224, num_inference_steps=20).images[0]
|
||||
```
|
||||
|
||||
The output image will have some tile-to-tile tone variation from the tiles having separate decoders, but you shouldn't see sharp seams between the tiles. The tiling is turned off for images that are 512x512 or smaller.
|
||||
|
||||
|
||||
<a name="sequential_offloading"></a>
|
||||
## Offloading to CPU with accelerate for memory savings
|
||||
|
||||
|
||||
@@ -1,4 +1,4 @@
|
||||
<!--Copyright 2022 The HuggingFace Team. All rights reserved.
|
||||
<!--Copyright 2023 The HuggingFace Team. All rights reserved.
|
||||
|
||||
Licensed under the Apache License, Version 2.0 (the "License"); you may not use this file except in compliance with
|
||||
the License. You may obtain a copy of the License at
|
||||
|
||||
@@ -1,4 +1,4 @@
|
||||
<!--Copyright 2022 The HuggingFace Team. All rights reserved.
|
||||
<!--Copyright 2023 The HuggingFace Team. All rights reserved.
|
||||
|
||||
Licensed under the Apache License, Version 2.0 (the "License"); you may not use this file except in compliance with
|
||||
the License. You may obtain a copy of the License at
|
||||
@@ -21,13 +21,13 @@ specific language governing permissions and limitations under the License.
|
||||
|
||||
## Stable Diffusion Inference
|
||||
|
||||
The snippet below demonstrates how to use the ONNX runtime. You need to use `StableDiffusionOnnxPipeline` instead of `StableDiffusionPipeline`. You also need to download the weights from the `onnx` branch of the repository, and indicate the runtime provider you want to use.
|
||||
The snippet below demonstrates how to use the ONNX runtime. You need to use `OnnxStableDiffusionPipeline` instead of `StableDiffusionPipeline`. You also need to download the weights from the `onnx` branch of the repository, and indicate the runtime provider you want to use.
|
||||
|
||||
```python
|
||||
# make sure you're logged in with `huggingface-cli login`
|
||||
from diffusers import StableDiffusionOnnxPipeline
|
||||
from diffusers import OnnxStableDiffusionPipeline
|
||||
|
||||
pipe = StableDiffusionOnnxPipeline.from_pretrained(
|
||||
pipe = OnnxStableDiffusionPipeline.from_pretrained(
|
||||
"runwayml/stable-diffusion-v1-5",
|
||||
revision="onnx",
|
||||
provider="CUDAExecutionProvider",
|
||||
@@ -37,6 +37,37 @@ prompt = "a photo of an astronaut riding a horse on mars"
|
||||
image = pipe(prompt).images[0]
|
||||
```
|
||||
|
||||
The snippet below demonstrates how to use the ONNX runtime with the Stable Diffusion upscaling pipeline.
|
||||
|
||||
```python
|
||||
from diffusers import OnnxStableDiffusionPipeline, OnnxStableDiffusionUpscalePipeline
|
||||
|
||||
prompt = "a photo of an astronaut riding a horse on mars"
|
||||
steps = 50
|
||||
|
||||
txt2img = OnnxStableDiffusionPipeline.from_pretrained(
|
||||
"runwayml/stable-diffusion-v1-5",
|
||||
revision="onnx",
|
||||
provider="CUDAExecutionProvider",
|
||||
)
|
||||
small_image = txt2img(
|
||||
prompt,
|
||||
num_inference_steps=steps,
|
||||
).images[0]
|
||||
|
||||
generator = torch.manual_seed(0)
|
||||
upscale = OnnxStableDiffusionUpscalePipeline.from_pretrained(
|
||||
"ssube/stable-diffusion-x4-upscaler-onnx",
|
||||
provider="CUDAExecutionProvider",
|
||||
)
|
||||
large_image = upscale(
|
||||
prompt,
|
||||
small_image,
|
||||
generator=generator,
|
||||
num_inference_steps=steps,
|
||||
).images[0]
|
||||
```
|
||||
|
||||
## Known Issues
|
||||
|
||||
- Generating multiple prompts in a batch seems to take too much memory. While we look into it, you may need to iterate instead of batching.
|
||||
|
||||
@@ -1,4 +1,4 @@
|
||||
<!--Copyright 2022 The HuggingFace Team. All rights reserved.
|
||||
<!--Copyright 2023 The HuggingFace Team. All rights reserved.
|
||||
|
||||
Licensed under the Apache License, Version 2.0 (the "License"); you may not use this file except in compliance with
|
||||
the License. You may obtain a copy of the License at
|
||||
|
||||
@@ -10,29 +10,29 @@ an "AS IS" BASIS, WITHOUT WARRANTIES OR CONDITIONS OF ANY KIND, either express o
|
||||
specific language governing permissions and limitations under the License.
|
||||
-->
|
||||
|
||||
# Torch2.0 support in Diffusers
|
||||
# Accelerated PyTorch 2.0 support in Diffusers
|
||||
|
||||
Starting from version `0.13.0`, Diffusers supports the latest optimization from the upcoming [PyTorch 2.0](https://pytorch.org/get-started/pytorch-2.0/) release. These include:
|
||||
1. Support for native flash and memory-efficient attention without any extra dependencies.
|
||||
2. [torch.compile](https://pytorch.org/tutorials/intermediate/torch_compile_tutorial.html) support for compiling individual models for extra performance boost.
|
||||
1. Support for accelerated transformers implementation with memory-efficient attention – no extra dependencies required.
|
||||
2. [torch.compile](https://pytorch.org/tutorials/intermediate/torch_compile_tutorial.html) support for extra performance boost when individual models are compiled.
|
||||
|
||||
|
||||
## Installation
|
||||
To benefit from the native efficient attention and `torch.compile`, we will need to install the nightly version of PyTorch as the stable version is yet to be released. The first step is to install CUDA11.7 or CUDA11.8,
|
||||
as torch2.0 does not support the previous versions. Once CUDA is installed, torch nightly can be installed using:
|
||||
To benefit from the accelerated transformers implementation and `torch.compile`, we will need to install the nightly version of PyTorch, as the stable version is yet to be released. The first step is to install CUDA 11.7 or CUDA 11.8,
|
||||
as PyTorch 2.0 does not support the previous versions. Once CUDA is installed, torch nightly can be installed using:
|
||||
|
||||
```bash
|
||||
pip install --pre torch torchvision --index-url https://download.pytorch.org/whl/nightly/cu117
|
||||
```
|
||||
|
||||
## Using efficient attention and torch.compile.
|
||||
## Using accelerated transformers and torch.compile.
|
||||
|
||||
|
||||
1. **Efficient Attention**
|
||||
1. **Accelerated Transformers implementation**
|
||||
|
||||
Efficient attention is implemented via the [`torch.nn.functional.scaled_dot_product_attention`](https://pytorch.org/docs/master/generated/torch.nn.functional.scaled_dot_product_attention) function, which automatically enables flash/memory efficient attention, depending on the input and the GPU type. This is the same as the `memory_efficient_attention` from [xFormers](https://github.com/facebookresearch/xformers) but built natively into PyTorch.
|
||||
PyTorch 2.0 includes an optimized and memory-efficient attention implementation through the [`torch.nn.functional.scaled_dot_product_attention`](https://pytorch.org/docs/master/generated/torch.nn.functional.scaled_dot_product_attention) function, which automatically enables several optimizations depending on the inputs and the GPU type. This is similar to the `memory_efficient_attention` from [xFormers](https://github.com/facebookresearch/xformers), but built natively into PyTorch.
|
||||
|
||||
Efficient attention will be enabled by default in Diffusers if torch2.0 is installed and if `torch.nn.functional.scaled_dot_product_attention` is available. To use it, you can install torch2.0 as suggested above and use the pipeline. For example:
|
||||
These optimizations will be enabled by default in Diffusers if PyTorch 2.0 is installed and if `torch.nn.functional.scaled_dot_product_attention` is available. To use it, just install `torch 2.0` as suggested above and simply use the pipeline. For example:
|
||||
|
||||
```Python
|
||||
import torch
|
||||
@@ -59,12 +59,12 @@ pip install --pre torch torchvision --index-url https://download.pytorch.org/whl
|
||||
image = pipe(prompt).images[0]
|
||||
```
|
||||
|
||||
This should be as fast and memory efficient as `xFormers`.
|
||||
This should be as fast and memory efficient as `xFormers`. More details [in our benchmark](#benchmark).
|
||||
|
||||
|
||||
2. **torch.compile**
|
||||
|
||||
To get an additional speedup, we can use the new `torch.compile` feature. To do so, we wrap our `unet` with `torch.compile`. For more information and different options, refer to the
|
||||
To get an additional speedup, we can use the new `torch.compile` feature. To do so, we simply wrap our `unet` with `torch.compile`. For more information and different options, refer to the
|
||||
[torch compile docs](https://pytorch.org/tutorials/intermediate/torch_compile_tutorial.html).
|
||||
|
||||
```python
|
||||
@@ -81,22 +81,23 @@ pip install --pre torch torchvision --index-url https://download.pytorch.org/whl
|
||||
images = pipe(prompt, num_inference_steps=steps, num_images_per_prompt=batch_size).images
|
||||
```
|
||||
|
||||
Depending on the type of GPU it can give between 2-9% speed-up over efficient attention. But note that as of now the speed-up is mostly noticeable on the more recent GPU architectures, such as in the A100.
|
||||
Depending on the type of GPU, `compile()` can yield between 2-9% of _additional speed-up_ over the accelerated transformer optimizations. Note, however, that compilation is able to squeeze more performance improvements in more recent GPU architectures such as Ampere (A100, 3090), Ada (4090) and Hopper (H100).
|
||||
|
||||
Note that compilation will also take some time to complete, so it is best suited for situations where you need to prepare your pipeline once and then perform the same type of inference operations multiple times.
|
||||
Compilation takes some time to complete, so it is best suited for situations where you need to prepare your pipeline once and then perform the same type of inference operations multiple times.
|
||||
|
||||
|
||||
## Benchmark
|
||||
|
||||
We conducted a simple benchmark on different GPUs to compare vanilla attention, xFormers, `torch.nn.functional.scaled_dot_product_attention` and `torch.compile+torch.nn.functional.scaled_dot_product_attention`.
|
||||
For the benchmark we used the the [stable-diffusion-v1-4](https://huggingface.co/CompVis/stable-diffusion-v1-4) model with 50 steps. `xFormers` benchmark is done using the `torch==1.13.1` version. The table below summarizes the result that we got.
|
||||
The `Speed over xformers` columns denotes the speed-up gained over `xFormers` using the `torch.compile+torch.nn.functional.scaled_dot_product_attention`.
|
||||
For the benchmark we used the the [stable-diffusion-v1-4](https://huggingface.co/CompVis/stable-diffusion-v1-4) model with 50 steps. The `xFormers` benchmark is done using the `torch==1.13.1` version, while the accelerated transformers optimizations are tested using nightly versions of PyTorch 2.0. The tables below summarize the results we got.
|
||||
|
||||
The `Speed over xformers` columns denote the speed-up gained over `xFormers` using the `torch.compile+torch.nn.functional.scaled_dot_product_attention`.
|
||||
|
||||
|
||||
### FP16 benchmark
|
||||
|
||||
The table below shows the benchmark results for inference using `fp16`. As we can see, `torch.nn.functional.scaled_dot_product_attention` is as fast as `xFormers` (sometimes slightly faster/slower) on all the GPUs we tested.
|
||||
And using `torch.compile` gives further speed-up up to 10% over `xFormers`, but it's mostly noticeable on the A100 GPU.
|
||||
And using `torch.compile` gives further speed-up of up of 10% over `xFormers`, but it's mostly noticeable on the A100 GPU.
|
||||
|
||||
___The time reported is in seconds.___
|
||||
|
||||
@@ -105,7 +106,7 @@ ___The time reported is in seconds.___
|
||||
| A100 | 10 | 12.02 | 8.7 | 8.79 | 7.89 | 9.31 |
|
||||
| A100 | 16 | 18.95 | 13.57 | 13.67 | 12.25 | 9.73 |
|
||||
| A100 | 32 (1) | OOM | 26.56 | 26.68 | 24.08 | 9.34 |
|
||||
| A100 | 64(2) | | 52.51 | 53.03 | 47.81 | 8.95 |
|
||||
| A100 | 64 | | 52.51 | 53.03 | 47.81 | 8.95 |
|
||||
| | | | | | | |
|
||||
| A10 | 4 | 13.94 | 9.81 | 10.01 | 9.35 | 4.69 |
|
||||
| A10 | 8 | 27.09 | 19 | 19.53 | 18.33 | 3.53 |
|
||||
@@ -137,13 +138,20 @@ ___The time reported is in seconds.___
|
||||
| 3090 Ti | 16 | OOM | 26.1 | 26.28 | 25.46 | 2.45 |
|
||||
| 3090 Ti | 32 (1) | | 51.78 | 52.04 | 49.15 | 5.08 |
|
||||
| 3090 Ti | 64 (1) | | 112.02 | 112.33 | 103.91 | 7.24 |
|
||||
| | | | | | | |
|
||||
| 4090 | 4 | 10.48 | 8.37 | 8.32 | 8.01 | 4.30 |
|
||||
| 4090 | 8 | 14.33 | 10.22 | 10.42 | 9.78 | 4.31 |
|
||||
| 4090 | 16 | | 17.07 | 17.46 | 17.15 | -0.47 |
|
||||
| 4090 | 32 (1) | | 39.03 | 39.86 | 37.97 | 2.72 |
|
||||
| 4090 | 64 (1) | | 77.29 | 79.44 | 77.67 | -0.49 |
|
||||
|
||||
|
||||
|
||||
### FP32 benchmark
|
||||
|
||||
The table below shows the benchmark results for inference using `fp32`. As we can see, `torch.nn.functional.scaled_dot_product_attention` is as fast as `xFormers` (sometimes slightly faster/slower) on all the GPUs we tested.
|
||||
Using `torch.compile` with efficient attention gives up to 18% performance improvement over `xFormers` in Ampere cards, and up to 20% over vanilla attention.
|
||||
The table below shows the benchmark results for inference using `fp32`. In this case, `torch.nn.functional.scaled_dot_product_attention` is faster than `xFormers` on all the GPUs we tested.
|
||||
|
||||
Using `torch.compile` in addition to the accelerated transformers implementation can yield up to 19% performance improvement over `xFormers` in Ampere and Ada cards, and up to 20% (Ampere) or 28% (Ada) over vanilla attention.
|
||||
|
||||
| GPU | Batch Size | Vanilla Attention | xFormers | PyTorch2.0 SDPA | SDPA + torch.compile | Speed over xformers (%) | Speed over vanilla (%) |
|
||||
| --- | --- | --- | --- | --- | --- | --- | --- |
|
||||
@@ -173,7 +181,7 @@ Using `torch.compile` with efficient attention gives up to 18% performance impro
|
||||
| | | | | | | |
|
||||
| 3090 | 1 | 7.09 | 6.78 | 6.11 | 6.03 | 11.06 | 14.95 |
|
||||
| 3090 | 4 | 22.69 | 21.45 | 18.67 | 18.09 | 15.66 | 20.27 |
|
||||
| 3090 | 8 (2) | | 42.59 | 36.75 | 35.59 | 16.44 | |
|
||||
| 3090 | 8 | | 42.59 | 36.75 | 35.59 | 16.44 | |
|
||||
| 3090 | 16 | | 85.35 | 72.37 | 70.25 | 17.69 | |
|
||||
| 3090 | 32 (1) | | 162.05 | 138.99 | 134.53 | 16.98 | |
|
||||
| 3090 | 48 | | 241.91 | 207.75 | | 14.12 | |
|
||||
@@ -185,12 +193,12 @@ Using `torch.compile` with efficient attention gives up to 18% performance impro
|
||||
| 3090 Ti | 32 (1) | | 142.55 | 124.44 | 120.74 | 15.30 | |
|
||||
| 3090 Ti | 48 | | 213.19 | 186.55 | | 12.50 | |
|
||||
| | | | | | | |
|
||||
| 4090 | 1 | 5.54 | 4.99 | 4.51 | | | |
|
||||
| 4090 | 4 | 13.67 | 11.4 | 10.3 | | | |
|
||||
| 4090 | 8 (2) | | 19.79 | 17.13 | | | |
|
||||
| 4090 | 16 | | 38.62 | 33.14 | | | |
|
||||
| 4090 | 32 (1) | | 76.57 | 65.96 | | | |
|
||||
| 4090 | 48 | | 114.44 | 98.78 | | | |
|
||||
| 4090 | 1 | 5.54 | 4.99 | 4.51 | 4.44 | 11.02 | 19.86 |
|
||||
| 4090 | 4 | 13.67 | 11.4 | 10.3 | 9.84 | 13.68 | 28.02 |
|
||||
| 4090 | 8 | | 19.79 | 17.13 | 16.19 | 18.19 | |
|
||||
| 4090 | 16 | | 38.62 | 33.14 | 32.31 | 16.34 | |
|
||||
| 4090 | 32 (1) | | 76.57 | 65.96 | 62.05 | 18.96 | |
|
||||
| 4090 | 48 | | 114.44 | 98.78 | | 13.68 | |
|
||||
|
||||
|
||||
|
||||
|
||||
@@ -1,4 +1,4 @@
|
||||
<!--Copyright 2022 The HuggingFace Team. All rights reserved.
|
||||
<!--Copyright 2023 The HuggingFace Team. All rights reserved.
|
||||
|
||||
Licensed under the Apache License, Version 2.0 (the "License"); you may not use this file except in compliance with
|
||||
the License. You may obtain a copy of the License at
|
||||
|
||||
@@ -1,4 +1,4 @@
|
||||
<!--Copyright 2022 The HuggingFace Team. All rights reserved.
|
||||
<!--Copyright 2023 The HuggingFace Team. All rights reserved.
|
||||
|
||||
Licensed under the Apache License, Version 2.0 (the "License"); you may not use this file except in compliance with
|
||||
the License. You may obtain a copy of the License at
|
||||
@@ -10,10 +10,25 @@ an "AS IS" BASIS, WITHOUT WARRANTIES OR CONDITIONS OF ANY KIND, either express o
|
||||
specific language governing permissions and limitations under the License.
|
||||
-->
|
||||
|
||||
[[open-in-colab]]
|
||||
|
||||
# Quicktour
|
||||
|
||||
Get up and running with 🧨 Diffusers quickly!
|
||||
Whether you're a developer or an everyday user, this quick tour will help you get started and show you how to use [`DiffusionPipeline`] for inference.
|
||||
Diffusion models are trained to denoise random Gaussian noise step-by-step to generate a sample of interest, such as an image or audio. This has sparked a tremendous amount of interest in generative AI, and you have probably seen examples of diffusion generated images on the internet. 🧨 Diffusers is a library aimed at making diffusion models widely accessible to everyone.
|
||||
|
||||
Whether you're a developer or an everyday user, this quicktour will introduce you to 🧨 Diffusers and help you get up and generating quickly! There are three main components of the library to know about:
|
||||
|
||||
* The [`DiffusionPipeline`] is a high-level end-to-end class designed to rapidly generate samples from pretrained diffusion models for inference.
|
||||
* Popular pretrained [model](./api/models) architectures and modules that can be used as building blocks for creating diffusion systems.
|
||||
* Many different [schedulers](./api/schedulers/overview) - algorithms that control how noise is added for training, and how to generate denoised images during inference.
|
||||
|
||||
The quicktour will show you how to use the [`DiffusionPipeline`] for inference, and then walk you through how to combine a model and scheduler to replicate what's happening inside the [`DiffusionPipeline`].
|
||||
|
||||
<Tip>
|
||||
|
||||
The quicktour is a simplified version of the introductory 🧨 Diffusers [notebook](https://colab.research.google.com/github/huggingface/notebooks/blob/main/diffusers/diffusers_intro.ipynb) to help you get started quickly. If you want to learn more about 🧨 Diffusers goal, design philosophy, and additional details about it's core API, check out the notebook!
|
||||
|
||||
</Tip>
|
||||
|
||||
Before you begin, make sure you have all the necessary libraries installed:
|
||||
|
||||
@@ -21,32 +36,32 @@ Before you begin, make sure you have all the necessary libraries installed:
|
||||
pip install --upgrade diffusers accelerate transformers
|
||||
```
|
||||
|
||||
- [`accelerate`](https://huggingface.co/docs/accelerate/index) speeds up model loading for inference and training
|
||||
- [`transformers`](https://huggingface.co/docs/transformers/index) is required to run the most popular diffusion models, such as [Stable Diffusion](https://huggingface.co/docs/diffusers/api/pipelines/stable_diffusion/overview)
|
||||
- [🤗 Accelerate](https://huggingface.co/docs/accelerate/index) speeds up model loading for inference and training.
|
||||
- [🤗 Transformers](https://huggingface.co/docs/transformers/index) is required to run the most popular diffusion models, such as [Stable Diffusion](https://huggingface.co/docs/diffusers/api/pipelines/stable_diffusion/overview).
|
||||
|
||||
## DiffusionPipeline
|
||||
|
||||
The [`DiffusionPipeline`] is the easiest way to use a pre-trained diffusion system for inference. You can use the [`DiffusionPipeline`] out-of-the-box for many tasks across different modalities. Take a look at the table below for some supported tasks:
|
||||
The [`DiffusionPipeline`] is the easiest way to use a pretrained diffusion system for inference. It is an end-to-end system containing the model and the scheduler. You can use the [`DiffusionPipeline`] out-of-the-box for many tasks. Take a look at the table below for some supported tasks, and for a complete list of supported tasks, check out the [🧨 Diffusers Summary](./api/pipelines/overview#diffusers-summary) table.
|
||||
|
||||
| **Task** | **Description** | **Pipeline**
|
||||
|------------------------------|--------------------------------------------------------------------------------------------------------------|-----------------|
|
||||
| Unconditional Image Generation | generate an image from gaussian noise | [unconditional_image_generation](./using-diffusers/unconditional_image_generation) |
|
||||
| Unconditional Image Generation | generate an image from Gaussian noise | [unconditional_image_generation](./using-diffusers/unconditional_image_generation) |
|
||||
| Text-Guided Image Generation | generate an image given a text prompt | [conditional_image_generation](./using-diffusers/conditional_image_generation) |
|
||||
| Text-Guided Image-to-Image Translation | adapt an image guided by a text prompt | [img2img](./using-diffusers/img2img) |
|
||||
| Text-Guided Image-Inpainting | fill the masked part of an image given the image, the mask and a text prompt | [inpaint](./using-diffusers/inpaint) |
|
||||
| Text-Guided Depth-to-Image Translation | adapt parts of an image guided by a text prompt while preserving structure via depth estimation | [depth2img](./using-diffusers/depth2img) |
|
||||
|
||||
For more in-detail information on how diffusion pipelines function for the different tasks, please have a look at the [**Using Diffusers**](./using-diffusers/overview) section.
|
||||
Start by creating an instance of a [`DiffusionPipeline`] and specify which pipeline checkpoint you would like to download.
|
||||
You can use the [`DiffusionPipeline`] for any [checkpoint](https://huggingface.co/models?library=diffusers&sort=downloads) stored on the Hugging Face Hub.
|
||||
In this quicktour, you'll load the [`stable-diffusion-v1-5`](https://huggingface.co/runwayml/stable-diffusion-v1-5) checkpoint for text-to-image generation.
|
||||
|
||||
As an example, start by creating an instance of [`DiffusionPipeline`] and specify which pipeline checkpoint you would like to download.
|
||||
You can use the [`DiffusionPipeline`] for any [Diffusers' checkpoint](https://huggingface.co/models?library=diffusers&sort=downloads).
|
||||
In this guide though, you'll use [`DiffusionPipeline`] for text-to-image generation with [Stable Diffusion](https://huggingface.co/CompVis/stable-diffusion).
|
||||
<Tip warning={true}>
|
||||
|
||||
For [Stable Diffusion](https://huggingface.co/CompVis/stable-diffusion), please carefully read its [license](https://huggingface.co/spaces/CompVis/stable-diffusion-license) before running the model.
|
||||
This is due to the improved image generation capabilities of the model and the potentially harmful content that could be produced with it.
|
||||
Please, head over to your stable diffusion model of choice, *e.g.* [`runwayml/stable-diffusion-v1-5`](https://huggingface.co/runwayml/stable-diffusion-v1-5), and read the license.
|
||||
For [Stable Diffusion](https://huggingface.co/CompVis/stable-diffusion) models, please carefully read the [license](https://huggingface.co/spaces/CompVis/stable-diffusion-license) first before running the model. 🧨 Diffusers implements a [`safety_checker`](https://github.com/huggingface/diffusers/blob/main/src/diffusers/pipelines/stable_diffusion/safety_checker.py) to prevent offensive or harmful content, but the model's improved image generation capabilities can still produce potentially harmful content.
|
||||
|
||||
You can load the model as follows:
|
||||
</Tip>
|
||||
|
||||
Load the model with the [`~DiffusionPipeline.from_pretrained`] method:
|
||||
|
||||
```python
|
||||
>>> from diffusers import DiffusionPipeline
|
||||
@@ -54,77 +69,245 @@ You can load the model as follows:
|
||||
>>> pipeline = DiffusionPipeline.from_pretrained("runwayml/stable-diffusion-v1-5")
|
||||
```
|
||||
|
||||
The [`DiffusionPipeline`] downloads and caches all modeling, tokenization, and scheduling components.
|
||||
Because the model consists of roughly 1.4 billion parameters, we strongly recommend running it on GPU.
|
||||
You can move the generator object to GPU, just like you would in PyTorch.
|
||||
The [`DiffusionPipeline`] downloads and caches all modeling, tokenization, and scheduling components. You'll see that the Stable Diffusion pipeline is composed of the [`UNet2DConditionModel`] and [`PNDMScheduler`] among other things:
|
||||
|
||||
```py
|
||||
>>> pipeline
|
||||
StableDiffusionPipeline {
|
||||
"_class_name": "StableDiffusionPipeline",
|
||||
"_diffusers_version": "0.13.1",
|
||||
...,
|
||||
"scheduler": [
|
||||
"diffusers",
|
||||
"PNDMScheduler"
|
||||
],
|
||||
...,
|
||||
"unet": [
|
||||
"diffusers",
|
||||
"UNet2DConditionModel"
|
||||
],
|
||||
"vae": [
|
||||
"diffusers",
|
||||
"AutoencoderKL"
|
||||
]
|
||||
}
|
||||
```
|
||||
|
||||
We strongly recommend running the pipeline on a GPU because the model consists of roughly 1.4 billion parameters.
|
||||
You can move the generator object to a GPU, just like you would in PyTorch:
|
||||
|
||||
```python
|
||||
>>> pipeline.to("cuda")
|
||||
```
|
||||
|
||||
Now you can use the `pipeline` on your text prompt:
|
||||
Now you can pass a text prompt to the `pipeline` to generate an image, and then access the denoised image. By default, the image output is wrapped in a [`PIL.Image`](https://pillow.readthedocs.io/en/stable/reference/Image.html?highlight=image#the-image-class) object.
|
||||
|
||||
```python
|
||||
>>> image = pipeline("An image of a squirrel in Picasso style").images[0]
|
||||
>>> image
|
||||
```
|
||||
|
||||
The output is by default wrapped into a [PIL Image object](https://pillow.readthedocs.io/en/stable/reference/Image.html?highlight=image#the-image-class).
|
||||
<div class="flex justify-center">
|
||||
<img src="https://huggingface.co/datasets/huggingface/documentation-images/resolve/main/image_of_squirrel_painting.png"/>
|
||||
</div>
|
||||
|
||||
You can save the image by simply calling:
|
||||
Save the image by calling `save`:
|
||||
|
||||
```python
|
||||
>>> image.save("image_of_squirrel_painting.png")
|
||||
```
|
||||
|
||||
**Note**: You can also use the pipeline locally by downloading the weights via:
|
||||
### Local pipeline
|
||||
|
||||
You can also use the pipeline locally. The only difference is you need to download the weights first:
|
||||
|
||||
```
|
||||
git lfs install
|
||||
git clone https://huggingface.co/runwayml/stable-diffusion-v1-5
|
||||
```
|
||||
|
||||
and then loading the saved weights into the pipeline.
|
||||
Then load the saved weights into the pipeline:
|
||||
|
||||
```python
|
||||
>>> pipeline = DiffusionPipeline.from_pretrained("./stable-diffusion-v1-5")
|
||||
```
|
||||
|
||||
Running the pipeline is then identical to the code above as it's the same model architecture.
|
||||
Now you can run the pipeline as you would in the section above.
|
||||
|
||||
```python
|
||||
>>> generator.to("cuda")
|
||||
>>> image = generator("An image of a squirrel in Picasso style").images[0]
|
||||
>>> image.save("image_of_squirrel_painting.png")
|
||||
```
|
||||
### Swapping schedulers
|
||||
|
||||
Diffusion systems can be used with multiple different [schedulers](./api/schedulers/overview) each with their
|
||||
pros and cons. By default, Stable Diffusion runs with [`PNDMScheduler`], but it's very simple to
|
||||
use a different scheduler. *E.g.* if you would instead like to use the [`EulerDiscreteScheduler`] scheduler,
|
||||
you could use it as follows:
|
||||
Different schedulers come with different denoising speeds and quality trade-offs. The best way to find out which one works best for you is to try them out! One of the main features of 🧨 Diffusers is to allow you to easily switch between schedulers. For example, to replace the default [`PNDMScheduler`] with the [`EulerDiscreteScheduler`], load it with the [`~diffusers.ConfigMixin.from_config`] method:
|
||||
|
||||
```python
|
||||
```py
|
||||
>>> from diffusers import EulerDiscreteScheduler
|
||||
|
||||
>>> pipeline = StableDiffusionPipeline.from_pretrained("runwayml/stable-diffusion-v1-5")
|
||||
|
||||
>>> # change scheduler to Euler
|
||||
>>> pipeline.scheduler = EulerDiscreteScheduler.from_config(pipeline.scheduler.config)
|
||||
```
|
||||
|
||||
For more in-detail information on how to change between schedulers, please refer to the [Using Schedulers](./using-diffusers/schedulers) guide.
|
||||
Try generating an image with the new scheduler and see if you notice a difference!
|
||||
|
||||
[Stability AI's](https://stability.ai/) Stable Diffusion model is an impressive image generation model
|
||||
and can do much more than just generating images from text. We have dedicated a whole documentation page,
|
||||
just for Stable Diffusion [here](./conceptual/stable_diffusion).
|
||||
In the next section, you'll take a closer look at the components - the model and scheduler - that make up the [`DiffusionPipeline`] and learn how to use these components to generate an image of a cat.
|
||||
|
||||
If you want to know how to optimize Stable Diffusion to run on less memory, higher inference speeds, on specific hardware, such as Mac, or with [ONNX Runtime](https://onnxruntime.ai/), please have a look at our
|
||||
optimization pages:
|
||||
## Models
|
||||
|
||||
- [Optimized PyTorch on GPU](./optimization/fp16)
|
||||
- [Mac OS with PyTorch](./optimization/mps)
|
||||
- [ONNX](./optimization/onnx)
|
||||
- [OpenVINO](./optimization/open_vino)
|
||||
Most models take a noisy sample, and at each timestep it predicts the *noise residual* (other models learn to predict the previous sample directly or the velocity or [`v-prediction`](https://github.com/huggingface/diffusers/blob/5e5ce13e2f89ac45a0066cb3f369462a3cf1d9ef/src/diffusers/schedulers/scheduling_ddim.py#L110)), the difference between a less noisy image and the input image. You can mix and match models to create other diffusion systems.
|
||||
|
||||
If you want to fine-tune or train your diffusion model, please have a look at the [**training section**](./training/overview)
|
||||
Models are initiated with the [`~ModelMixin.from_pretrained`] method which also locally caches the model weights so it is faster the next time you load the model. For the quicktour, you'll load the [`UNet2DModel`], a basic unconditional image generation model with a checkpoint trained on cat images:
|
||||
|
||||
Finally, please be considerate when distributing generated images publicly 🤗.
|
||||
```py
|
||||
>>> from diffusers import UNet2DModel
|
||||
|
||||
>>> repo_id = "google/ddpm-cat-256"
|
||||
>>> model = UNet2DModel.from_pretrained(repo_id)
|
||||
```
|
||||
|
||||
To access the model parameters, call `model.config`:
|
||||
|
||||
```py
|
||||
>>> model.config
|
||||
```
|
||||
|
||||
The model configuration is a 🧊 frozen 🧊 dictionary, which means those parameters can't be changed after the model is created. This is intentional and ensures that the parameters used to define the model architecture at the start remain the same, while other parameters can still be adjusted during inference.
|
||||
|
||||
Some of the most important parameters are:
|
||||
|
||||
* `sample_size`: the height and width dimension of the input sample.
|
||||
* `in_channels`: the number of input channels of the input sample.
|
||||
* `down_block_types` and `up_block_types`: the type of down- and upsampling blocks used to create the UNet architecture.
|
||||
* `block_out_channels`: the number of output channels of the downsampling blocks; also used in reverse order for the number of input channels of the upsampling blocks.
|
||||
* `layers_per_block`: the number of ResNet blocks present in each UNet block.
|
||||
|
||||
To use the model for inference, create the image shape with random Gaussian noise. It should have a `batch` axis because the model can receive multiple random noises, a `channel` axis corresponding to the number of input channels, and a `sample_size` axis for the height and width of the image:
|
||||
|
||||
```py
|
||||
>>> import torch
|
||||
|
||||
>>> torch.manual_seed(0)
|
||||
|
||||
>>> noisy_sample = torch.randn(1, model.config.in_channels, model.config.sample_size, model.config.sample_size)
|
||||
>>> noisy_sample.shape
|
||||
torch.Size([1, 3, 256, 256])
|
||||
```
|
||||
|
||||
For inference, pass the noisy image to the model and a `timestep`. The `timestep` indicates how noisy the input image is, with more noise at the beginning and less at the end. This helps the model determine its position in the diffusion process, whether it is closer to the start or the end. Use the `sample` method to get the model output:
|
||||
|
||||
```py
|
||||
>>> with torch.no_grad():
|
||||
... noisy_residual = model(sample=noisy_sample, timestep=2).sample
|
||||
```
|
||||
|
||||
To generate actual examples though, you'll need a scheduler to guide the denoising process. In the next section, you'll learn how to couple a model with a scheduler.
|
||||
|
||||
## Schedulers
|
||||
|
||||
Schedulers manage going from a noisy sample to a less noisy sample given the model output - in this case, it is the `noisy_residual`.
|
||||
|
||||
<Tip>
|
||||
|
||||
🧨 Diffusers is a toolbox for building diffusion systems. While the [`DiffusionPipeline`] is a convenient way to get started with a pre-built diffusion system, you can also choose your own the model and scheduler components separately to build a custom diffusion system.
|
||||
|
||||
</Tip>
|
||||
|
||||
For the quicktour, you'll instantiate the [`DDPMScheduler`] with it's [`~diffusers.ConfigMixin.from_config`] method:
|
||||
|
||||
```py
|
||||
>>> from diffusers import DDPMScheduler
|
||||
|
||||
>>> scheduler = DDPMScheduler.from_config(repo_id)
|
||||
>>> scheduler
|
||||
DDPMScheduler {
|
||||
"_class_name": "DDPMScheduler",
|
||||
"_diffusers_version": "0.13.1",
|
||||
"beta_end": 0.02,
|
||||
"beta_schedule": "linear",
|
||||
"beta_start": 0.0001,
|
||||
"clip_sample": true,
|
||||
"clip_sample_range": 1.0,
|
||||
"num_train_timesteps": 1000,
|
||||
"prediction_type": "epsilon",
|
||||
"trained_betas": null,
|
||||
"variance_type": "fixed_small"
|
||||
}
|
||||
```
|
||||
|
||||
<Tip>
|
||||
|
||||
💡 Notice how the scheduler is instantiated from a configuration. Unlike a model, a scheduler does not have trainable weights and is parameter-free!
|
||||
|
||||
</Tip>
|
||||
|
||||
Some of the most important parameters are:
|
||||
|
||||
* `num_train_timesteps`: the length of the denoising process or in other words, the number of timesteps required to process random Gaussian noise into a data sample.
|
||||
* `beta_schedule`: the type of noise schedule to use for inference and training.
|
||||
* `beta_start` and `beta_end`: the start and end noise values for the noise schedule.
|
||||
|
||||
To predict a slightly less noisy image, pass the following to the scheduler's [`~diffusers.DDPMScheduler.step`] method: model output, `timestep`, and current `sample`.
|
||||
|
||||
```py
|
||||
>>> less_noisy_sample = scheduler.step(model_output=noisy_residual, timestep=2, sample=noisy_sample).prev_sample
|
||||
>>> less_noisy_sample.shape
|
||||
```
|
||||
|
||||
The `less_noisy_sample` can be passed to the next `timestep` where it'll get even less noisier! Let's bring it all together now and visualize the entire denoising process.
|
||||
|
||||
First, create a function that postprocesses and displays the denoised image as a `PIL.Image`:
|
||||
|
||||
```py
|
||||
>>> import PIL.Image
|
||||
>>> import numpy as np
|
||||
|
||||
|
||||
>>> def display_sample(sample, i):
|
||||
... image_processed = sample.cpu().permute(0, 2, 3, 1)
|
||||
... image_processed = (image_processed + 1.0) * 127.5
|
||||
... image_processed = image_processed.numpy().astype(np.uint8)
|
||||
|
||||
... image_pil = PIL.Image.fromarray(image_processed[0])
|
||||
... display(f"Image at step {i}")
|
||||
... display(image_pil)
|
||||
```
|
||||
|
||||
To speed up the denoising process, move the input and model to a GPU:
|
||||
|
||||
```py
|
||||
>>> model.to("cuda")
|
||||
>>> noisy_sample = noisy_sample.to("cuda")
|
||||
```
|
||||
|
||||
Now create a denoising loop that predicts the residual of the less noisy sample, and computes the less noisy sample with the scheduler:
|
||||
|
||||
```py
|
||||
>>> import tqdm
|
||||
|
||||
>>> sample = noisy_sample
|
||||
|
||||
>>> for i, t in enumerate(tqdm.tqdm(scheduler.timesteps)):
|
||||
... # 1. predict noise residual
|
||||
... with torch.no_grad():
|
||||
... residual = model(sample, t).sample
|
||||
|
||||
... # 2. compute less noisy image and set x_t -> x_t-1
|
||||
... sample = scheduler.step(residual, t, sample).prev_sample
|
||||
|
||||
... # 3. optionally look at image
|
||||
... if (i + 1) % 50 == 0:
|
||||
... display_sample(sample, i + 1)
|
||||
```
|
||||
|
||||
Sit back and watch as a cat is generated from nothing but noise! 😻
|
||||
|
||||
<div class="flex justify-center">
|
||||
<img src="https://huggingface.co/datasets/huggingface/documentation-images/resolve/main/diffusers/diffusion-quicktour.png"/>
|
||||
</div>
|
||||
|
||||
## Next steps
|
||||
|
||||
Hopefully you generated some cool images with 🧨 Diffusers in this quicktour! For your next steps, you can:
|
||||
|
||||
* Train or finetune a model to generate your own images in the [training](./tutorials/basic_training) tutorial.
|
||||
* See example official and community [training or finetuning scripts](https://github.com/huggingface/diffusers/tree/main/examples#-diffusers-examples) for a variety of use cases.
|
||||
* Learn more about loading, accessing, changing and comparing schedulers in the [Using different Schedulers](./using-diffusers/schedulers) guide.
|
||||
* Explore prompt engineering, speed and memory optimizations, and tips and tricks for generating higher quality images with the [Stable Diffusion](./stable_diffusion) guide.
|
||||
* Dive deeper into speeding up 🧨 Diffusers with guides on [optimized PyTorch on a GPU](./optimization/fp16), and inference guides for running [Stable Diffusion on Apple Silicon (M1/M2)](./optimization/mps) and [ONNX Runtime](./optimization/onnx).
|
||||
@@ -1,4 +1,4 @@
|
||||
<!--Copyright 2022 The HuggingFace Team. All rights reserved.
|
||||
<!--Copyright 2023 The HuggingFace Team. All rights reserved.
|
||||
|
||||
Licensed under the Apache License, Version 2.0 (the "License"); you may not use this file except in compliance with
|
||||
the License. You may obtain a copy of the License at
|
||||
|
||||
@@ -1,4 +1,4 @@
|
||||
<!--Copyright 2022 The HuggingFace Team. All rights reserved.
|
||||
<!--Copyright 2023 The HuggingFace Team. All rights reserved.
|
||||
|
||||
Licensed under the Apache License, Version 2.0 (the "License"); you may not use this file except in compliance with
|
||||
the License. You may obtain a copy of the License at
|
||||
@@ -10,55 +10,67 @@ an "AS IS" BASIS, WITHOUT WARRANTIES OR CONDITIONS OF ANY KIND, either express o
|
||||
specific language governing permissions and limitations under the License.
|
||||
-->
|
||||
|
||||
# DreamBooth fine-tuning example
|
||||
# DreamBooth
|
||||
|
||||
[DreamBooth](https://arxiv.org/abs/2208.12242) is a method to personalize text-to-image models like stable diffusion given just a few (3~5) images of a subject.
|
||||
[[open-in-colab]]
|
||||
|
||||
[DreamBooth](https://arxiv.org/abs/2208.12242) is a method to personalize text-to-image models like Stable Diffusion given just a few (3-5) images of a subject. It allows the model to generate contextualized images of the subject in different scenes, poses, and views.
|
||||
|
||||
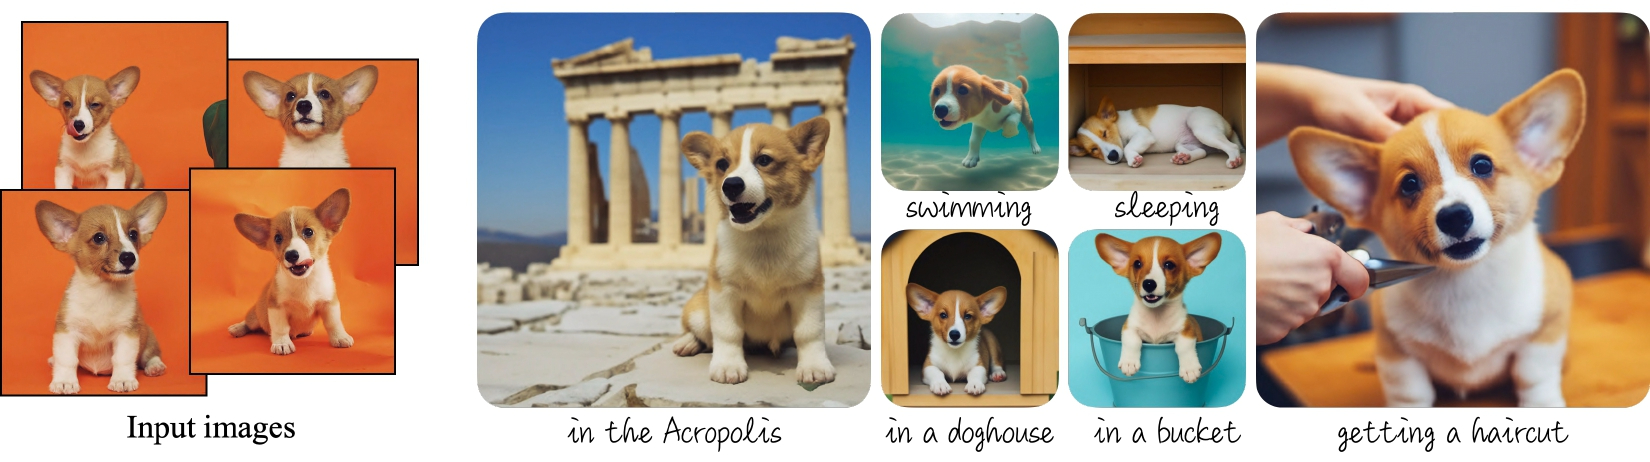
|
||||
_Dreambooth examples from the [project's blog](https://dreambooth.github.io)._
|
||||
<small>Dreambooth examples from the <a href="https://dreambooth.github.io">project's blog.</a></small>
|
||||
|
||||
The [Dreambooth training script](https://github.com/huggingface/diffusers/tree/main/examples/dreambooth) shows how to implement this training procedure on a pre-trained Stable Diffusion model.
|
||||
This guide will show you how to finetune DreamBooth with the [`CompVis/stable-diffusion-v1-4`](https://huggingface.co/CompVis/stable-diffusion-v1-4) model for various GPU sizes, and with Flax. All the training scripts for DreamBooth used in this guide can be found [here](https://github.com/huggingface/diffusers/tree/main/examples/dreambooth) if you're interested in digging deeper and seeing how things work.
|
||||
|
||||
<Tip warning={true}>
|
||||
|
||||
Dreambooth fine-tuning is very sensitive to hyperparameters and easy to overfit. We recommend you take a look at our [in-depth analysis](https://huggingface.co/blog/dreambooth) with recommended settings for different subjects, and go from there.
|
||||
|
||||
</Tip>
|
||||
|
||||
## Training locally
|
||||
|
||||
### Installing the dependencies
|
||||
|
||||
Before running the scripts, make sure to install the library's training dependencies. We also recommend to install `diffusers` from the `main` github branch.
|
||||
Before running the scripts, make sure you install the library's training dependencies. We also recommend installing 🧨 Diffusers from the `main` GitHub branch:
|
||||
|
||||
```bash
|
||||
pip install git+https://github.com/huggingface/diffusers
|
||||
pip install -U -r diffusers/examples/dreambooth/requirements.txt
|
||||
```
|
||||
|
||||
xFormers is not part of the training requirements, but [we recommend you install it if you can](../optimization/xformers). It could make your training faster and less memory intensive.
|
||||
xFormers is not part of the training requirements, but we recommend you [install](../optimization/xformers) it if you can because it could make your training faster and less memory intensive.
|
||||
|
||||
After all dependencies have been set up you can configure a [🤗 Accelerate](https://github.com/huggingface/accelerate/) environment with:
|
||||
After all the dependencies have been set up, initialize a [🤗 Accelerate](https://github.com/huggingface/accelerate/) environment with:
|
||||
|
||||
```bash
|
||||
accelerate config
|
||||
```
|
||||
|
||||
In this example we'll use model version `v1-4`, so please visit [its card](https://huggingface.co/CompVis/stable-diffusion-v1-4) and carefully read the license before proceeding.
|
||||
To setup a default 🤗 Accelerate environment without choosing any configurations:
|
||||
|
||||
The command below will download and cache the model weights from the Hub because we use the model's Hub id `CompVis/stable-diffusion-v1-4`. You may also clone the repo locally and use the local path in your system where the checkout was saved.
|
||||
```bash
|
||||
accelerate config default
|
||||
```
|
||||
|
||||
### Dog toy example
|
||||
Or if your environment doesn't support an interactive shell like a notebook, you can use:
|
||||
|
||||
In this example we'll use [these images](https://drive.google.com/drive/folders/1BO_dyz-p65qhBRRMRA4TbZ8qW4rB99JZ) to add a new concept to Stable Diffusion using the Dreambooth process. They will be our training data. Please, download them and place them somewhere in your system.
|
||||
```py
|
||||
from accelerate.utils import write_basic_config
|
||||
|
||||
Then you can launch the training script using:
|
||||
write_basic_config()
|
||||
```
|
||||
|
||||
## Finetuning
|
||||
|
||||
<Tip warning={true}>
|
||||
|
||||
DreamBooth finetuning is very sensitive to hyperparameters and easy to overfit. We recommend you take a look at our [in-depth analysis](https://huggingface.co/blog/dreambooth) with recommended settings for different subjects to help you choose the appropriate hyperparameters.
|
||||
|
||||
</Tip>
|
||||
|
||||
<frameworkcontent>
|
||||
<pt>
|
||||
Let's try DreamBooth with a [few images of a dog](https://drive.google.com/drive/folders/1BO_dyz-p65qhBRRMRA4TbZ8qW4rB99JZ); download and save them to a directory and then set the `INSTANCE_DIR` environment variable to that path:
|
||||
|
||||
```bash
|
||||
export MODEL_NAME="CompVis/stable-diffusion-v1-4"
|
||||
export INSTANCE_DIR="path_to_training_images"
|
||||
export OUTPUT_DIR="path_to_saved_model"
|
||||
```
|
||||
|
||||
Then you can launch the training script (you can find the full training script [here](https://github.com/huggingface/diffusers/blob/main/examples/dreambooth/train_dreambooth.py)) with the following command:
|
||||
|
||||
```bash
|
||||
accelerate launch train_dreambooth.py \
|
||||
--pretrained_model_name_or_path=$MODEL_NAME \
|
||||
--instance_data_dir=$INSTANCE_DIR \
|
||||
@@ -72,13 +84,44 @@ accelerate launch train_dreambooth.py \
|
||||
--lr_warmup_steps=0 \
|
||||
--max_train_steps=400
|
||||
```
|
||||
</pt>
|
||||
<jax>
|
||||
If you have access to TPUs or want to train even faster, you can try out the [Flax training script](https://github.com/huggingface/diffusers/blob/main/examples/dreambooth/train_dreambooth_flax.py). The Flax training script doesn't support gradient checkpointing or gradient accumulation, so you'll need a GPU with at least 30GB of memory.
|
||||
|
||||
### Training with a prior-preserving loss
|
||||
Before running the script, make sure you have the requirements installed:
|
||||
|
||||
Prior preservation is used to avoid overfitting and language-drift. Please, refer to the paper to learn more about it if you are interested. For prior preservation, we use other images of the same class as part of the training process. The nice thing is that we can generate those images using the Stable Diffusion model itself! The training script will save the generated images to a local path we specify.
|
||||
```bash
|
||||
pip install -U -r requirements.txt
|
||||
```
|
||||
|
||||
According to the paper, it's recommended to generate `num_epochs * num_samples` images for prior preservation. 200-300 works well for most cases.
|
||||
Now you can launch the training script with the following command:
|
||||
|
||||
```bash
|
||||
export MODEL_NAME="duongna/stable-diffusion-v1-4-flax"
|
||||
export INSTANCE_DIR="path-to-instance-images"
|
||||
export OUTPUT_DIR="path-to-save-model"
|
||||
|
||||
python train_dreambooth_flax.py \
|
||||
--pretrained_model_name_or_path=$MODEL_NAME \
|
||||
--instance_data_dir=$INSTANCE_DIR \
|
||||
--output_dir=$OUTPUT_DIR \
|
||||
--instance_prompt="a photo of sks dog" \
|
||||
--resolution=512 \
|
||||
--train_batch_size=1 \
|
||||
--learning_rate=5e-6 \
|
||||
--max_train_steps=400
|
||||
```
|
||||
</jax>
|
||||
</frameworkcontent>
|
||||
|
||||
## Finetuning with prior-preserving loss
|
||||
|
||||
Prior preservation is used to avoid overfitting and language-drift (check out the [paper](https://arxiv.org/abs/2208.12242) to learn more if you're interested). For prior preservation, you use other images of the same class as part of the training process. The nice thing is that you can generate those images using the Stable Diffusion model itself! The training script will save the generated images to a local path you specify.
|
||||
|
||||
The author's recommend generating `num_epochs * num_samples` images for prior preservation. In most cases, 200-300 images work well.
|
||||
|
||||
<frameworkcontent>
|
||||
<pt>
|
||||
```bash
|
||||
export MODEL_NAME="CompVis/stable-diffusion-v1-4"
|
||||
export INSTANCE_DIR="path_to_training_images"
|
||||
@@ -102,32 +145,125 @@ accelerate launch train_dreambooth.py \
|
||||
--num_class_images=200 \
|
||||
--max_train_steps=800
|
||||
```
|
||||
</pt>
|
||||
<jax>
|
||||
```bash
|
||||
export MODEL_NAME="duongna/stable-diffusion-v1-4-flax"
|
||||
export INSTANCE_DIR="path-to-instance-images"
|
||||
export CLASS_DIR="path-to-class-images"
|
||||
export OUTPUT_DIR="path-to-save-model"
|
||||
|
||||
### Saving checkpoints while training
|
||||
python train_dreambooth_flax.py \
|
||||
--pretrained_model_name_or_path=$MODEL_NAME \
|
||||
--instance_data_dir=$INSTANCE_DIR \
|
||||
--class_data_dir=$CLASS_DIR \
|
||||
--output_dir=$OUTPUT_DIR \
|
||||
--with_prior_preservation --prior_loss_weight=1.0 \
|
||||
--instance_prompt="a photo of sks dog" \
|
||||
--class_prompt="a photo of dog" \
|
||||
--resolution=512 \
|
||||
--train_batch_size=1 \
|
||||
--learning_rate=5e-6 \
|
||||
--num_class_images=200 \
|
||||
--max_train_steps=800
|
||||
```
|
||||
</jax>
|
||||
</frameworkcontent>
|
||||
|
||||
It's easy to overfit while training with Dreambooth, so sometimes it's useful to save regular checkpoints during the process. One of the intermediate checkpoints might work better than the final model! To use this feature you need to pass the following argument to the training script:
|
||||
## Finetuning the text encoder and UNet
|
||||
|
||||
The script also allows you to finetune the `text_encoder` along with the `unet`. In our experiments (check out the [Training Stable Diffusion with DreamBooth using 🧨 Diffusers](https://huggingface.co/blog/dreambooth) post for more details), this yields much better results, especially when generating images of faces.
|
||||
|
||||
<Tip warning={true}>
|
||||
|
||||
Training the text encoder requires additional memory and it won't fit on a 16GB GPU. You'll need at least 24GB VRAM to use this option.
|
||||
|
||||
</Tip>
|
||||
|
||||
Pass the `--train_text_encoder` argument to the training script to enable finetuning the `text_encoder` and `unet`:
|
||||
|
||||
<frameworkcontent>
|
||||
<pt>
|
||||
```bash
|
||||
export MODEL_NAME="CompVis/stable-diffusion-v1-4"
|
||||
export INSTANCE_DIR="path_to_training_images"
|
||||
export CLASS_DIR="path_to_class_images"
|
||||
export OUTPUT_DIR="path_to_saved_model"
|
||||
|
||||
accelerate launch train_dreambooth.py \
|
||||
--pretrained_model_name_or_path=$MODEL_NAME \
|
||||
--train_text_encoder \
|
||||
--instance_data_dir=$INSTANCE_DIR \
|
||||
--class_data_dir=$CLASS_DIR \
|
||||
--output_dir=$OUTPUT_DIR \
|
||||
--with_prior_preservation --prior_loss_weight=1.0 \
|
||||
--instance_prompt="a photo of sks dog" \
|
||||
--class_prompt="a photo of dog" \
|
||||
--resolution=512 \
|
||||
--train_batch_size=1 \
|
||||
--use_8bit_adam
|
||||
--gradient_checkpointing \
|
||||
--learning_rate=2e-6 \
|
||||
--lr_scheduler="constant" \
|
||||
--lr_warmup_steps=0 \
|
||||
--num_class_images=200 \
|
||||
--max_train_steps=800
|
||||
```
|
||||
</pt>
|
||||
<jax>
|
||||
```bash
|
||||
export MODEL_NAME="duongna/stable-diffusion-v1-4-flax"
|
||||
export INSTANCE_DIR="path-to-instance-images"
|
||||
export CLASS_DIR="path-to-class-images"
|
||||
export OUTPUT_DIR="path-to-save-model"
|
||||
|
||||
python train_dreambooth_flax.py \
|
||||
--pretrained_model_name_or_path=$MODEL_NAME \
|
||||
--train_text_encoder \
|
||||
--instance_data_dir=$INSTANCE_DIR \
|
||||
--class_data_dir=$CLASS_DIR \
|
||||
--output_dir=$OUTPUT_DIR \
|
||||
--with_prior_preservation --prior_loss_weight=1.0 \
|
||||
--instance_prompt="a photo of sks dog" \
|
||||
--class_prompt="a photo of dog" \
|
||||
--resolution=512 \
|
||||
--train_batch_size=1 \
|
||||
--learning_rate=2e-6 \
|
||||
--num_class_images=200 \
|
||||
--max_train_steps=800
|
||||
```
|
||||
</jax>
|
||||
</frameworkcontent>
|
||||
|
||||
## Finetuning with LoRA
|
||||
|
||||
You can also use Low-Rank Adaptation of Large Language Models (LoRA), a fine-tuning technique for accelerating training large models, on DreamBooth. For more details, take a look at the [LoRA training](training/lora#dreambooth) guide.
|
||||
|
||||
## Saving checkpoints while training
|
||||
|
||||
It's easy to overfit while training with Dreambooth, so sometimes it's useful to save regular checkpoints during the training process. One of the intermediate checkpoints might actually work better than the final model! Pass the following argument to the training script to enable saving checkpoints:
|
||||
|
||||
```bash
|
||||
--checkpointing_steps=500
|
||||
```
|
||||
|
||||
This will save the full training state in subfolders of your `output_dir`. Subfolder names begin with the prefix `checkpoint-`, and then the number of steps performed so far; for example: `checkpoint-1500` would be a checkpoint saved after 1500 training steps.
|
||||
This saves the full training state in subfolders of your `output_dir`. Subfolder names begin with the prefix `checkpoint-`, followed by the number of steps performed so far; for example, `checkpoint-1500` would be a checkpoint saved after 1500 training steps.
|
||||
|
||||
#### Resuming training from a saved checkpoint
|
||||
### Resume training from a saved checkpoint
|
||||
|
||||
If you want to resume training from any of the saved checkpoints, you can pass the argument `--resume_from_checkpoint` and then indicate the name of the checkpoint you want to use. You can also use the special string `"latest"` to resume from the last checkpoint saved (i.e., the one with the largest number of steps). For example, the following would resume training from the checkpoint saved after 1500 steps:
|
||||
If you want to resume training from any of the saved checkpoints, you can pass the argument `--resume_from_checkpoint` to the script and specify the name of the checkpoint you want to use. You can also use the special string `"latest"` to resume from the last saved checkpoint (the one with the largest number of steps). For example, the following would resume training from the checkpoint saved after 1500 steps:
|
||||
|
||||
```bash
|
||||
--resume_from_checkpoint="checkpoint-1500"
|
||||
```
|
||||
|
||||
This would be a good opportunity to tweak some of your hyperparameters if you wish.
|
||||
This is a good opportunity to tweak some of your hyperparameters if you wish.
|
||||
|
||||
#### Performing inference using a saved checkpoint
|
||||
### Inference from a saved checkpoint
|
||||
|
||||
Saved checkpoints are stored in a format suitable for resuming training. They not only include the model weights, but also the state of the optimizer, data loaders and learning rate.
|
||||
Saved checkpoints are stored in a format suitable for resuming training. They not only include the model weights, but also the state of the optimizer, data loaders, and learning rate.
|
||||
|
||||
**Note**: If you have installed `"accelerate>=0.16.0"` you can use the following code to run
|
||||
If you have **`"accelerate>=0.16.0"`** installed, use the following code to run
|
||||
inference from an intermediate checkpoint.
|
||||
|
||||
```python
|
||||
@@ -150,7 +286,7 @@ pipeline.to("cuda")
|
||||
pipeline.save_pretrained("dreambooth-pipeline")
|
||||
```
|
||||
|
||||
If you have installed `"accelerate<0.16.0"` you need to first convert it to an inference pipeline. This is how you could do it:
|
||||
If you have **`"accelerate<0.16.0"`** installed, you need to convert it to an inference pipeline first:
|
||||
|
||||
```python
|
||||
from accelerate import Accelerator
|
||||
@@ -179,15 +315,37 @@ pipeline = DiffusionPipeline.from_pretrained(
|
||||
pipeline.save_pretrained("dreambooth-pipeline")
|
||||
```
|
||||
|
||||
### Training on a 16GB GPU
|
||||
## Optimizations for different GPU sizes
|
||||
|
||||
With the help of gradient checkpointing and the 8-bit optimizer from [bitsandbytes](https://github.com/TimDettmers/bitsandbytes), it's possible to train dreambooth on a 16GB GPU.
|
||||
Depending on your hardware, there are a few different ways to optimize DreamBooth on GPUs from 16GB to just 8GB!
|
||||
|
||||
### xFormers
|
||||
|
||||
[xFormers](https://github.com/facebookresearch/xformers) is a toolbox for optimizing Transformers, and it include a [memory-efficient attention](https://facebookresearch.github.io/xformers/components/ops.html#module-xformers.ops) mechanism that is used in 🧨 Diffusers. You'll need to [install xFormers](./optimization/xformers) and then add the following argument to your training script:
|
||||
|
||||
```bash
|
||||
--enable_xformers_memory_efficient_attention
|
||||
```
|
||||
|
||||
xFormers is not available in Flax.
|
||||
|
||||
### Set gradients to none
|
||||
|
||||
Another way you can lower your memory footprint is to [set the gradients](https://pytorch.org/docs/stable/generated/torch.optim.Optimizer.zero_grad.html) to `None` instead of zero. However, this may change certain behaviors, so if you run into any issues, try removing this argument. Add the following argument to your training script to set the gradients to `None`:
|
||||
|
||||
```bash
|
||||
--set_grads_to_none
|
||||
```
|
||||
|
||||
### 16GB GPU
|
||||
|
||||
With the help of gradient checkpointing and [bitsandbytes](https://github.com/TimDettmers/bitsandbytes) 8-bit optimizer, it's possible to train DreamBooth on a 16GB GPU. Make sure you have bitsandbytes installed:
|
||||
|
||||
```bash
|
||||
pip install bitsandbytes
|
||||
```
|
||||
|
||||
Then pass the `--use_8bit_adam` option to the training script.
|
||||
Then pass the `--use_8bit_adam` option to the training script:
|
||||
|
||||
```bash
|
||||
export MODEL_NAME="CompVis/stable-diffusion-v1-4"
|
||||
@@ -214,25 +372,18 @@ accelerate launch train_dreambooth.py \
|
||||
--max_train_steps=800
|
||||
```
|
||||
|
||||
### Fine-tune the text encoder in addition to the UNet
|
||||
### 12GB GPU
|
||||
|
||||
The script also allows to fine-tune the `text_encoder` along with the `unet`. It has been observed experimentally that this gives much better results, especially on faces. Please, refer to [our blog](https://huggingface.co/blog/dreambooth) for more details.
|
||||
|
||||
To enable this option, pass the `--train_text_encoder` argument to the training script.
|
||||
|
||||
<Tip>
|
||||
Training the text encoder requires additional memory, so training won't fit on a 16GB GPU. You'll need at least 24GB VRAM to use this option.
|
||||
</Tip>
|
||||
To run DreamBooth on a 12GB GPU, you'll need to enable gradient checkpointing, the 8-bit optimizer, xFormers, and set the gradients to `None`:
|
||||
|
||||
```bash
|
||||
export MODEL_NAME="CompVis/stable-diffusion-v1-4"
|
||||
export INSTANCE_DIR="path_to_training_images"
|
||||
export CLASS_DIR="path_to_class_images"
|
||||
export OUTPUT_DIR="path_to_saved_model"
|
||||
export INSTANCE_DIR="path-to-instance-images"
|
||||
export CLASS_DIR="path-to-class-images"
|
||||
export OUTPUT_DIR="path-to-save-model"
|
||||
|
||||
accelerate launch train_dreambooth.py \
|
||||
--pretrained_model_name_or_path=$MODEL_NAME \
|
||||
--train_text_encoder \
|
||||
--instance_data_dir=$INSTANCE_DIR \
|
||||
--class_data_dir=$CLASS_DIR \
|
||||
--output_dir=$OUTPUT_DIR \
|
||||
@@ -241,8 +392,10 @@ accelerate launch train_dreambooth.py \
|
||||
--class_prompt="a photo of dog" \
|
||||
--resolution=512 \
|
||||
--train_batch_size=1 \
|
||||
--use_8bit_adam
|
||||
--gradient_checkpointing \
|
||||
--gradient_accumulation_steps=1 --gradient_checkpointing \
|
||||
--use_8bit_adam \
|
||||
--enable_xformers_memory_efficient_attention \
|
||||
--set_grads_to_none \
|
||||
--learning_rate=2e-6 \
|
||||
--lr_scheduler="constant" \
|
||||
--lr_warmup_steps=0 \
|
||||
@@ -250,19 +403,25 @@ accelerate launch train_dreambooth.py \
|
||||
--max_train_steps=800
|
||||
```
|
||||
|
||||
### Training on a 8 GB GPU:
|
||||
### 8 GB GPU
|
||||
|
||||
Using [DeepSpeed](https://www.deepspeed.ai/) it's even possible to offload some
|
||||
tensors from VRAM to either CPU or NVME, allowing training to proceed with less GPU memory.
|
||||
For 8GB GPUs, you'll need the help of [DeepSpeed](https://www.deepspeed.ai/) to offload some
|
||||
tensors from the VRAM to either the CPU or NVME, enabling training with less GPU memory.
|
||||
|
||||
DeepSpeed needs to be enabled with `accelerate config`. During configuration,
|
||||
answer yes to "Do you want to use DeepSpeed?". Combining DeepSpeed stage 2, fp16
|
||||
mixed precision, and offloading both the model parameters and the optimizer state to CPU, it's
|
||||
possible to train on under 8 GB VRAM. The drawback is that this requires more system RAM (about 25 GB). See [the DeepSpeed documentation](https://huggingface.co/docs/accelerate/usage_guides/deepspeed) for more configuration options.
|
||||
Run the following command to configure your 🤗 Accelerate environment:
|
||||
|
||||
Changing the default Adam optimizer to DeepSpeed's special version of Adam
|
||||
`deepspeed.ops.adam.DeepSpeedCPUAdam` gives a substantial speedup, but enabling
|
||||
it requires the system's CUDA toolchain version to be the same as the one installed with PyTorch. 8-bit optimizers don't seem to be compatible with DeepSpeed at the moment.
|
||||
```bash
|
||||
accelerate config
|
||||
```
|
||||
|
||||
During configuration, confirm that you want to use DeepSpeed. Now it's possible to train on under 8GB VRAM by combining DeepSpeed stage 2, fp16 mixed precision, and offloading the model parameters and the optimizer state to the CPU. The drawback is that this requires more system RAM, about 25 GB. See [the DeepSpeed documentation](https://huggingface.co/docs/accelerate/usage_guides/deepspeed) for more configuration options.
|
||||
|
||||
You should also change the default Adam optimizer to DeepSpeed's optimized version of Adam
|
||||
[`deepspeed.ops.adam.DeepSpeedCPUAdam`](https://deepspeed.readthedocs.io/en/latest/optimizers.html#adam-cpu) for a substantial speedup. Enabling `DeepSpeedCPUAdam` requires your system's CUDA toolchain version to be the same as the one installed with PyTorch.
|
||||
|
||||
8-bit optimizers don't seem to be compatible with DeepSpeed at the moment.
|
||||
|
||||
Launch training with the following command:
|
||||
|
||||
```bash
|
||||
export MODEL_NAME="CompVis/stable-diffusion-v1-4"
|
||||
@@ -292,11 +451,10 @@ accelerate launch train_dreambooth.py \
|
||||
|
||||
## Inference
|
||||
|
||||
Once you have trained a model, inference can be done using the `StableDiffusionPipeline`, by simply indicating the path where the model was saved. Make sure that your prompts include the special `identifier` used during training (`sks` in the previous examples).
|
||||
|
||||
**Note**: If you have installed `"accelerate>=0.16.0"` you can use the following code to run
|
||||
inference from an intermediate checkpoint.
|
||||
Once you have trained a model, specify the path to where the model is saved, and use it for inference in the [`StableDiffusionPipeline`]. Make sure your prompts include the special `identifier` used during training (`sks` in the previous examples).
|
||||
|
||||
If you have **`"accelerate>=0.16.0"`** installed, you can use the following code to run
|
||||
inference from an intermediate checkpoint:
|
||||
|
||||
```python
|
||||
from diffusers import StableDiffusionPipeline
|
||||
@@ -311,4 +469,4 @@ image = pipe(prompt, num_inference_steps=50, guidance_scale=7.5).images[0]
|
||||
image.save("dog-bucket.png")
|
||||
```
|
||||
|
||||
You may also run inference from [any of the saved training checkpoints](#performing-inference-using-a-saved-checkpoint).
|
||||
You may also run inference from any of the [saved training checkpoints](#inference-from-a-saved-checkpoint).
|
||||
@@ -10,54 +10,151 @@ an "AS IS" BASIS, WITHOUT WARRANTIES OR CONDITIONS OF ANY KIND, either express o
|
||||
specific language governing permissions and limitations under the License.
|
||||
-->
|
||||
|
||||
# LoRA Support in Diffusers
|
||||
# Low-Rank Adaptation of Large Language Models (LoRA)
|
||||
|
||||
Diffusers supports LoRA for faster fine-tuning of Stable Diffusion, allowing greater memory efficiency and easier portability.
|
||||
[[open-in-colab]]
|
||||
|
||||
Low-Rank Adaption of Large Language Models was first introduced by Microsoft in
|
||||
[LoRA: Low-Rank Adaptation of Large Language Models](https://arxiv.org/abs/2106.09685) by *Edward J. Hu, Yelong Shen, Phillip Wallis, Zeyuan Allen-Zhu, Yuanzhi Li, Shean Wang, Lu Wang, Weizhu Chen*.
|
||||
<Tip warning={true}>
|
||||
|
||||
In a nutshell, LoRA allows adapting pretrained models by adding pairs of rank-decomposition weight matrices (called **update matrices**)
|
||||
to existing weights and **only** training those newly added weights. This has a couple of advantages:
|
||||
|
||||
- Previous pretrained weights are kept frozen so that the model is not so prone to [catastrophic forgetting](https://www.pnas.org/doi/10.1073/pnas.1611835114).
|
||||
- Rank-decomposition matrices have significantly fewer parameters than the original model, which means that trained LoRA weights are easily portable.
|
||||
- LoRA matrices are generally added to the attention layers of the original model and they control to which extent the model is adapted toward new training images via a `scale` parameter.
|
||||
|
||||
**__Note that the usage of LoRA is not just limited to attention layers. In the original LoRA work, the authors found out that just amending
|
||||
the attention layers of a language model is sufficient to obtain good downstream performance with great efficiency. This is why, it's common
|
||||
to just add the LoRA weights to the attention layers of a model.__**
|
||||
|
||||
[cloneofsimo](https://github.com/cloneofsimo) was the first to try out LoRA training for Stable Diffusion in the popular [lora](https://github.com/cloneofsimo/lora) GitHub repository.
|
||||
|
||||
<Tip>
|
||||
|
||||
LoRA allows us to achieve greater memory efficiency since the pretrained weights are kept frozen and only the LoRA weights are trained, thereby
|
||||
allowing us to run fine-tuning on consumer GPUs like Tesla T4, RTX 3080 or even RTX 2080 Ti! One can get access to GPUs like T4 in the free
|
||||
tiers of Kaggle Kernels and Google Colab Notebooks.
|
||||
Currently, LoRA is only supported for the attention layers of the [`UNet2DConditionalModel`].
|
||||
|
||||
</Tip>
|
||||
|
||||
## Getting started with LoRA for fine-tuning
|
||||
[Low-Rank Adaptation of Large Language Models (LoRA)](https://arxiv.org/abs/2106.09685) is a training method that accelerates the training of large models while consuming less memory. It adds pairs of rank-decomposition weight matrices (called **update matrices**) to existing weights, and **only** trains those newly added weights. This has a couple of advantages:
|
||||
|
||||
Stable Diffusion can be fine-tuned in different ways:
|
||||
- Previous pretrained weights are kept frozen so the model is not as prone to [catastrophic forgetting](https://www.pnas.org/doi/10.1073/pnas.1611835114).
|
||||
- Rank-decomposition matrices have significantly fewer parameters than the original model, which means that trained LoRA weights are easily portable.
|
||||
- LoRA matrices are generally added to the attention layers of the original model. 🧨 Diffusers provides the [`~diffusers.loaders.UNet2DConditionLoadersMixin.load_attn_procs`] method to load the LoRA weights into a model's attention layers. You can control the extent to which the model is adapted toward new training images via a `scale` parameter.
|
||||
- The greater memory-efficiency allows you to run fine-tuning on consumer GPUs like the Tesla T4, RTX 3080 or even the RTX 2080 Ti! GPUs like the T4 are free and readily accessible in Kaggle or Google Colab notebooks.
|
||||
|
||||
* [Textual inversion](https://huggingface.co/docs/diffusers/main/en/training/text_inversion)
|
||||
* [DreamBooth](https://huggingface.co/docs/diffusers/main/en/training/dreambooth)
|
||||
* [Text2Image fine-tuning](https://huggingface.co/docs/diffusers/main/en/training/text2image)
|
||||
<Tip>
|
||||
|
||||
We provide two end-to-end examples that show how to run fine-tuning with LoRA:
|
||||
💡 LoRA is not only limited to attention layers. The authors found that amending
|
||||
the attention layers of a language model is sufficient to obtain good downstream performance with great efficiency. This is why it's common to just add the LoRA weights to the attention layers of a model. Check out the [Using LoRA for efficient Stable Diffusion fine-tuning](https://huggingface.co/blog/lora) blog for more information about how LoRA works!
|
||||
|
||||
* [DreamBooth](https://github.com/huggingface/diffusers/tree/main/examples/dreambooth#training-with-low-rank-adaptation-of-large-language-models-lora)
|
||||
* [Text2Image](https://github.com/huggingface/diffusers/tree/main/examples/text_to_image#training-with-lora)
|
||||
</Tip>
|
||||
|
||||
If you want to perform DreamBooth training with LoRA, for instance, you would run:
|
||||
[cloneofsimo](https://github.com/cloneofsimo) was the first to try out LoRA training for Stable Diffusion in the popular [lora](https://github.com/cloneofsimo/lora) GitHub repository. 🧨 Diffusers now supports finetuning with LoRA for [text-to-image generation](https://github.com/huggingface/diffusers/tree/main/examples/text_to_image#training-with-lora) and [DreamBooth](https://github.com/huggingface/diffusers/tree/main/examples/dreambooth#training-with-low-rank-adaptation-of-large-language-models-lora). This guide will show you how to do both.
|
||||
|
||||
If you'd like to store or share your model with the community, login to your Hugging Face account (create [one](hf.co/join) if you don't have one already):
|
||||
|
||||
```bash
|
||||
huggingface-cli login
|
||||
```
|
||||
|
||||
## Text-to-image
|
||||
|
||||
Finetuning a model like Stable Diffusion, which has billions of parameters, can be slow and difficult. With LoRA, it is much easier and faster to finetune a diffusion model. It can run on hardware with as little as 11GB of GPU RAM without resorting to tricks such as 8-bit optimizers.
|
||||
|
||||
### Training[[text-to-image-training]]
|
||||
|
||||
Let's finetune [`stable-diffusion-v1-5`](https://huggingface.co/runwayml/stable-diffusion-v1-5) on the [Pokémon BLIP captions](https://huggingface.co/datasets/lambdalabs/pokemon-blip-captions) dataset to generate your own Pokémon.
|
||||
|
||||
To start, make sure you have the `MODEL_NAME` and `DATASET_NAME` environment variables set. The `OUTPUT_DIR` and `HUB_MODEL_ID` variables are optional and specify where to save the model to on the Hub:
|
||||
|
||||
```bash
|
||||
export MODEL_NAME="runwayml/stable-diffusion-v1-5"
|
||||
export OUTPUT_DIR="/sddata/finetune/lora/pokemon"
|
||||
export HUB_MODEL_ID="pokemon-lora"
|
||||
export DATASET_NAME="lambdalabs/pokemon-blip-captions"
|
||||
```
|
||||
|
||||
There are some flags to be aware of before you start training:
|
||||
|
||||
* `--push_to_hub` stores the trained LoRA embeddings on the Hub.
|
||||
* `--report_to=wandb` reports and logs the training results to your Weights & Biases dashboard (as an example, take a look at this [report](https://wandb.ai/pcuenq/text2image-fine-tune/runs/b4k1w0tn?workspace=user-pcuenq)).
|
||||
* `--learning_rate=1e-04`, you can afford to use a higher learning rate than you normally would with LoRA.
|
||||
|
||||
Now you're ready to launch the training (you can find the full training script [here](https://github.com/huggingface/diffusers/blob/main/examples/text_to_image/train_text_to_image_lora.py)):
|
||||
|
||||
```bash
|
||||
accelerate launch --mixed_precision="fp16" train_text_to_image_lora.py \
|
||||
--pretrained_model_name_or_path=$MODEL_NAME \
|
||||
--dataset_name=$DATASET_NAME \
|
||||
--dataloader_num_workers=8 \
|
||||
--resolution=512 --center_crop --random_flip \
|
||||
--train_batch_size=1 \
|
||||
--gradient_accumulation_steps=4 \
|
||||
--max_train_steps=15000 \
|
||||
--learning_rate=1e-04 \
|
||||
--max_grad_norm=1 \
|
||||
--lr_scheduler="cosine" --lr_warmup_steps=0 \
|
||||
--output_dir=${OUTPUT_DIR} \
|
||||
--push_to_hub \
|
||||
--hub_model_id=${HUB_MODEL_ID} \
|
||||
--report_to=wandb \
|
||||
--checkpointing_steps=500 \
|
||||
--validation_prompt="A pokemon with blue eyes." \
|
||||
--seed=1337
|
||||
```
|
||||
|
||||
### Inference[[text-to-image-inference]]
|
||||
|
||||
Now you can use the model for inference by loading the base model in the [`StableDiffusionPipeline`] and then the [`DPMSolverMultistepScheduler`]:
|
||||
|
||||
```py
|
||||
>>> import torch
|
||||
>>> from diffusers import StableDiffusionPipeline, DPMSolverMultistepScheduler
|
||||
|
||||
>>> model_base = "runwayml/stable-diffusion-v1-5"
|
||||
|
||||
>>> pipe = StableDiffusionPipeline.from_pretrained(model_base, torch_dtype=torch.float16)
|
||||
>>> pipe.scheduler = DPMSolverMultistepScheduler.from_config(pipe.scheduler.config)
|
||||
```
|
||||
|
||||
Load the LoRA weights from your finetuned model *on top of the base model weights*, and then move the pipeline to a GPU for faster inference. When you merge the LoRA weights with the frozen pretrained model weights, you can optionally adjust how much of the weights to merge with the `scale` parameter:
|
||||
|
||||
<Tip>
|
||||
|
||||
💡 A `scale` value of `0` is the same as not using your LoRA weights and you're only using the base model weights, and a `scale` value of `1` means you're only using the fully finetuned LoRA weights. Values between `0` and `1` interpolates between the two weights.
|
||||
|
||||
</Tip>
|
||||
|
||||
```py
|
||||
>>> pipe.unet.load_attn_procs(model_path)
|
||||
>>> pipe.to("cuda")
|
||||
# use half the weights from the LoRA finetuned model and half the weights from the base model
|
||||
|
||||
>>> image = pipe(
|
||||
... "A pokemon with blue eyes.", num_inference_steps=25, guidance_scale=7.5, cross_attention_kwargs={"scale": 0.5}
|
||||
... ).images[0]
|
||||
# use the weights from the fully finetuned LoRA model
|
||||
|
||||
>>> image = pipe("A pokemon with blue eyes.", num_inference_steps=25, guidance_scale=7.5).images[0]
|
||||
>>> image.save("blue_pokemon.png")
|
||||
```
|
||||
|
||||
## DreamBooth
|
||||
|
||||
[DreamBooth](https://arxiv.org/abs/2208.12242) is a finetuning technique for personalizing a text-to-image model like Stable Diffusion to generate photorealistic images of a subject in different contexts, given a few images of the subject. However, DreamBooth is very sensitive to hyperparameters and it is easy to overfit. Some important hyperparameters to consider include those that affect the training time (learning rate, number of training steps), and inference time (number of steps, scheduler type).
|
||||
|
||||
<Tip>
|
||||
|
||||
💡 Take a look at the [Training Stable Diffusion with DreamBooth using 🧨 Diffusers](https://huggingface.co/blog/dreambooth) blog for an in-depth analysis of DreamBooth experiments and recommended settings.
|
||||
|
||||
</Tip>
|
||||
|
||||
### Training[[dreambooth-training]]
|
||||
|
||||
Let's finetune [`stable-diffusion-v1-5`](https://huggingface.co/runwayml/stable-diffusion-v1-5) with DreamBooth and LoRA with some 🐶 [dog images](https://drive.google.com/drive/folders/1BO_dyz-p65qhBRRMRA4TbZ8qW4rB99JZ). Download and save these images to a directory.
|
||||
|
||||
To start, make sure you have the `MODEL_NAME` and `INSTANCE_DIR` (path to directory containing images) environment variables set. The `OUTPUT_DIR` variables is optional and specifies where to save the model to on the Hub:
|
||||
|
||||
```bash
|
||||
export MODEL_NAME="runwayml/stable-diffusion-v1-5"
|
||||
export INSTANCE_DIR="path-to-instance-images"
|
||||
export OUTPUT_DIR="path-to-save-model"
|
||||
```
|
||||
|
||||
There are some flags to be aware of before you start training:
|
||||
|
||||
* `--push_to_hub` stores the trained LoRA embeddings on the Hub.
|
||||
* `--report_to=wandb` reports and logs the training results to your Weights & Biases dashboard (as an example, take a look at this [report](https://wandb.ai/pcuenq/text2image-fine-tune/runs/b4k1w0tn?workspace=user-pcuenq)).
|
||||
* `--learning_rate=1e-04`, you can afford to use a higher learning rate than you normally would with LoRA.
|
||||
|
||||
Now you're ready to launch the training (you can find the full training script [here](https://github.com/huggingface/diffusers/blob/main/examples/dreambooth/train_dreambooth_lora.py)):
|
||||
|
||||
```bash
|
||||
accelerate launch train_dreambooth_lora.py \
|
||||
--pretrained_model_name_or_path=$MODEL_NAME \
|
||||
--instance_data_dir=$INSTANCE_DIR \
|
||||
@@ -78,101 +175,40 @@ accelerate launch train_dreambooth_lora.py \
|
||||
--push_to_hub
|
||||
```
|
||||
|
||||
A similar process can be followed to fully fine-tune Stable Diffusion on a custom dataset using the
|
||||
`examples/text_to_image/train_text_to_image_lora.py` script.
|
||||
### Inference[[dreambooth-inference]]
|
||||
|
||||
Refer to the respective examples linked above to learn more.
|
||||
Now you can use the model for inference by loading the base model in the [`StableDiffusionPipeline`]:
|
||||
|
||||
```py
|
||||
>>> import torch
|
||||
>>> from diffusers import StableDiffusionPipeline
|
||||
|
||||
>>> model_base = "runwayml/stable-diffusion-v1-5"
|
||||
|
||||
>>> pipe = StableDiffusionPipeline.from_pretrained(model_base, torch_dtype=torch.float16)
|
||||
```
|
||||
|
||||
Load the LoRA weights from your finetuned DreamBooth model *on top of the base model weights*, and then move the pipeline to a GPU for faster inference. When you merge the LoRA weights with the frozen pretrained model weights, you can optionally adjust how much of the weights to merge with the `scale` parameter:
|
||||
|
||||
<Tip>
|
||||
|
||||
When using LoRA we can use a much higher learning rate (typically 1e-4 as opposed to ~1e-6) compared to non-LoRA Dreambooth fine-tuning.
|
||||
💡 A `scale` value of `0` is the same as not using your LoRA weights and you're only using the base model weights, and a `scale` value of `1` means you're only using the fully finetuned LoRA weights. Values between `0` and `1` interpolates between the two weights.
|
||||
|
||||
</Tip>
|
||||
|
||||
But there is no free lunch. For the given dataset and expected generation quality, you'd still need to experiment with
|
||||
different hyperparameters. Here are some important ones:
|
||||
|
||||
* Training time
|
||||
* Learning rate
|
||||
* Number of training steps
|
||||
* Inference time
|
||||
* Number of steps
|
||||
* Scheduler type
|
||||
|
||||
Additionally, you can follow [this blog](https://huggingface.co/blog/dreambooth) that documents some of our experimental
|
||||
findings for performing DreamBooth training of Stable Diffusion.
|
||||
|
||||
When fine-tuning, the LoRA update matrices are only added to the attention layers. To enable this, we added new weight
|
||||
loading functionalities. Their details are available [here](https://huggingface.co/docs/diffusers/main/en/api/loaders).
|
||||
|
||||
## Inference
|
||||
|
||||
Assuming you used the `examples/text_to_image/train_text_to_image_lora.py` to fine-tune Stable Diffusion on the [Pokemon
|
||||
dataset](https://huggingface.co/datasets/lambdalabs/pokemon-blip-captions), you can perform inference like so:
|
||||
|
||||
```py
|
||||
from diffusers import StableDiffusionPipeline
|
||||
import torch
|
||||
|
||||
model_path = "sayakpaul/sd-model-finetuned-lora-t4"
|
||||
pipe = StableDiffusionPipeline.from_pretrained("CompVis/stable-diffusion-v1-4", torch_dtype=torch.float16)
|
||||
pipe.unet.load_attn_procs(model_path)
|
||||
pipe.to("cuda")
|
||||
|
||||
prompt = "A pokemon with blue eyes."
|
||||
image = pipe(prompt, num_inference_steps=30, guidance_scale=7.5).images[0]
|
||||
image.save("pokemon.png")
|
||||
```
|
||||
|
||||
Here are some example images you can expect:
|
||||
|
||||
<img src="https://huggingface.co/datasets/huggingface/documentation-images/resolve/main/pokemon-collage.png"/>
|
||||
|
||||
[`sayakpaul/sd-model-finetuned-lora-t4`](https://huggingface.co/sayakpaul/sd-model-finetuned-lora-t4) contains [LoRA fine-tuned update matrices](https://huggingface.co/sayakpaul/sd-model-finetuned-lora-t4/blob/main/pytorch_lora_weights.bin)
|
||||
which is only 3 MBs in size. During inference, the pre-trained Stable Diffusion checkpoints are loaded alongside these update
|
||||
matrices and then they are combined to run inference.
|
||||
|
||||
You can use the [`huggingface_hub`](https://github.com/huggingface/huggingface_hub) library to retrieve the base model
|
||||
from [`sayakpaul/sd-model-finetuned-lora-t4`](https://huggingface.co/sayakpaul/sd-model-finetuned-lora-t4) like so:
|
||||
|
||||
```py
|
||||
from huggingface_hub.repocard import RepoCard
|
||||
>>> pipe.unet.load_attn_procs(model_path)
|
||||
>>> pipe.to("cuda")
|
||||
# use half the weights from the LoRA finetuned model and half the weights from the base model
|
||||
|
||||
card = RepoCard.load("sayakpaul/sd-model-finetuned-lora-t4")
|
||||
base_model = card.data.to_dict()["base_model"]
|
||||
# 'CompVis/stable-diffusion-v1-4'
|
||||
```
|
||||
>>> image = pipe(
|
||||
... "A picture of a sks dog in a bucket.",
|
||||
... num_inference_steps=25,
|
||||
... guidance_scale=7.5,
|
||||
... cross_attention_kwargs={"scale": 0.5},
|
||||
... ).images[0]
|
||||
# use the weights from the fully finetuned LoRA model
|
||||
|
||||
And then you can use `pipe = StableDiffusionPipeline.from_pretrained(base_model, torch_dtype=torch.float16)`.
|
||||
|
||||
This is especially useful when you don't want to hardcode the base model identifier during initializing the `StableDiffusionPipeline`.
|
||||
|
||||
Inference for DreamBooth training remains the same. Check
|
||||
[this section](https://github.com/huggingface/diffusers/tree/main/examples/dreambooth#inference-1) for more details.
|
||||
|
||||
### Merging LoRA with original model
|
||||
|
||||
When performing inference, you can merge the trained LoRA weights with the frozen pre-trained model weights, to interpolate between the original model's inference result (as if no fine-tuning had occurred) and the fully fine-tuned version.
|
||||
|
||||
You can adjust the merging ratio with a parameter called α (alpha) in the paper, or `scale` in our implementation. You can tweak it with the following code, that passes `scale` as `cross_attention_kwargs` in the pipeline call:
|
||||
|
||||
```py
|
||||
from diffusers import StableDiffusionPipeline
|
||||
import torch
|
||||
|
||||
model_path = "sayakpaul/sd-model-finetuned-lora-t4"
|
||||
pipe = StableDiffusionPipeline.from_pretrained("CompVis/stable-diffusion-v1-4", torch_dtype=torch.float16)
|
||||
pipe.unet.load_attn_procs(model_path)
|
||||
pipe.to("cuda")
|
||||
|
||||
prompt = "A pokemon with blue eyes."
|
||||
image = pipe(prompt, num_inference_steps=30, guidance_scale=7.5, cross_attention_kwargs={"scale": 0.5}).images[0]
|
||||
image.save("pokemon.png")
|
||||
```
|
||||
|
||||
A value of `0` is the same as _not_ using the LoRA weights, whereas `1` means only the LoRA fine-tuned weights will be used. Values between 0 and 1 will interpolate between the two versions.
|
||||
|
||||
|
||||
## Known limitations
|
||||
|
||||
* Currently, we only support LoRA for the attention layers of [`UNet2DConditionModel`](https://huggingface.co/docs/diffusers/main/en/api/models#diffusers.UNet2DConditionModel).
|
||||
>>> image = pipe("A picture of a sks dog in a bucket.", num_inference_steps=25, guidance_scale=7.5).images[0]
|
||||
>>> image.save("bucket-dog.png")
|
||||
```
|
||||
@@ -1,4 +1,4 @@
|
||||
<!--Copyright 2022 The HuggingFace Team. All rights reserved.
|
||||
<!--Copyright 2023 The HuggingFace Team. All rights reserved.
|
||||
|
||||
Licensed under the Apache License, Version 2.0 (the "License"); you may not use this file except in compliance with
|
||||
the License. You may obtain a copy of the License at
|
||||
|
||||
@@ -1,4 +1,4 @@
|
||||
<!--Copyright 2022 The HuggingFace Team. All rights reserved.
|
||||
<!--Copyright 2023 The HuggingFace Team. All rights reserved.
|
||||
|
||||
Licensed under the Apache License, Version 2.0 (the "License"); you may not use this file except in compliance with
|
||||
the License. You may obtain a copy of the License at
|
||||
@@ -11,20 +11,15 @@ specific language governing permissions and limitations under the License.
|
||||
-->
|
||||
|
||||
|
||||
# Stable Diffusion text-to-image fine-tuning
|
||||
|
||||
The [`train_text_to_image.py`](https://github.com/huggingface/diffusers/tree/main/examples/text_to_image) script shows how to fine-tune the stable diffusion model on your own dataset.
|
||||
# Text-to-image
|
||||
|
||||
<Tip warning={true}>
|
||||
|
||||
The text-to-image fine-tuning script is experimental. It's easy to overfit and run into issues like catastrophic forgetting. We recommend to explore different hyperparameters to get the best results on your dataset.
|
||||
The text-to-image fine-tuning script is experimental. It's easy to overfit and run into issues like catastrophic forgetting. We recommend you explore different hyperparameters to get the best results on your dataset.
|
||||
|
||||
</Tip>
|
||||
|
||||
|
||||
## Running locally
|
||||
|
||||
### Installing the dependencies
|
||||
Text-to-image models like Stable Diffusion generate an image from a text prompt. This guide will show you how to finetune the [`CompVis/stable-diffusion-v1-4`](https://huggingface.co/CompVis/stable-diffusion-v1-4) model on your own dataset with PyTorch and Flax. All the training scripts for text-to-image finetuning used in this guide can be found in this [repository](https://github.com/huggingface/diffusers/tree/main/examples/text_to_image) if you're interested in taking a closer look.
|
||||
|
||||
Before running the scripts, make sure to install the library's training dependencies:
|
||||
|
||||
@@ -33,32 +28,51 @@ pip install git+https://github.com/huggingface/diffusers.git
|
||||
pip install -U -r requirements.txt
|
||||
```
|
||||
|
||||
And initialize an [🤗Accelerate](https://github.com/huggingface/accelerate/) environment with:
|
||||
And initialize an [🤗 Accelerate](https://github.com/huggingface/accelerate/) environment with:
|
||||
|
||||
```bash
|
||||
accelerate config
|
||||
```
|
||||
|
||||
You need to accept the model license before downloading or using the weights. In this example we'll use model version `v1-4`, so you'll need to visit [its card](https://huggingface.co/CompVis/stable-diffusion-v1-4), read the license and tick the checkbox if you agree.
|
||||
|
||||
You have to be a registered user in 🤗 Hugging Face Hub, and you'll also need to use an access token for the code to work. For more information on access tokens, please refer to [this section of the documentation](https://huggingface.co/docs/hub/security-tokens).
|
||||
|
||||
Run the following command to authenticate your token
|
||||
|
||||
```bash
|
||||
huggingface-cli login
|
||||
```
|
||||
|
||||
If you have already cloned the repo, then you won't need to go through these steps. Instead, you can pass the path to your local checkout to the training script and it will be loaded from there.
|
||||
|
||||
### Hardware Requirements for Fine-tuning
|
||||
## Hardware requirements
|
||||
|
||||
Using `gradient_checkpointing` and `mixed_precision` it should be possible to fine tune the model on a single 24GB GPU. For higher `batch_size` and faster training it's better to use GPUs with more than 30GB of GPU memory. You can also use JAX / Flax for fine-tuning on TPUs or GPUs, see [below](#flax-jax-finetuning) for details.
|
||||
Using `gradient_checkpointing` and `mixed_precision`, it should be possible to finetune the model on a single 24GB GPU. For higher `batch_size`'s and faster training, it's better to use GPUs with more than 30GB of GPU memory. You can also use JAX/Flax for fine-tuning on TPUs or GPUs, which will be covered [below](#flax-jax-finetuning).
|
||||
|
||||
### Fine-tuning Example
|
||||
You can reduce your memory footprint even more by enabling memory efficient attention with xFormers. Make sure you have [xFormers installed](./optimization/xformers) and pass the `--enable_xformers_memory_efficient_attention` flag to the training script.
|
||||
|
||||
The following script will launch a fine-tuning run using [Justin Pinkneys' captioned Pokemon dataset](https://huggingface.co/datasets/lambdalabs/pokemon-blip-captions), available in Hugging Face Hub.
|
||||
xFormers is not available for Flax.
|
||||
|
||||
## Upload model to Hub
|
||||
|
||||
Store your model on the Hub by adding the following argument to the training script:
|
||||
|
||||
```bash
|
||||
--push_to_hub
|
||||
```
|
||||
|
||||
## Save and load checkpoints
|
||||
|
||||
It is a good idea to regularly save checkpoints in case anything happens during training. To save a checkpoint, pass the following argument to the training script:
|
||||
|
||||
```bash
|
||||
--checkpointing_steps=500
|
||||
```
|
||||
|
||||
Every 500 steps, the full training state is saved in a subfolder in the `output_dir`. The checkpoint has the format `checkpoint-` followed by the number of steps trained so far. For example, `checkpoint-1500` is a checkpoint saved after 1500 training steps.
|
||||
|
||||
To load a checkpoint to resume training, pass the argument `--resume_from_checkpoint` to the training script and specify the checkpoint you want to resume from. For example, the following argument resumes training from the checkpoint saved after 1500 training steps:
|
||||
|
||||
```bash
|
||||
--resume_from_checkpoint="checkpoint-1500"
|
||||
```
|
||||
|
||||
## Fine-tuning
|
||||
|
||||
<frameworkcontent>
|
||||
<pt>
|
||||
Launch the [PyTorch training script](https://github.com/huggingface/diffusers/blob/main/examples/text_to_image/train_text_to_image.py) for a fine-tuning run on the [Pokémon BLIP captions](https://huggingface.co/datasets/lambdalabs/pokemon-blip-captions) dataset like this:
|
||||
|
||||
```bash
|
||||
export MODEL_NAME="CompVis/stable-diffusion-v1-4"
|
||||
@@ -80,9 +94,9 @@ accelerate launch train_text_to_image.py \
|
||||
--output_dir="sd-pokemon-model"
|
||||
```
|
||||
|
||||
To run on your own training files you need to prepare the dataset according to the format required by `datasets`. You can upload your dataset to the Hub, or you can prepare a local folder with your files. [This documentation](https://huggingface.co/docs/datasets/v2.4.0/en/image_load#imagefolder-with-metadata) explains how to do it.
|
||||
To finetune on your own dataset, prepare the dataset according to the format required by 🤗 [Datasets](https://huggingface.co/docs/datasets/index). You can [upload your dataset to the Hub](https://huggingface.co/docs/datasets/image_dataset#upload-dataset-to-the-hub), or you can [prepare a local folder with your files](https://huggingface.co/docs/datasets/image_dataset#imagefolder).
|
||||
|
||||
You should modify the script if you wish to use custom loading logic. We have left pointers in the code in the appropriate places :)
|
||||
Modify the script if you want to use custom loading logic. We left pointers in the code in the appropriate places to help you. 🤗 The example script below shows how to finetune on a local dataset in `TRAIN_DIR` and where to save the model to in `OUTPUT_DIR`:
|
||||
|
||||
```bash
|
||||
export MODEL_NAME="CompVis/stable-diffusion-v1-4"
|
||||
@@ -104,25 +118,19 @@ accelerate launch train_text_to_image.py \
|
||||
--lr_scheduler="constant" --lr_warmup_steps=0 \
|
||||
--output_dir=${OUTPUT_DIR}
|
||||
```
|
||||
</pt>
|
||||
<jax>
|
||||
With Flax, it's possible to train a Stable Diffusion model faster on TPUs and GPUs thanks to [@duongna211](https://github.com/duongna21). This is very efficient on TPU hardware but works great on GPUs too. The Flax training script doesn't support features like gradient checkpointing or gradient accumulation yet, so you'll need a GPU with at least 30GB of memory or a TPU v3.
|
||||
|
||||
Once training is finished the model will be saved to the `OUTPUT_DIR` specified in the command. To load the fine-tuned model for inference, just pass that path to `StableDiffusionPipeline`:
|
||||
Before running the script, make sure you have the requirements installed:
|
||||
|
||||
```python
|
||||
from diffusers import StableDiffusionPipeline
|
||||
|
||||
model_path = "path_to_saved_model"
|
||||
pipe = StableDiffusionPipeline.from_pretrained(model_path, torch_dtype=torch.float16)
|
||||
pipe.to("cuda")
|
||||
|
||||
image = pipe(prompt="yoda").images[0]
|
||||
image.save("yoda-pokemon.png")
|
||||
```bash
|
||||
pip install -U -r requirements_flax.txt
|
||||
```
|
||||
|
||||
### Flax / JAX fine-tuning
|
||||
Now you can launch the [Flax training script](https://github.com/huggingface/diffusers/blob/main/examples/text_to_image/train_text_to_image_flax.py) like this:
|
||||
|
||||
Thanks to [@duongna211](https://github.com/duongna21) it's possible to fine-tune Stable Diffusion using Flax! This is very efficient on TPU hardware but works great on GPUs too. You can use the [Flax training script](https://github.com/huggingface/diffusers/blob/main/examples/text_to_image/train_text_to_image_flax.py) like this:
|
||||
|
||||
```Python
|
||||
```bash
|
||||
export MODEL_NAME="runwayml/stable-diffusion-v1-5"
|
||||
export dataset_name="lambdalabs/pokemon-blip-captions"
|
||||
|
||||
@@ -136,3 +144,77 @@ python train_text_to_image_flax.py \
|
||||
--max_grad_norm=1 \
|
||||
--output_dir="sd-pokemon-model"
|
||||
```
|
||||
|
||||
To finetune on your own dataset, prepare the dataset according to the format required by 🤗 [Datasets](https://huggingface.co/docs/datasets/index). You can [upload your dataset to the Hub](https://huggingface.co/docs/datasets/image_dataset#upload-dataset-to-the-hub), or you can [prepare a local folder with your files](https://huggingface.co/docs/datasets/image_dataset#imagefolder).
|
||||
|
||||
Modify the script if you want to use custom loading logic. We left pointers in the code in the appropriate places to help you. 🤗 The example script below shows how to finetune on a local dataset in `TRAIN_DIR`:
|
||||
|
||||
```bash
|
||||
export MODEL_NAME="duongna/stable-diffusion-v1-4-flax"
|
||||
export TRAIN_DIR="path_to_your_dataset"
|
||||
|
||||
python train_text_to_image_flax.py \
|
||||
--pretrained_model_name_or_path=$MODEL_NAME \
|
||||
--train_data_dir=$TRAIN_DIR \
|
||||
--resolution=512 --center_crop --random_flip \
|
||||
--train_batch_size=1 \
|
||||
--mixed_precision="fp16" \
|
||||
--max_train_steps=15000 \
|
||||
--learning_rate=1e-05 \
|
||||
--max_grad_norm=1 \
|
||||
--output_dir="sd-pokemon-model"
|
||||
```
|
||||
</jax>
|
||||
</frameworkcontent>
|
||||
|
||||
## LoRA
|
||||
|
||||
You can also use Low-Rank Adaptation of Large Language Models (LoRA), a fine-tuning technique for accelerating training large models, for fine-tuning text-to-image models. For more details, take a look at the [LoRA training](lora#text-to-image) guide.
|
||||
|
||||
## Inference
|
||||
|
||||
Now you can load the fine-tuned model for inference by passing the model path or model name on the Hub to the [`StableDiffusionPipeline`]:
|
||||
|
||||
<frameworkcontent>
|
||||
<pt>
|
||||
```python
|
||||
from diffusers import StableDiffusionPipeline
|
||||
|
||||
model_path = "path_to_saved_model"
|
||||
pipe = StableDiffusionPipeline.from_pretrained(model_path, torch_dtype=torch.float16)
|
||||
pipe.to("cuda")
|
||||
|
||||
image = pipe(prompt="yoda").images[0]
|
||||
image.save("yoda-pokemon.png")
|
||||
```
|
||||
</pt>
|
||||
<jax>
|
||||
```python
|
||||
import jax
|
||||
import numpy as np
|
||||
from flax.jax_utils import replicate
|
||||
from flax.training.common_utils import shard
|
||||
from diffusers import FlaxStableDiffusionPipeline
|
||||
|
||||
model_path = "path_to_saved_model"
|
||||
pipe, params = FlaxStableDiffusionPipeline.from_pretrained(model_path, dtype=jax.numpy.bfloat16)
|
||||
|
||||
prompt = "yoda pokemon"
|
||||
prng_seed = jax.random.PRNGKey(0)
|
||||
num_inference_steps = 50
|
||||
|
||||
num_samples = jax.device_count()
|
||||
prompt = num_samples * [prompt]
|
||||
prompt_ids = pipeline.prepare_inputs(prompt)
|
||||
|
||||
# shard inputs and rng
|
||||
params = replicate(params)
|
||||
prng_seed = jax.random.split(prng_seed, jax.device_count())
|
||||
prompt_ids = shard(prompt_ids)
|
||||
|
||||
images = pipeline(prompt_ids, params, prng_seed, num_inference_steps, jit=True).images
|
||||
images = pipeline.numpy_to_pil(np.asarray(images.reshape((num_samples,) + images.shape[-3:])))
|
||||
image.save("yoda-pokemon.png")
|
||||
```
|
||||
</jax>
|
||||
</frameworkcontent>
|
||||
|
||||
@@ -1,4 +1,4 @@
|
||||
<!--Copyright 2022 The HuggingFace Team. All rights reserved.
|
||||
<!--Copyright 2023 The HuggingFace Team. All rights reserved.
|
||||
|
||||
Licensed under the Apache License, Version 2.0 (the "License"); you may not use this file except in compliance with
|
||||
the License. You may obtain a copy of the License at
|
||||
@@ -14,74 +14,85 @@ specific language governing permissions and limitations under the License.
|
||||
|
||||
# Textual Inversion
|
||||
|
||||
Textual Inversion is a technique for capturing novel concepts from a small number of example images in a way that can later be used to control text-to-image pipelines. It does so by learning new 'words' in the embedding space of the pipeline's text encoder. These special words can then be used within text prompts to achieve very fine-grained control of the resulting images.
|
||||
[[open-in-colab]]
|
||||
|
||||
[Textual Inversion](https://arxiv.org/abs/2208.01618) is a technique for capturing novel concepts from a small number of example images. While the technique was originally demonstrated with a [latent diffusion model](https://github.com/CompVis/latent-diffusion), it has since been applied to other model variants like [Stable Diffusion](https://huggingface.co/docs/diffusers/main/en/conceptual/stable_diffusion). The learned concepts can be used to better control the images generated from text-to-image pipelines. It learns new "words" in the text encoder's embedding space, which are used within text prompts for personalized image generation.
|
||||
|
||||
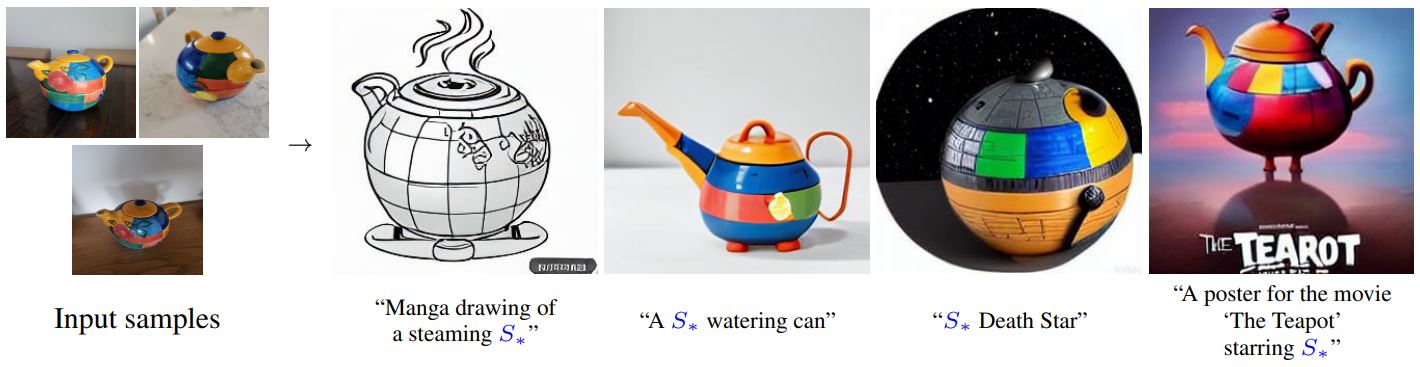
|
||||
_By using just 3-5 images you can teach new concepts to a model such as Stable Diffusion for personalized image generation ([image source](https://github.com/rinongal/textual_inversion))._
|
||||
<small>By using just 3-5 images you can teach new concepts to a model such as Stable Diffusion for personalized image generation <a href="https://github.com/rinongal/textual_inversion">(image source)</a></small>
|
||||
|
||||
This technique was introduced in [An Image is Worth One Word: Personalizing Text-to-Image Generation using Textual Inversion](https://arxiv.org/abs/2208.01618). The paper demonstrated the concept using a [latent diffusion model](https://github.com/CompVis/latent-diffusion) but the idea has since been applied to other variants such as [Stable Diffusion](https://huggingface.co/docs/diffusers/main/en/conceptual/stable_diffusion).
|
||||
This guide will show you how to train a [`runwayml/stable-diffusion-v1-5`](https://huggingface.co/runwayml/stable-diffusion-v1-5) model with Textual Inversion. All the training scripts for Textual Inversion used in this guide can be found [here](https://github.com/huggingface/diffusers/tree/main/examples/textual_inversion) if you're interested in taking a closer look at how things work under the hood.
|
||||
|
||||
<Tip>
|
||||
|
||||
## How It Works
|
||||
There is a community-created collection of trained Textual Inversion models in the [Stable Diffusion Textual Inversion Concepts Library](https://huggingface.co/sd-concepts-library) which are readily available for inference. Over time, this'll hopefully grow into a useful resource as more concepts are added!
|
||||
|
||||
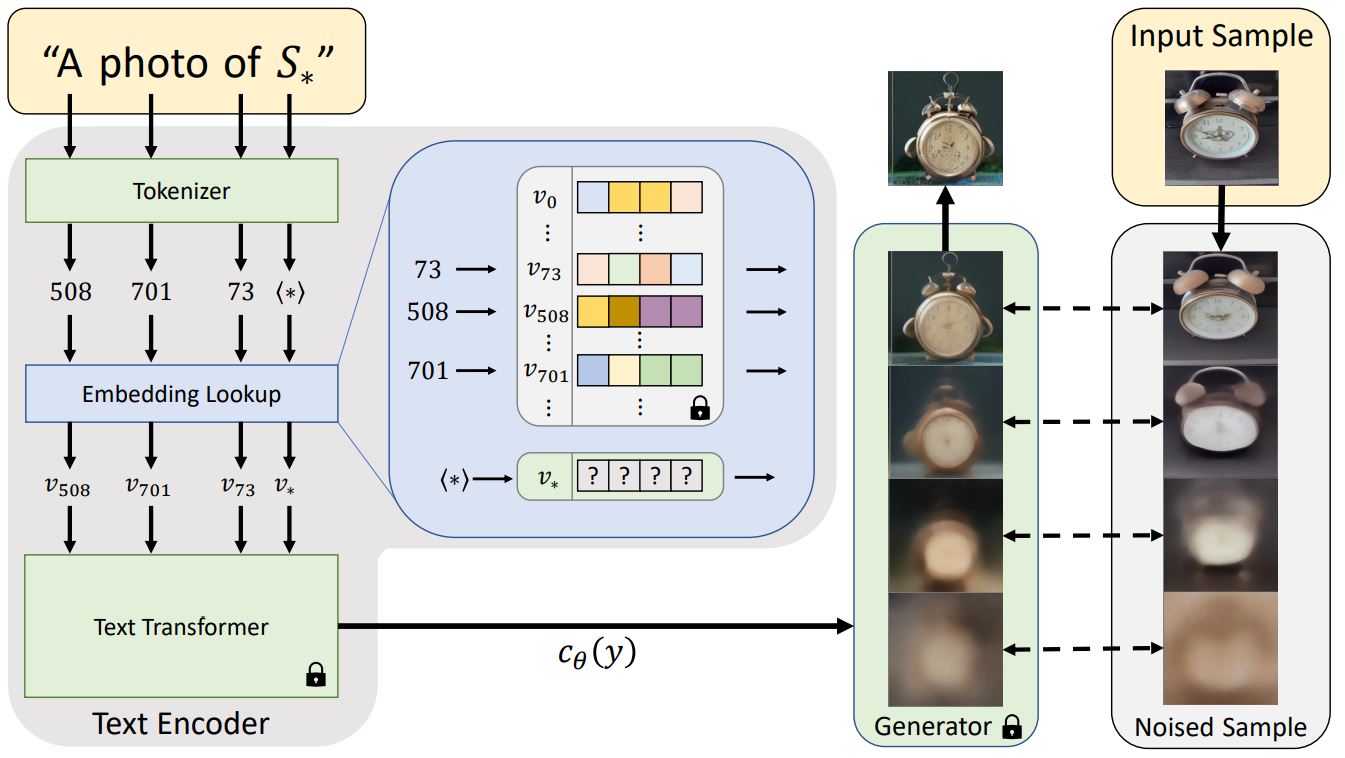
|
||||
_Architecture Overview from the [textual inversion blog post](https://textual-inversion.github.io/)_
|
||||
</Tip>
|
||||
|
||||
Before a text prompt can be used in a diffusion model, it must first be processed into a numerical representation. This typically involves tokenizing the text, converting each token to an embedding and then feeding those embeddings through a model (typically a transformer) whose output will be used as the conditioning for the diffusion model.
|
||||
|
||||
Textual inversion learns a new token embedding (v* in the diagram above). A prompt (that includes a token which will be mapped to this new embedding) is used in conjunction with a noised version of one or more training images as inputs to the generator model, which attempts to predict the denoised version of the image. The embedding is optimized based on how well the model does at this task - an embedding that better captures the object or style shown by the training images will give more useful information to the diffusion model and thus result in a lower denoising loss. After many steps (typically several thousand) with a variety of prompt and image variants the learned embedding should hopefully capture the essence of the new concept being taught.
|
||||
|
||||
## Usage
|
||||
|
||||
To train your own textual inversions, see the [example script here](https://github.com/huggingface/diffusers/tree/main/examples/textual_inversion).
|
||||
|
||||
There is also a notebook for training:
|
||||
[](https://colab.research.google.com/github/huggingface/notebooks/blob/main/diffusers/sd_textual_inversion_training.ipynb)
|
||||
|
||||
And one for inference:
|
||||
[](https://colab.research.google.com/github/huggingface/notebooks/blob/main/diffusers/stable_conceptualizer_inference.ipynb)
|
||||
|
||||
In addition to using concepts you have trained yourself, there is a community-created collection of trained textual inversions in the new [Stable Diffusion public concepts library](https://huggingface.co/sd-concepts-library) which you can also use from the inference notebook above. Over time this will hopefully grow into a useful resource as more examples are added.
|
||||
|
||||
## Example: Running locally
|
||||
|
||||
The `textual_inversion.py` script [here](https://github.com/huggingface/diffusers/blob/main/examples/textual_inversion) shows how to implement the training procedure and adapt it for stable diffusion.
|
||||
|
||||
### Installing the dependencies
|
||||
|
||||
Before running the scripts, make sure to install the library's training dependencies.
|
||||
Before you begin, make sure you install the library's training dependencies:
|
||||
|
||||
```bash
|
||||
pip install diffusers[training] accelerate transformers
|
||||
pip install diffusers accelerate transformers
|
||||
```
|
||||
|
||||
And initialize an [🤗Accelerate](https://github.com/huggingface/accelerate/) environment with:
|
||||
After all the dependencies have been set up, initialize a [🤗Accelerate](https://github.com/huggingface/accelerate/) environment with:
|
||||
|
||||
```bash
|
||||
accelerate config
|
||||
```
|
||||
|
||||
|
||||
### Cat toy example
|
||||
|
||||
You need to accept the model license before downloading or using the weights. In this example we'll use model version `v1-4`, so you'll need to visit [its card](https://huggingface.co/CompVis/stable-diffusion-v1-4), read the license and tick the checkbox if you agree.
|
||||
|
||||
You have to be a registered user in 🤗 Hugging Face Hub, and you'll also need to use an access token for the code to work. For more information on access tokens, please refer to [this section of the documentation](https://huggingface.co/docs/hub/security-tokens).
|
||||
|
||||
Run the following command to authenticate your token
|
||||
To setup a default 🤗 Accelerate environment without choosing any configurations:
|
||||
|
||||
```bash
|
||||
huggingface-cli login
|
||||
accelerate config default
|
||||
```
|
||||
|
||||
If you have already cloned the repo, then you won't need to go through these steps.
|
||||
Or if your environment doesn't support an interactive shell like a notebook, you can use:
|
||||
|
||||
<br>
|
||||
```bash
|
||||
from accelerate.utils import write_basic_config
|
||||
|
||||
Now let's get our dataset.Download 3-4 images from [here](https://drive.google.com/drive/folders/1fmJMs25nxS_rSNqS5hTcRdLem_YQXbq5) and save them in a directory. This will be our training data.
|
||||
write_basic_config()
|
||||
```
|
||||
|
||||
And launch the training using
|
||||
Finally, you try and [install xFormers](https://huggingface.co/docs/diffusers/main/en/training/optimization/xformers) to reduce your memory footprint with xFormers memory-efficient attention. Once you have xFormers installed, add the `--enable_xformers_memory_efficient_attention` argument to the training script. xFormers is not supported for Flax.
|
||||
|
||||
## Upload model to Hub
|
||||
|
||||
If you want to store your model on the Hub, add the following argument to the training script:
|
||||
|
||||
```bash
|
||||
--push_to_hub
|
||||
```
|
||||
|
||||
## Save and load checkpoints
|
||||
|
||||
It is often a good idea to regularly save checkpoints of your model during training. This way, you can resume training from a saved checkpoint if your training is interrupted for any reason. To save a checkpoint, pass the following argument to the training script to save the full training state in a subfolder in `output_dir` every 500 steps:
|
||||
|
||||
```bash
|
||||
--checkpointing_steps=500
|
||||
```
|
||||
|
||||
To resume training from a saved checkpoint, pass the following argument to the training script and the specific checkpoint you'd like to resume from:
|
||||
|
||||
```bash
|
||||
--resume_from_checkpoint="checkpoint-1500"
|
||||
```
|
||||
|
||||
## Finetuning
|
||||
|
||||
For your training dataset, download these [images of a cat statue](https://drive.google.com/drive/folders/1fmJMs25nxS_rSNqS5hTcRdLem_YQXbq5) and store them in a directory.
|
||||
|
||||
Set the `MODEL_NAME` environment variable to the model repository id, and the `DATA_DIR` environment variable to the path of the directory containing the images. Now you can launch the [training script](https://github.com/huggingface/diffusers/blob/main/examples/textual_inversion/textual_inversion.py):
|
||||
|
||||
<Tip>
|
||||
|
||||
💡 A full training run takes ~1 hour on one V100 GPU. While you're waiting for the training to complete, feel free to check out [how Textual Inversion works](#how-it-works) in the section below if you're curious!
|
||||
|
||||
</Tip>
|
||||
|
||||
<frameworkcontent>
|
||||
<pt>
|
||||
```bash
|
||||
export MODEL_NAME="runwayml/stable-diffusion-v1-5"
|
||||
export DATA_DIR="path-to-dir-containing-images"
|
||||
@@ -100,14 +111,56 @@ accelerate launch textual_inversion.py \
|
||||
--lr_warmup_steps=0 \
|
||||
--output_dir="textual_inversion_cat"
|
||||
```
|
||||
</pt>
|
||||
<jax>
|
||||
If you have access to TPUs, try out the [Flax training script](https://github.com/huggingface/diffusers/blob/main/examples/textual_inversion/textual_inversion_flax.py) to train even faster (this'll also work for GPUs). With the same configuration settings, the Flax training script should be at least 70% faster than the PyTorch training script! ⚡️
|
||||
|
||||
A full training run takes ~1 hour on one V100 GPU.
|
||||
Before you begin, make sure you install the Flax specific dependencies:
|
||||
|
||||
```bash
|
||||
pip install -U -r requirements_flax.txt
|
||||
```
|
||||
|
||||
### Inference
|
||||
Then you can launch the [training script](https://github.com/huggingface/diffusers/blob/main/examples/textual_inversion/textual_inversion_flax.py):
|
||||
|
||||
Once you have trained a model using above command, the inference can be done simply using the `StableDiffusionPipeline`. Make sure to include the `placeholder_token` in your prompt.
|
||||
```bash
|
||||
export MODEL_NAME="duongna/stable-diffusion-v1-4-flax"
|
||||
export DATA_DIR="path-to-dir-containing-images"
|
||||
|
||||
python textual_inversion_flax.py \
|
||||
--pretrained_model_name_or_path=$MODEL_NAME \
|
||||
--train_data_dir=$DATA_DIR \
|
||||
--learnable_property="object" \
|
||||
--placeholder_token="<cat-toy>" --initializer_token="toy" \
|
||||
--resolution=512 \
|
||||
--train_batch_size=1 \
|
||||
--max_train_steps=3000 \
|
||||
--learning_rate=5.0e-04 --scale_lr \
|
||||
--output_dir="textual_inversion_cat"
|
||||
```
|
||||
</jax>
|
||||
</frameworkcontent>
|
||||
|
||||
### Intermediate logging
|
||||
|
||||
If you're interested in following along with your model training progress, you can save the generated images from the training process. Add the following arguments to the training script to enable intermediate logging:
|
||||
|
||||
- `validation_prompt`, the prompt used to generate samples (this is set to `None` by default and intermediate logging is disabled)
|
||||
- `num_validation_images`, the number of sample images to generate
|
||||
- `validation_steps`, the number of steps before generating `num_validation_images` from the `validation_prompt`
|
||||
|
||||
```bash
|
||||
--validation_prompt="A <cat-toy> backpack"
|
||||
--num_validation_images=4
|
||||
--validation_steps=100
|
||||
```
|
||||
|
||||
## Inference
|
||||
|
||||
Once you have trained a model, you can use it for inference with the [`StableDiffusionPipeline]. Make sure you include the `placeholder_token` in your prompt, in this case, it is `<cat-toy>`.
|
||||
|
||||
<frameworkcontent>
|
||||
<pt>
|
||||
```python
|
||||
from diffusers import StableDiffusionPipeline
|
||||
|
||||
@@ -120,3 +173,43 @@ image = pipe(prompt, num_inference_steps=50, guidance_scale=7.5).images[0]
|
||||
|
||||
image.save("cat-backpack.png")
|
||||
```
|
||||
</pt>
|
||||
<jax>
|
||||
```python
|
||||
import jax
|
||||
import numpy as np
|
||||
from flax.jax_utils import replicate
|
||||
from flax.training.common_utils import shard
|
||||
from diffusers import FlaxStableDiffusionPipeline
|
||||
|
||||
model_path = "path-to-your-trained-model"
|
||||
pipe, params = FlaxStableDiffusionPipeline.from_pretrained(model_path, dtype=jax.numpy.bfloat16)
|
||||
|
||||
prompt = "A <cat-toy> backpack"
|
||||
prng_seed = jax.random.PRNGKey(0)
|
||||
num_inference_steps = 50
|
||||
|
||||
num_samples = jax.device_count()
|
||||
prompt = num_samples * [prompt]
|
||||
prompt_ids = pipeline.prepare_inputs(prompt)
|
||||
|
||||
# shard inputs and rng
|
||||
params = replicate(params)
|
||||
prng_seed = jax.random.split(prng_seed, jax.device_count())
|
||||
prompt_ids = shard(prompt_ids)
|
||||
|
||||
images = pipeline(prompt_ids, params, prng_seed, num_inference_steps, jit=True).images
|
||||
images = pipeline.numpy_to_pil(np.asarray(images.reshape((num_samples,) + images.shape[-3:])))
|
||||
image.save("cat-backpack.png")
|
||||
```
|
||||
</jax>
|
||||
</frameworkcontent>
|
||||
|
||||
## How it works
|
||||
|
||||

|
||||
<small>Architecture overview from the Textual Inversion <a href="https://textual-inversion.github.io/">blog post.</a></small>
|
||||
|
||||
Usually, text prompts are tokenized into an embedding before being passed to a model, which is often a transformer. Textual Inversion does something similar, but it learns a new token embedding, `v*`, from a special token `S*` in the diagram above. The model output is used to condition the diffusion model, which helps the diffusion model understand the prompt and new concepts from just a few example images.
|
||||
|
||||
To do this, Textual Inversion uses a generator model and noisy versions of the training images. The generator tries to predict less noisy versions of the images, and the token embedding `v*` is optimized based on how well the generator does. If the token embedding successfully captures the new concept, it gives more useful information to the diffusion model and helps create clearer images with less noise. This optimization process typically occurs after several thousand steps of exposure to a variety of prompt and image variants.
|
||||
@@ -1,4 +1,4 @@
|
||||
<!--Copyright 2022 The HuggingFace Team. All rights reserved.
|
||||
<!--Copyright 2023 The HuggingFace Team. All rights reserved.
|
||||
|
||||
Licensed under the Apache License, Version 2.0 (the "License"); you may not use this file except in compliance with
|
||||
the License. You may obtain a copy of the License at
|
||||
|
||||
414
docs/source/en/tutorials/basic_training.mdx
Normal file
414
docs/source/en/tutorials/basic_training.mdx
Normal file
@@ -0,0 +1,414 @@
|
||||
<!--Copyright 2023 The HuggingFace Team. All rights reserved.
|
||||
|
||||
Licensed under the Apache License, Version 2.0 (the "License"); you may not use this file except in compliance with
|
||||
the License. You may obtain a copy of the License at
|
||||
|
||||
http://www.apache.org/licenses/LICENSE-2.0
|
||||
|
||||
Unless required by applicable law or agreed to in writing, software distributed under the License is distributed on
|
||||
an "AS IS" BASIS, WITHOUT WARRANTIES OR CONDITIONS OF ANY KIND, either express or implied. See the License for the
|
||||
specific language governing permissions and limitations under the License.
|
||||
-->
|
||||
|
||||
[[open-in-colab]]
|
||||
|
||||
# Train a diffusion model
|
||||
|
||||
Unconditional image generation is a popular application of diffusion models that generates images that look like those in the dataset used for training. Typically, the best results are obtained from finetuning a pretrained model on a specific dataset. You can find many of these checkpoints on the [Hub](https://huggingface.co/search/full-text?q=unconditional-image-generation&type=model), but if you can't find one you like, you can always train your own!
|
||||
|
||||
This tutorial will teach you how to train a [`UNet2DModel`] from scratch on a subset of the [Smithsonian Butterflies](https://huggingface.co/datasets/huggan/smithsonian_butterflies_subset) dataset to generate your own 🦋 butterflies 🦋.
|
||||
|
||||
<Tip>
|
||||
|
||||
💡 This training tutorial is based on the [Training with 🧨 Diffusers](https://colab.research.google.com/github/huggingface/notebooks/blob/main/diffusers/training_example.ipynb) notebook. For additional details and context about diffusion models like how they work, check out the notebook!
|
||||
|
||||
</Tip>
|
||||
|
||||
Before you begin, make sure you have 🤗 Datasets installed to load and preprocess image datasets, and 🤗 Accelerate, to simplify training on any number of GPUs. The following command will also install [TensorBoard](https://www.tensorflow.org/tensorboard) to visualize training metrics (you can also use [Weights & Biases](https://docs.wandb.ai/) to track your training).
|
||||
|
||||
```bash
|
||||
!pip install diffusers[training]
|
||||
```
|
||||
|
||||
We encourage you to share your model with the community, and in order to do that, you'll need to login to your Hugging Face account (create one [here](https://hf.co/join) if you don't already have one!). You can login from a notebook and enter your token when prompted:
|
||||
|
||||
```py
|
||||
>>> from huggingface_hub import notebook_login
|
||||
|
||||
>>> notebook_login()
|
||||
```
|
||||
|
||||
Or login in from the terminal:
|
||||
|
||||
```bash
|
||||
huggingface-cli login
|
||||
```
|
||||
|
||||
Since the model checkpoints are quite large, install [Git-LFS](https://git-lfs.com/) to version these large files:
|
||||
|
||||
```bash
|
||||
!sudo apt -qq install git-lfs
|
||||
!git config --global credential.helper store
|
||||
```
|
||||
|
||||
## Training configuration
|
||||
|
||||
For convenience, create a `TrainingConfig` class containing the training hyperparameters (feel free to adjust them):
|
||||
|
||||
```py
|
||||
>>> from dataclasses import dataclass
|
||||
|
||||
|
||||
>>> @dataclass
|
||||
... class TrainingConfig:
|
||||
... image_size = 128 # the generated image resolution
|
||||
... train_batch_size = 16
|
||||
... eval_batch_size = 16 # how many images to sample during evaluation
|
||||
... num_epochs = 50
|
||||
... gradient_accumulation_steps = 1
|
||||
... learning_rate = 1e-4
|
||||
... lr_warmup_steps = 500
|
||||
... save_image_epochs = 10
|
||||
... save_model_epochs = 30
|
||||
... mixed_precision = "fp16" # `no` for float32, `fp16` for automatic mixed precision
|
||||
... output_dir = "ddpm-butterflies-128" # the model name locally and on the HF Hub
|
||||
|
||||
... push_to_hub = True # whether to upload the saved model to the HF Hub
|
||||
... hub_private_repo = False
|
||||
... overwrite_output_dir = True # overwrite the old model when re-running the notebook
|
||||
... seed = 0
|
||||
|
||||
|
||||
>>> config = TrainingConfig()
|
||||
```
|
||||
|
||||
## Load the dataset
|
||||
|
||||
You can easily load the [Smithsonian Butterflies](https://huggingface.co/datasets/huggan/smithsonian_butterflies_subset) dataset with the 🤗 Datasets library:
|
||||
|
||||
```py
|
||||
>>> from datasets import load_dataset
|
||||
|
||||
>>> config.dataset_name = "huggan/smithsonian_butterflies_subset"
|
||||
>>> dataset = load_dataset(config.dataset_name, split="train")
|
||||
```
|
||||
|
||||
<Tip>
|
||||
|
||||
💡 You can find additional datasets from the [HugGan Community Event](https://huggingface.co/huggan) or you can use your own dataset by creating a local [`ImageFolder`](https://huggingface.co/docs/datasets/image_dataset#imagefolder). Set `config.dataset_name` to the repository id of the dataset if it is from the HugGan Community Event, or `imagefolder` if you're using your own images.
|
||||
|
||||
</Tip>
|
||||
|
||||
🤗 Datasets uses the [`~datasets.Image`] feature to automatically decode the image data and load it as a [`PIL.Image`](https://pillow.readthedocs.io/en/stable/reference/Image.html) which we can visualize:
|
||||
|
||||
```py
|
||||
>>> import matplotlib.pyplot as plt
|
||||
|
||||
>>> fig, axs = plt.subplots(1, 4, figsize=(16, 4))
|
||||
>>> for i, image in enumerate(dataset[:4]["image"]):
|
||||
... axs[i].imshow(image)
|
||||
... axs[i].set_axis_off()
|
||||
>>> fig.show()
|
||||
```
|
||||
|
||||
<div class="flex justify-center">
|
||||
<img src="https://huggingface.co/datasets/huggingface/documentation-images/resolve/main/diffusers/butterflies_ds.png"/>
|
||||
</div>
|
||||
|
||||
The images are all different sizes though, so you'll need to preprocess them first:
|
||||
|
||||
* `Resize` changes the image size to the one defined in `config.image_size`.
|
||||
* `RandomHorizontalFlip` augments the dataset by randomly mirroring the images.
|
||||
* `Normalize` is important to rescale the pixel values into a [-1, 1] range, which is what the model expects.
|
||||
|
||||
```py
|
||||
>>> from torchvision import transforms
|
||||
|
||||
>>> preprocess = transforms.Compose(
|
||||
... [
|
||||
... transforms.Resize((config.image_size, config.image_size)),
|
||||
... transforms.RandomHorizontalFlip(),
|
||||
... transforms.ToTensor(),
|
||||
... transforms.Normalize([0.5], [0.5]),
|
||||
... ]
|
||||
... )
|
||||
```
|
||||
|
||||
Use 🤗 Datasets' [`~datasets.Dataset.set_transform`] method to apply the `preprocess` function on the fly during training:
|
||||
|
||||
```py
|
||||
>>> def transform(examples):
|
||||
... images = [preprocess(image.convert("RGB")) for image in examples["image"]]
|
||||
... return {"images": images}
|
||||
|
||||
|
||||
>>> dataset.set_transform(transform)
|
||||
```
|
||||
|
||||
Feel free to visualize the images again to confirm that they've been resized. Now you're ready to wrap the dataset in a [DataLoader](https://pytorch.org/docs/stable/data#torch.utils.data.DataLoader) for training!
|
||||
|
||||
```py
|
||||
>>> import torch
|
||||
|
||||
>>> train_dataloader = torch.utils.data.DataLoader(dataset, batch_size=config.train_batch_size, shuffle=True)
|
||||
```
|
||||
|
||||
## Create a UNet2DModel
|
||||
|
||||
Pretrained models in 🧨 Diffusers are easily created from their model class with the parameters you want. For example, to create a [`UNet2DModel`]:
|
||||
|
||||
```py
|
||||
>>> from diffusers import UNet2DModel
|
||||
|
||||
>>> model = UNet2DModel(
|
||||
... sample_size=config.image_size, # the target image resolution
|
||||
... in_channels=3, # the number of input channels, 3 for RGB images
|
||||
... out_channels=3, # the number of output channels
|
||||
... layers_per_block=2, # how many ResNet layers to use per UNet block
|
||||
... block_out_channels=(128, 128, 256, 256, 512, 512), # the number of output channels for each UNet block
|
||||
... down_block_types=(
|
||||
... "DownBlock2D", # a regular ResNet downsampling block
|
||||
... "DownBlock2D",
|
||||
... "DownBlock2D",
|
||||
... "DownBlock2D",
|
||||
... "AttnDownBlock2D", # a ResNet downsampling block with spatial self-attention
|
||||
... "DownBlock2D",
|
||||
... ),
|
||||
... up_block_types=(
|
||||
... "UpBlock2D", # a regular ResNet upsampling block
|
||||
... "AttnUpBlock2D", # a ResNet upsampling block with spatial self-attention
|
||||
... "UpBlock2D",
|
||||
... "UpBlock2D",
|
||||
... "UpBlock2D",
|
||||
... "UpBlock2D",
|
||||
... ),
|
||||
... )
|
||||
```
|
||||
|
||||
It is often a good idea to quickly check the sample image shape matches the model output shape:
|
||||
|
||||
```py
|
||||
>>> sample_image = dataset[0]["images"].unsqueeze(0)
|
||||
>>> print("Input shape:", sample_image.shape)
|
||||
Input shape: torch.Size([1, 3, 128, 128])
|
||||
|
||||
>>> print("Output shape:", model(sample_image, timestep=0).sample.shape)
|
||||
Output shape: torch.Size([1, 3, 128, 128])
|
||||
```
|
||||
|
||||
Great! Next, you'll need a scheduler to add some noise to the image.
|
||||
|
||||
## Create a scheduler
|
||||
|
||||
The scheduler behaves differently depending on whether you're using the model for training or inference. During inference, the scheduler generates image from the noise. During training, the scheduler takes a model output - or a sample - from a specific point in the diffusion process and applies noise to the image according to a *noise schedule* and an *update rule*.
|
||||
|
||||
Let's take a look at the [`DDPMScheduler`] and use the `add_noise` method to add some random noise to the `sample_image` from before:
|
||||
|
||||
```py
|
||||
>>> import torch
|
||||
>>> from PIL import Image
|
||||
>>> from diffusers import DDPMScheduler
|
||||
|
||||
>>> noise_scheduler = DDPMScheduler(num_train_timesteps=1000)
|
||||
>>> noise = torch.randn(sample_image.shape)
|
||||
>>> timesteps = torch.LongTensor([50])
|
||||
>>> noisy_image = noise_scheduler.add_noise(sample_image, noise, timesteps)
|
||||
|
||||
>>> Image.fromarray(((noisy_image.permute(0, 2, 3, 1) + 1.0) * 127.5).type(torch.uint8).numpy()[0])
|
||||
```
|
||||
|
||||
<div class="flex justify-center">
|
||||
<img src="https://huggingface.co/datasets/huggingface/documentation-images/resolve/main/diffusers/noisy_butterfly.png"/>
|
||||
</div>
|
||||
|
||||
The training objective of the model is to predict the noise added to the image. The loss at this step can be calculated by:
|
||||
|
||||
```py
|
||||
>>> import torch.nn.functional as F
|
||||
|
||||
>>> noise_pred = model(noisy_image, timesteps).sample
|
||||
>>> loss = F.mse_loss(noise_pred, noise)
|
||||
```
|
||||
|
||||
## Train the model
|
||||
|
||||
By now, you have most of the pieces to start training the model and all that's left is putting everything together.
|
||||
|
||||
First, you'll need an optimizer and a learning rate scheduler:
|
||||
|
||||
```py
|
||||
>>> from diffusers.optimization import get_cosine_schedule_with_warmup
|
||||
|
||||
>>> optimizer = torch.optim.AdamW(model.parameters(), lr=config.learning_rate)
|
||||
>>> lr_scheduler = get_cosine_schedule_with_warmup(
|
||||
... optimizer=optimizer,
|
||||
... num_warmup_steps=config.lr_warmup_steps,
|
||||
... num_training_steps=(len(train_dataloader) * config.num_epochs),
|
||||
... )
|
||||
```
|
||||
|
||||
Then, you'll need a way to evaluate the model. For evaluation, you can use the [`DDPMPipeline`] to generate a batch of sample images and save it as a grid:
|
||||
|
||||
```py
|
||||
>>> from diffusers import DDPMPipeline
|
||||
>>> import math
|
||||
|
||||
|
||||
>>> def make_grid(images, rows, cols):
|
||||
... w, h = images[0].size
|
||||
... grid = Image.new("RGB", size=(cols * w, rows * h))
|
||||
... for i, image in enumerate(images):
|
||||
... grid.paste(image, box=(i % cols * w, i // cols * h))
|
||||
... return grid
|
||||
|
||||
|
||||
>>> def evaluate(config, epoch, pipeline):
|
||||
... # Sample some images from random noise (this is the backward diffusion process).
|
||||
... # The default pipeline output type is `List[PIL.Image]`
|
||||
... images = pipeline(
|
||||
... batch_size=config.eval_batch_size,
|
||||
... generator=torch.manual_seed(config.seed),
|
||||
... ).images
|
||||
|
||||
... # Make a grid out of the images
|
||||
... image_grid = make_grid(images, rows=4, cols=4)
|
||||
|
||||
... # Save the images
|
||||
... test_dir = os.path.join(config.output_dir, "samples")
|
||||
... os.makedirs(test_dir, exist_ok=True)
|
||||
... image_grid.save(f"{test_dir}/{epoch:04d}.png")
|
||||
```
|
||||
|
||||
Now you can wrap all these components together in a training loop with 🤗 Accelerate for easy TensorBoard logging, gradient accumulation, and mixed precision training. To upload the model to the Hub, write a function to get your repository name and information and then push it to the Hub.
|
||||
|
||||
<Tip>
|
||||
|
||||
💡 The training loop below may look intimidating and long, but it'll be worth it later when you launch your training in just one line of code! If you can't wait and want to start generating images, feel free to copy and run the code below. You can always come back and examine the training loop more closely later, like when you're waiting for your model to finish training. 🤗
|
||||
|
||||
</Tip>
|
||||
|
||||
```py
|
||||
>>> from accelerate import Accelerator
|
||||
>>> from huggingface_hub import HfFolder, Repository, whoami
|
||||
>>> from tqdm.auto import tqdm
|
||||
>>> from pathlib import Path
|
||||
>>> import os
|
||||
|
||||
|
||||
>>> def get_full_repo_name(model_id: str, organization: str = None, token: str = None):
|
||||
... if token is None:
|
||||
... token = HfFolder.get_token()
|
||||
... if organization is None:
|
||||
... username = whoami(token)["name"]
|
||||
... return f"{username}/{model_id}"
|
||||
... else:
|
||||
... return f"{organization}/{model_id}"
|
||||
|
||||
|
||||
>>> def train_loop(config, model, noise_scheduler, optimizer, train_dataloader, lr_scheduler):
|
||||
... # Initialize accelerator and tensorboard logging
|
||||
... accelerator = Accelerator(
|
||||
... mixed_precision=config.mixed_precision,
|
||||
... gradient_accumulation_steps=config.gradient_accumulation_steps,
|
||||
... log_with="tensorboard",
|
||||
... logging_dir=os.path.join(config.output_dir, "logs"),
|
||||
... )
|
||||
... if accelerator.is_main_process:
|
||||
... if config.push_to_hub:
|
||||
... repo_name = get_full_repo_name(Path(config.output_dir).name)
|
||||
... repo = Repository(config.output_dir, clone_from=repo_name)
|
||||
... elif config.output_dir is not None:
|
||||
... os.makedirs(config.output_dir, exist_ok=True)
|
||||
... accelerator.init_trackers("train_example")
|
||||
|
||||
... # Prepare everything
|
||||
... # There is no specific order to remember, you just need to unpack the
|
||||
... # objects in the same order you gave them to the prepare method.
|
||||
... model, optimizer, train_dataloader, lr_scheduler = accelerator.prepare(
|
||||
... model, optimizer, train_dataloader, lr_scheduler
|
||||
... )
|
||||
|
||||
... global_step = 0
|
||||
|
||||
... # Now you train the model
|
||||
... for epoch in range(config.num_epochs):
|
||||
... progress_bar = tqdm(total=len(train_dataloader), disable=not accelerator.is_local_main_process)
|
||||
... progress_bar.set_description(f"Epoch {epoch}")
|
||||
|
||||
... for step, batch in enumerate(train_dataloader):
|
||||
... clean_images = batch["images"]
|
||||
... # Sample noise to add to the images
|
||||
... noise = torch.randn(clean_images.shape).to(clean_images.device)
|
||||
... bs = clean_images.shape[0]
|
||||
|
||||
... # Sample a random timestep for each image
|
||||
... timesteps = torch.randint(
|
||||
... 0, noise_scheduler.num_train_timesteps, (bs,), device=clean_images.device
|
||||
... ).long()
|
||||
|
||||
... # Add noise to the clean images according to the noise magnitude at each timestep
|
||||
... # (this is the forward diffusion process)
|
||||
... noisy_images = noise_scheduler.add_noise(clean_images, noise, timesteps)
|
||||
|
||||
... with accelerator.accumulate(model):
|
||||
... # Predict the noise residual
|
||||
... noise_pred = model(noisy_images, timesteps, return_dict=False)[0]
|
||||
... loss = F.mse_loss(noise_pred, noise)
|
||||
... accelerator.backward(loss)
|
||||
|
||||
... accelerator.clip_grad_norm_(model.parameters(), 1.0)
|
||||
... optimizer.step()
|
||||
... lr_scheduler.step()
|
||||
... optimizer.zero_grad()
|
||||
|
||||
... progress_bar.update(1)
|
||||
... logs = {"loss": loss.detach().item(), "lr": lr_scheduler.get_last_lr()[0], "step": global_step}
|
||||
... progress_bar.set_postfix(**logs)
|
||||
... accelerator.log(logs, step=global_step)
|
||||
... global_step += 1
|
||||
|
||||
... # After each epoch you optionally sample some demo images with evaluate() and save the model
|
||||
... if accelerator.is_main_process:
|
||||
... pipeline = DDPMPipeline(unet=accelerator.unwrap_model(model), scheduler=noise_scheduler)
|
||||
|
||||
... if (epoch + 1) % config.save_image_epochs == 0 or epoch == config.num_epochs - 1:
|
||||
... evaluate(config, epoch, pipeline)
|
||||
|
||||
... if (epoch + 1) % config.save_model_epochs == 0 or epoch == config.num_epochs - 1:
|
||||
... if config.push_to_hub:
|
||||
... repo.push_to_hub(commit_message=f"Epoch {epoch}", blocking=True)
|
||||
... else:
|
||||
... pipeline.save_pretrained(config.output_dir)
|
||||
```
|
||||
|
||||
Phew, that was quite a bit of code! But you're finally ready to launch the training with 🤗 Accelerate's [`~accelerate.notebook_launcher`] function. Pass the function the training loop, all the training arguments, and the number of processes (you can change this value to the number of GPUs available to you) to use for training:
|
||||
|
||||
```py
|
||||
>>> from accelerate import notebook_launcher
|
||||
|
||||
>>> args = (config, model, noise_scheduler, optimizer, train_dataloader, lr_scheduler)
|
||||
|
||||
>>> notebook_launcher(train_loop, args, num_processes=1)
|
||||
```
|
||||
|
||||
Once training is complete, take a look at the final 🦋 images 🦋 generated by your diffusion model!
|
||||
|
||||
```py
|
||||
>>> import glob
|
||||
|
||||
>>> sample_images = sorted(glob.glob(f"{config.output_dir}/samples/*.png"))
|
||||
>>> Image.open(sample_images[-1])
|
||||
```
|
||||
|
||||
<div class="flex justify-center">
|
||||
<img src="https://huggingface.co/datasets/huggingface/documentation-images/resolve/main/diffusers/butterflies_final.png"/>
|
||||
</div>
|
||||
|
||||
## Next steps
|
||||
|
||||
Unconditional image generation is one example of a task that can be trained. You can explore other tasks and training techniques by visiting the [🧨 Diffusers Training Examples](./training/overview) page. Here are some examples of what you can learn:
|
||||
|
||||
* [Textual Inversion](./training/text_inversion), an algorithm that teaches a model a specific visual concept and integrates it into the generated image.
|
||||
* [DreamBooth](./training/dreambooth), a technique for generating personalized images of a subject given several input images of the subject.
|
||||
* [Guide](./training/text2image) to finetuning a Stable Diffusion model on your own dataset.
|
||||
* [Guide](./training/lora) to using LoRA, a memory-efficient technique for finetuning really large models faster.
|
||||
@@ -1,4 +1,4 @@
|
||||
<!--Copyright 2022 The HuggingFace Team. All rights reserved.
|
||||
<!--Copyright 2023 The HuggingFace Team. All rights reserved.
|
||||
|
||||
Licensed under the Apache License, Version 2.0 (the "License"); you may not use this file except in compliance with
|
||||
the License. You may obtain a copy of the License at
|
||||
|
||||
@@ -1,4 +1,4 @@
|
||||
<!--Copyright 2022 The HuggingFace Team. All rights reserved.
|
||||
<!--Copyright 2023 The HuggingFace Team. All rights reserved.
|
||||
|
||||
Licensed under the Apache License, Version 2.0 (the "License"); you may not use this file except in compliance with
|
||||
the License. You may obtain a copy of the License at
|
||||
@@ -27,56 +27,64 @@ Depending on the use case, one should choose a technique accordingly. In many ca
|
||||
Unless otherwise mentioned, these are techniques that work with existing models and don't require their own weights.
|
||||
|
||||
1. [Instruct Pix2Pix](#instruct-pix2pix)
|
||||
2. [Pix2Pix 0](#pix2pixzero)
|
||||
3. [Attend and excite](#attend-and-excite)
|
||||
4. [Semantic guidance](#semantic-guidance)
|
||||
5. [Self attention guidance](#self-attention-guidance)
|
||||
6. [Depth2image](#depth2image)
|
||||
7. [DreamBooth](#dreambooth)
|
||||
8. [Textual Inversion](#textual-inversion)
|
||||
2. [Pix2Pix Zero](#pix2pixzero)
|
||||
3. [Attend and Excite](#attend-and-excite)
|
||||
4. [Semantic Guidance](#semantic-guidance)
|
||||
5. [Self-attention Guidance](#self-attention-guidance)
|
||||
6. [Depth2Image](#depth2image)
|
||||
7. [MultiDiffusion Panorama](#multidiffusion-panorama)
|
||||
8. [DreamBooth](#dreambooth)
|
||||
9. [Textual Inversion](#textual-inversion)
|
||||
10. [ControlNet](#controlnet)
|
||||
11. [Prompt Weighting](#prompt-weighting)
|
||||
|
||||
## Instruct pix2pix
|
||||
## Instruct Pix2Pix
|
||||
|
||||
[Paper](https://github.com/timothybrooks/instruct-pix2pix)
|
||||
[Paper](https://arxiv.org/abs/2211.09800)
|
||||
|
||||
[Pix2Pix](../api/pipelines/stable_diffusion/pix2pix) is fine-tuned from stable diffusion to support editing input images. It takes as input an image with a prompt describing an edit, and it outputs the edited image.
|
||||
Pix2Pix has been trained to work explicitely well with instructGPT-like prompts.
|
||||
[Instruct Pix2Pix](../api/pipelines/stable_diffusion/pix2pix) is fine-tuned from stable diffusion to support editing input images. It takes as inputs an image and a prompt describing an edit, and it outputs the edited image.
|
||||
Instruct Pix2Pix has been explicitly trained to work well with [InstructGPT](https://openai.com/blog/instruction-following/)-like prompts.
|
||||
|
||||
See [here](../api/pipelines/stable_diffusion/pix2pix) for more information on how to use it.
|
||||
|
||||
## Pix2PixZero
|
||||
## Pix2Pix Zero
|
||||
|
||||
[Paper](https://pix2pixzero.github.io/)
|
||||
[Paper](https://arxiv.org/abs/2302.03027)
|
||||
|
||||
[Pix2Pix-zero](../api/pipelines/stable_diffusion/pix2pix_zero) allows modifying an image from one concept to another while preserving general image semantics.
|
||||
[Pix2Pix Zero](../api/pipelines/stable_diffusion/pix2pix_zero) allows modifying an image so that one concept or subject is translated to another one while preserving general image semantics.
|
||||
|
||||
The denoising process is guided from one conceptual embedding towards another conceptual embedding. The intermediate latents are optimized during the denoising process to push the attention maps towards reference attention maps. The reference attention maps are from the denoising process of the input image and are used to encourage semantic preservation.
|
||||
|
||||
Pix2PixZero can be used both to edit synthetic images as well as real images.
|
||||
- To edit synthetic images, one first generates on image given a caption.
|
||||
Next, for a concept of the caption that shall be edited as well as the new target concept one generates image captions (e.g. with a model like [Flan-T5](https://huggingface.co/docs/transformers/model_doc/flan-t5)). Then, "mean" prompt embeddings for both the source and target concepts are created via the text encoder. Finally, the pix2pix-zero algorithm is used to edit the synthetic image.
|
||||
- To edit a real image, one first generates an image caption using a model like [Blip](https://huggingface.co/docs/transformers/model_doc/blip). Then one applies ddim inversion on the prompt and image to generate "inverse" latents. Similar to before, "mean" prompt embeddings for both source and target concepts are created and finally the pix2pix-zero algorithm in combination with the "inverse" latents is used to edit the image.
|
||||
Pix2Pix Zero can be used both to edit synthetic images as well as real images.
|
||||
- To edit synthetic images, one first generates an image given a caption.
|
||||
Next, we generate image captions for the concept that shall be edited and for the new target concept. We can use a model like [Flan-T5](https://huggingface.co/docs/transformers/model_doc/flan-t5) for this purpose. Then, "mean" prompt embeddings for both the source and target concepts are created via the text encoder. Finally, the pix2pix-zero algorithm is used to edit the synthetic image.
|
||||
- To edit a real image, one first generates an image caption using a model like [BLIP](https://huggingface.co/docs/transformers/model_doc/blip). Then one applies ddim inversion on the prompt and image to generate "inverse" latents. Similar to before, "mean" prompt embeddings for both source and target concepts are created and finally the pix2pix-zero algorithm in combination with the "inverse" latents is used to edit the image.
|
||||
|
||||
<Tip>
|
||||
|
||||
Pix2PixZero is the first model that allows "0-shot" image editing. This means that the model
|
||||
Pix2Pix Zero is the first model that allows "zero-shot" image editing. This means that the model
|
||||
can edit an image in less than a minute on a consumer GPU as shown [here](../api/pipelines/stable_diffusion/pix2pix_zero#usage-example)
|
||||
|
||||
</Tip>
|
||||
|
||||
As mentioned above, Pix2Pix Zero includes optimizing the latents (and not any of the UNet, VAE, or the text encoder) to steer the generation toward a specific concept. This means that the overall
|
||||
pipeline might require more memory than a standard [StableDiffusionPipeline](../api/pipelines/stable_diffusion/text2img).
|
||||
|
||||
See [here](../api/pipelines/stable_diffusion/pix2pix_zero) for more information on how to use it.
|
||||
|
||||
## Attend and excite
|
||||
## Attend and Excite
|
||||
|
||||
[Paper](https://attendandexcite.github.io/Attend-and-Excite/)
|
||||
[Paper](https://arxiv.org/abs/2301.13826)
|
||||
|
||||
[Attend and excite](../api/pipelines/stable_diffusion/attend_and_excite) allows subjects in the prompt to be faithfully represented in the final image.
|
||||
[Attend and Excite](../api/pipelines/stable_diffusion/attend_and_excite) allows subjects in the prompt to be faithfully represented in the final image.
|
||||
|
||||
A set of token indices are given as input, corresponding to the subjects in the prompt that need to be present in the image. During denoising, each token index is insured to have above a minimum attention threshold for at least one patch of the image. The intermediate latents are iteratively optimized during the denoising process to strengthen the attention of the most neglected subject token until the attention threshold is passed for all subject tokens.
|
||||
A set of token indices are given as input, corresponding to the subjects in the prompt that need to be present in the image. During denoising, each token index is guaranteed to have a minimum attention threshold for at least one patch of the image. The intermediate latents are iteratively optimized during the denoising process to strengthen the attention of the most neglected subject token until the attention threshold is passed for all subject tokens.
|
||||
|
||||
Like Pix2Pix Zero, Attend and Excite also involves a mini optimization loop (leaving the pre-trained weights untouched) in its pipeline and can require more memory than the usual `StableDiffusionPipeline`.
|
||||
|
||||
See [here](../api/pipelines/stable_diffusion/attend_and_excite) for more information on how to use it.
|
||||
|
||||
## Semantic guidance
|
||||
## Semantic Guidance (SEGA)
|
||||
|
||||
[Paper](https://arxiv.org/abs/2301.12247)
|
||||
|
||||
@@ -84,41 +92,76 @@ SEGA allows applying or removing one or more concepts from an image. The strengt
|
||||
|
||||
Similar to how classifier free guidance provides guidance via empty prompt inputs, SEGA provides guidance on conceptual prompts. Multiple of these conceptual prompts can be applied simultaneously. Each conceptual prompt can either add or remove their concept depending on if the guidance is applied positively or negatively.
|
||||
|
||||
Unlike Pix2Pix Zero or Attend and Excite, SEGA directly interacts with the diffusion process instead of performing any explicit gradient-based optimization.
|
||||
|
||||
See [here](../api/pipelines/semantic_stable_diffusion) for more information on how to use it.
|
||||
|
||||
## Self attention guidance
|
||||
## Self-attention Guidance (SAG)
|
||||
|
||||
[Paper](https://arxiv.org/abs/2210.00939)
|
||||
|
||||
[Self attention guidance](../api/pipelines/stable_diffusion/self_attention_guidance) improves the general quality of images.
|
||||
[Self-attention Guidance](../api/pipelines/stable_diffusion/self_attention_guidance) improves the general quality of images.
|
||||
|
||||
SAG provides guidance from predictions not conditioned on high frequency details to fully conditioned images. The high frequency details are extracted out of the UNet self-attention maps.
|
||||
SAG provides guidance from predictions not conditioned on high-frequency details to fully conditioned images. The high frequency details are extracted out of the UNet self-attention maps.
|
||||
|
||||
See [here](../api/pipelines/stable_diffusion/self_attention_guidance) for more information on how to use it.
|
||||
|
||||
## Depth2image
|
||||
## Depth2Image
|
||||
|
||||
[Paper](https://huggingface.co/stabilityai/stable-diffusion-2-depth)
|
||||
[Project](https://huggingface.co/stabilityai/stable-diffusion-2-depth)
|
||||
|
||||
[Depth2image](../pipelines/stable_diffusion_2#depthtoimage) is fine-tuned from stable diffusion to better preserve semantics for text guided image variation.
|
||||
[Depth2Image](../pipelines/stable_diffusion_2#depthtoimage) is fine-tuned from Stable Diffusion to better preserve semantics for text guided image variation.
|
||||
|
||||
It conditions on a monocular depth estimate of the original image.
|
||||
|
||||
|
||||
See [here](../api/pipelines/stable_diffusion_2#depthtoimage) for more information on how to use it.
|
||||
|
||||
### Fine-tuning methods
|
||||
<Tip>
|
||||
|
||||
In addition to pre-trained models, diffusers has training scripts for fine-tuning models on user provided data.
|
||||
An important distinction between methods like InstructPix2Pix and Pix2Pix Zero is that the former
|
||||
involves fine-tuning the pre-trained weights while the latter does not. This means that you can
|
||||
apply Pix2Pix Zero to any of the available Stable Diffusion models.
|
||||
|
||||
## DreamBooth
|
||||
</Tip>
|
||||
|
||||
## MultiDiffusion Panorama
|
||||
|
||||
[Paper](https://arxiv.org/abs/2302.08113)
|
||||
|
||||
MultiDiffusion defines a new generation process over a pre-trained diffusion model. This process binds together multiple diffusion generation methods that can be readily applied to generate high quality and diverse images. Results adhere to user-provided controls, such as desired aspect ratio (e.g., panorama), and spatial guiding signals, ranging from tight segmentation masks to bounding boxes.
|
||||
[MultiDiffusion Panorama](../api/pipelines/stable_diffusion/panorama) allows to generate high-quality images at arbitrary aspect ratios (e.g., panoramas).
|
||||
|
||||
See [here](../api/pipelines/stable_diffusion/panorama) for more information on how to use it to generate panoramic images.
|
||||
|
||||
## Fine-tuning your own models
|
||||
|
||||
In addition to pre-trained models, Diffusers has training scripts for fine-tuning models on user-provided data.
|
||||
|
||||
### DreamBooth
|
||||
|
||||
[DreamBooth](../training/dreambooth) fine-tunes a model to teach it about a new subject. I.e. a few pictures of a person can be used to generate images of that person in different styles.
|
||||
|
||||
See [here](../training/dreambooth) for more information on how to use it.
|
||||
|
||||
## Textual Inversion
|
||||
### Textual Inversion
|
||||
|
||||
[Textual Inversion](../training/text_inversion) fine-tunes a model to teach it about a new concept. I.e. a few pictures of a style of artwork can be used to generate images in that style.
|
||||
|
||||
See [here](../training/text_inversion) for more information on how to use it.
|
||||
|
||||
## ControlNet
|
||||
|
||||
[Paper](https://arxiv.org/abs/2302.05543)
|
||||
|
||||
[ControlNet](../api/pipelines/stable_diffusion/controlnet) is an auxiliary network which adds an extra condition.
|
||||
There are 8 canonical pre-trained ControlNets trained on different conditionings such as edge detection, scribbles,
|
||||
depth maps, and semantic segmentations.
|
||||
|
||||
See [here](../api/pipelines/stable_diffusion/controlnet) for more information on how to use it.
|
||||
|
||||
## Prompt Weighting
|
||||
|
||||
Prompt weighting is a simple technique that puts more attention weight on certain parts of the text
|
||||
input.
|
||||
|
||||
For a more in-detail explanation and examples, see [here](../using-diffusers/weighted_prompts).
|
||||
|
||||
@@ -1,4 +1,4 @@
|
||||
<!--Copyright 2022 The HuggingFace Team. All rights reserved.
|
||||
<!--Copyright 2023 The HuggingFace Team. All rights reserved.
|
||||
|
||||
Licensed under the Apache License, Version 2.0 (the "License"); you may not use this file except in compliance with
|
||||
the License. You may obtain a copy of the License at
|
||||
|
||||
@@ -1,4 +1,4 @@
|
||||
<!--Copyright 2022 The HuggingFace Team. All rights reserved.
|
||||
<!--Copyright 2023 The HuggingFace Team. All rights reserved.
|
||||
|
||||
Licensed under the Apache License, Version 2.0 (the "License"); you may not use this file except in compliance with
|
||||
the License. You may obtain a copy of the License at
|
||||
@@ -12,7 +12,17 @@ specific language governing permissions and limitations under the License.
|
||||
|
||||
# Text-Guided Image-to-Image Generation
|
||||
|
||||
The [`StableDiffusionImg2ImgPipeline`] lets you pass a text prompt and an initial image to condition the generation of new images.
|
||||
[[open-in-colab]]
|
||||
|
||||
The [`StableDiffusionImg2ImgPipeline`] lets you pass a text prompt and an initial image to condition the generation of new images. This tutorial shows how to use it for text-guided image-to-image generation with Stable Diffusion model.
|
||||
|
||||
Before you begin, make sure you have all the necessary libraries installed:
|
||||
|
||||
```bash
|
||||
!pip install diffusers transformers ftfy accelerate
|
||||
```
|
||||
|
||||
Get started by creating a [`StableDiffusionImg2ImgPipeline`] with a pretrained Stable Diffusion model.
|
||||
|
||||
```python
|
||||
import torch
|
||||
@@ -21,25 +31,83 @@ from PIL import Image
|
||||
from io import BytesIO
|
||||
|
||||
from diffusers import StableDiffusionImg2ImgPipeline
|
||||
```
|
||||
|
||||
# load the pipeline
|
||||
Load the pipeline
|
||||
|
||||
```python
|
||||
device = "cuda"
|
||||
pipe = StableDiffusionImg2ImgPipeline.from_pretrained("runwayml/stable-diffusion-v1-5", torch_dtype=torch.float16).to(
|
||||
device
|
||||
)
|
||||
```
|
||||
|
||||
# let's download an initial image
|
||||
Download an initial image and preprocess it so we can pass it to the pipeline.
|
||||
|
||||
```python
|
||||
url = "https://raw.githubusercontent.com/CompVis/stable-diffusion/main/assets/stable-samples/img2img/sketch-mountains-input.jpg"
|
||||
|
||||
response = requests.get(url)
|
||||
init_image = Image.open(BytesIO(response.content)).convert("RGB")
|
||||
init_image.thumbnail((768, 768))
|
||||
|
||||
prompt = "A fantasy landscape, trending on artstation"
|
||||
|
||||
images = pipe(prompt=prompt, image=init_image, strength=0.75, guidance_scale=7.5).images
|
||||
|
||||
images[0].save("fantasy_landscape.png")
|
||||
init_image
|
||||
```
|
||||
You can also run this example on colab [](https://colab.research.google.com/github/huggingface/notebooks/blob/main/diffusers/image_2_image_using_diffusers.ipynb)
|
||||
|
||||
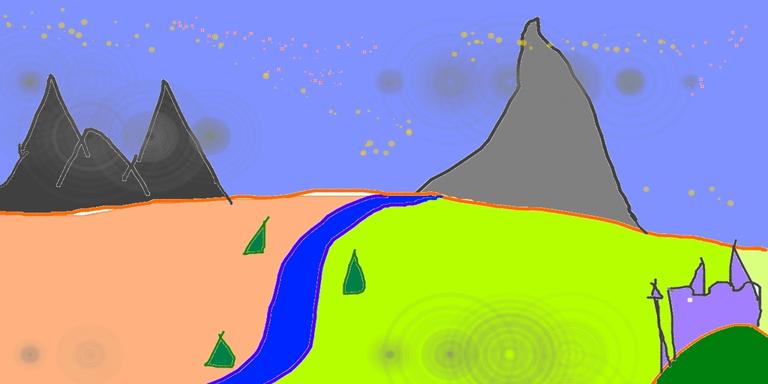
|
||||
|
||||
Define the prompt and run the pipeline.
|
||||
|
||||
```python
|
||||
prompt = "A fantasy landscape, trending on artstation"
|
||||
```
|
||||
|
||||
<Tip>
|
||||
|
||||
`strength` is a value between 0.0 and 1.0, that controls the amount of noise that is added to the input image. Values that approach 1.0 allow for lots of variations but will also produce images that are not semantically consistent with the input.
|
||||
|
||||
</Tip>
|
||||
|
||||
Let's generate two images with same pipeline and seed, but with different values for `strength`
|
||||
|
||||
```python
|
||||
generator = torch.Generator(device=device).manual_seed(1024)
|
||||
image = pipe(prompt=prompt, image=init_image, strength=0.75, guidance_scale=7.5, generator=generator).images[0]
|
||||
```
|
||||
|
||||
```python
|
||||
image
|
||||
```
|
||||
|
||||

|
||||
|
||||
|
||||
```python
|
||||
image = pipe(prompt=prompt, image=init_image, strength=0.5, guidance_scale=7.5, generator=generator).images[0]
|
||||
image
|
||||
```
|
||||
|
||||

|
||||
|
||||
|
||||
As you can see, when using a lower value for `strength`, the generated image is more closer to the original `image`
|
||||
|
||||
Now let's use a different scheduler - [LMSDiscreteScheduler](https://huggingface.co/docs/diffusers/api/schedulers#diffusers.LMSDiscreteScheduler)
|
||||
|
||||
```python
|
||||
from diffusers import LMSDiscreteScheduler
|
||||
|
||||
lms = LMSDiscreteScheduler.from_config(pipe.scheduler.config)
|
||||
pipe.scheduler = lms
|
||||
```
|
||||
|
||||
```python
|
||||
generator = torch.Generator(device=device).manual_seed(1024)
|
||||
image = pipe(prompt=prompt, image=init_image, strength=0.75, guidance_scale=7.5, generator=generator).images[0]
|
||||
```
|
||||
|
||||
```python
|
||||
image
|
||||
```
|
||||
|
||||

|
||||
|
||||
|
||||
@@ -1,4 +1,4 @@
|
||||
<!--Copyright 2022 The HuggingFace Team. All rights reserved.
|
||||
<!--Copyright 2023 The HuggingFace Team. All rights reserved.
|
||||
|
||||
Licensed under the Apache License, Version 2.0 (the "License"); you may not use this file except in compliance with
|
||||
the License. You may obtain a copy of the License at
|
||||
|
||||
Some files were not shown because too many files have changed in this diff Show More
Reference in New Issue
Block a user