mirror of
https://github.com/huggingface/diffusers.git
synced 2025-12-07 21:14:44 +08:00
Compare commits
3 Commits
modular-re
...
fix-hook-r
| Author | SHA1 | Date | |
|---|---|---|---|
|
|
72000d6b72 | ||
|
|
d50a96c81f | ||
|
|
71a4706d5f |
1
.github/workflows/benchmark.yml
vendored
1
.github/workflows/benchmark.yml
vendored
@@ -38,7 +38,6 @@ jobs:
|
||||
python -m venv /opt/venv && export PATH="/opt/venv/bin:$PATH"
|
||||
python -m uv pip install -e [quality,test]
|
||||
python -m uv pip install pandas peft
|
||||
python -m uv pip uninstall transformers && python -m uv pip install transformers==4.48.0
|
||||
- name: Environment
|
||||
run: |
|
||||
python utils/print_env.py
|
||||
|
||||
58
.github/workflows/nightly_tests.yml
vendored
58
.github/workflows/nightly_tests.yml
vendored
@@ -180,55 +180,6 @@ jobs:
|
||||
pip install slack_sdk tabulate
|
||||
python utils/log_reports.py >> $GITHUB_STEP_SUMMARY
|
||||
|
||||
run_torch_compile_tests:
|
||||
name: PyTorch Compile CUDA tests
|
||||
|
||||
runs-on:
|
||||
group: aws-g4dn-2xlarge
|
||||
|
||||
container:
|
||||
image: diffusers/diffusers-pytorch-compile-cuda
|
||||
options: --gpus 0 --shm-size "16gb" --ipc host
|
||||
|
||||
steps:
|
||||
- name: Checkout diffusers
|
||||
uses: actions/checkout@v3
|
||||
with:
|
||||
fetch-depth: 2
|
||||
|
||||
- name: NVIDIA-SMI
|
||||
run: |
|
||||
nvidia-smi
|
||||
- name: Install dependencies
|
||||
run: |
|
||||
python -m venv /opt/venv && export PATH="/opt/venv/bin:$PATH"
|
||||
python -m uv pip install -e [quality,test,training]
|
||||
- name: Environment
|
||||
run: |
|
||||
python utils/print_env.py
|
||||
- name: Run torch compile tests on GPU
|
||||
env:
|
||||
HF_TOKEN: ${{ secrets.DIFFUSERS_HF_HUB_READ_TOKEN }}
|
||||
RUN_COMPILE: yes
|
||||
run: |
|
||||
python -m pytest -n 1 --max-worker-restart=0 --dist=loadfile -s -v -k "compile" --make-reports=tests_torch_compile_cuda tests/
|
||||
- name: Failure short reports
|
||||
if: ${{ failure() }}
|
||||
run: cat reports/tests_torch_compile_cuda_failures_short.txt
|
||||
|
||||
- name: Test suite reports artifacts
|
||||
if: ${{ always() }}
|
||||
uses: actions/upload-artifact@v4
|
||||
with:
|
||||
name: torch_compile_test_reports
|
||||
path: reports
|
||||
|
||||
- name: Generate Report and Notify Channel
|
||||
if: always()
|
||||
run: |
|
||||
pip install slack_sdk tabulate
|
||||
python utils/log_reports.py >> $GITHUB_STEP_SUMMARY
|
||||
|
||||
run_big_gpu_torch_tests:
|
||||
name: Torch tests on big GPU
|
||||
strategy:
|
||||
@@ -463,16 +414,10 @@ jobs:
|
||||
config:
|
||||
- backend: "bitsandbytes"
|
||||
test_location: "bnb"
|
||||
additional_deps: ["peft"]
|
||||
- backend: "gguf"
|
||||
test_location: "gguf"
|
||||
additional_deps: ["peft"]
|
||||
- backend: "torchao"
|
||||
test_location: "torchao"
|
||||
additional_deps: []
|
||||
- backend: "optimum_quanto"
|
||||
test_location: "quanto"
|
||||
additional_deps: []
|
||||
runs-on:
|
||||
group: aws-g6e-xlarge-plus
|
||||
container:
|
||||
@@ -490,9 +435,6 @@ jobs:
|
||||
python -m venv /opt/venv && export PATH="/opt/venv/bin:$PATH"
|
||||
python -m uv pip install -e [quality,test]
|
||||
python -m uv pip install -U ${{ matrix.config.backend }}
|
||||
if [ "${{ join(matrix.config.additional_deps, ' ') }}" != "" ]; then
|
||||
python -m uv pip install ${{ join(matrix.config.additional_deps, ' ') }}
|
||||
fi
|
||||
python -m uv pip install pytest-reportlog
|
||||
- name: Environment
|
||||
run: |
|
||||
|
||||
122
.github/workflows/pr_style_bot.yml
vendored
122
.github/workflows/pr_style_bot.yml
vendored
@@ -9,9 +9,119 @@ permissions:
|
||||
pull-requests: write
|
||||
|
||||
jobs:
|
||||
style:
|
||||
uses: huggingface/huggingface_hub/.github/workflows/style-bot-action.yml@main
|
||||
with:
|
||||
python_quality_dependencies: "[quality]"
|
||||
secrets:
|
||||
bot_token: ${{ secrets.GITHUB_TOKEN }}
|
||||
run-style-bot:
|
||||
if: >
|
||||
contains(github.event.comment.body, '@bot /style') &&
|
||||
github.event.issue.pull_request != null
|
||||
runs-on: ubuntu-latest
|
||||
|
||||
steps:
|
||||
- name: Extract PR details
|
||||
id: pr_info
|
||||
uses: actions/github-script@v6
|
||||
with:
|
||||
script: |
|
||||
const prNumber = context.payload.issue.number;
|
||||
const { data: pr } = await github.rest.pulls.get({
|
||||
owner: context.repo.owner,
|
||||
repo: context.repo.repo,
|
||||
pull_number: prNumber
|
||||
});
|
||||
|
||||
// We capture both the branch ref and the "full_name" of the head repo
|
||||
// so that we can check out the correct repository & branch (including forks).
|
||||
core.setOutput("prNumber", prNumber);
|
||||
core.setOutput("headRef", pr.head.ref);
|
||||
core.setOutput("headRepoFullName", pr.head.repo.full_name);
|
||||
|
||||
- name: Check out PR branch
|
||||
uses: actions/checkout@v3
|
||||
env:
|
||||
HEADREPOFULLNAME: ${{ steps.pr_info.outputs.headRepoFullName }}
|
||||
HEADREF: ${{ steps.pr_info.outputs.headRef }}
|
||||
with:
|
||||
# Instead of checking out the base repo, use the contributor's repo name
|
||||
repository: ${{ env.HEADREPOFULLNAME }}
|
||||
ref: ${{ env.HEADREF }}
|
||||
# You may need fetch-depth: 0 for being able to push
|
||||
fetch-depth: 0
|
||||
token: ${{ secrets.GITHUB_TOKEN }}
|
||||
|
||||
- name: Debug
|
||||
env:
|
||||
HEADREPOFULLNAME: ${{ steps.pr_info.outputs.headRepoFullName }}
|
||||
HEADREF: ${{ steps.pr_info.outputs.headRef }}
|
||||
PRNUMBER: ${{ steps.pr_info.outputs.prNumber }}
|
||||
run: |
|
||||
echo "PR number: ${{ env.PRNUMBER }}"
|
||||
echo "Head Ref: ${{ env.HEADREF }}"
|
||||
echo "Head Repo Full Name: ${{ env.HEADREPOFULLNAME }}"
|
||||
|
||||
- name: Set up Python
|
||||
uses: actions/setup-python@v4
|
||||
|
||||
- name: Install dependencies
|
||||
run: |
|
||||
pip install .[quality]
|
||||
|
||||
- name: Download Makefile from main branch
|
||||
run: |
|
||||
curl -o main_Makefile https://raw.githubusercontent.com/huggingface/diffusers/main/Makefile
|
||||
|
||||
- name: Compare Makefiles
|
||||
run: |
|
||||
if ! diff -q main_Makefile Makefile; then
|
||||
echo "Error: The Makefile has changed. Please ensure it matches the main branch."
|
||||
exit 1
|
||||
fi
|
||||
echo "No changes in Makefile. Proceeding..."
|
||||
rm -rf main_Makefile
|
||||
|
||||
- name: Run make style and make quality
|
||||
run: |
|
||||
make style && make quality
|
||||
|
||||
- name: Commit and push changes
|
||||
id: commit_and_push
|
||||
env:
|
||||
HEADREPOFULLNAME: ${{ steps.pr_info.outputs.headRepoFullName }}
|
||||
HEADREF: ${{ steps.pr_info.outputs.headRef }}
|
||||
PRNUMBER: ${{ steps.pr_info.outputs.prNumber }}
|
||||
GITHUB_TOKEN: ${{ secrets.GITHUB_TOKEN }}
|
||||
run: |
|
||||
echo "HEADREPOFULLNAME: ${{ env.HEADREPOFULLNAME }}, HEADREF: ${{ env.HEADREF }}"
|
||||
# Configure git with the Actions bot user
|
||||
git config user.name "github-actions[bot]"
|
||||
git config user.email "github-actions[bot]@users.noreply.github.com"
|
||||
|
||||
# Make sure your 'origin' remote is set to the contributor's fork
|
||||
git remote set-url origin "https://x-access-token:${GITHUB_TOKEN}@github.com/${{ env.HEADREPOFULLNAME }}.git"
|
||||
|
||||
# If there are changes after running style/quality, commit them
|
||||
if [ -n "$(git status --porcelain)" ]; then
|
||||
git add .
|
||||
git commit -m "Apply style fixes"
|
||||
# Push to the original contributor's forked branch
|
||||
git push origin HEAD:${{ env.HEADREF }}
|
||||
echo "changes_pushed=true" >> $GITHUB_OUTPUT
|
||||
else
|
||||
echo "No changes to commit."
|
||||
echo "changes_pushed=false" >> $GITHUB_OUTPUT
|
||||
fi
|
||||
|
||||
- name: Comment on PR with workflow run link
|
||||
if: steps.commit_and_push.outputs.changes_pushed == 'true'
|
||||
uses: actions/github-script@v6
|
||||
with:
|
||||
script: |
|
||||
const prNumber = parseInt(process.env.prNumber, 10);
|
||||
const runUrl = `${process.env.GITHUB_SERVER_URL}/${process.env.GITHUB_REPOSITORY}/actions/runs/${process.env.GITHUB_RUN_ID}`
|
||||
|
||||
await github.rest.issues.createComment({
|
||||
owner: context.repo.owner,
|
||||
repo: context.repo.repo,
|
||||
issue_number: prNumber,
|
||||
body: `Style fixes have been applied. [View the workflow run here](${runUrl}).`
|
||||
});
|
||||
env:
|
||||
prNumber: ${{ steps.pr_info.outputs.prNumber }}
|
||||
|
||||
1
.github/workflows/pr_tests.yml
vendored
1
.github/workflows/pr_tests.yml
vendored
@@ -3,6 +3,7 @@ name: Fast tests for PRs
|
||||
on:
|
||||
pull_request:
|
||||
branches: [main]
|
||||
types: [synchronize]
|
||||
paths:
|
||||
- "src/diffusers/**.py"
|
||||
- "benchmarks/**.py"
|
||||
|
||||
296
.github/workflows/pr_tests_gpu.yml
vendored
296
.github/workflows/pr_tests_gpu.yml
vendored
@@ -1,296 +0,0 @@
|
||||
name: Fast GPU Tests on PR
|
||||
|
||||
on:
|
||||
pull_request:
|
||||
branches: main
|
||||
paths:
|
||||
- "src/diffusers/models/modeling_utils.py"
|
||||
- "src/diffusers/models/model_loading_utils.py"
|
||||
- "src/diffusers/pipelines/pipeline_utils.py"
|
||||
- "src/diffusers/pipeline_loading_utils.py"
|
||||
- "src/diffusers/loaders/lora_base.py"
|
||||
- "src/diffusers/loaders/lora_pipeline.py"
|
||||
- "src/diffusers/loaders/peft.py"
|
||||
- "tests/pipelines/test_pipelines_common.py"
|
||||
- "tests/models/test_modeling_common.py"
|
||||
workflow_dispatch:
|
||||
|
||||
concurrency:
|
||||
group: ${{ github.workflow }}-${{ github.head_ref || github.run_id }}
|
||||
cancel-in-progress: true
|
||||
|
||||
env:
|
||||
DIFFUSERS_IS_CI: yes
|
||||
OMP_NUM_THREADS: 8
|
||||
MKL_NUM_THREADS: 8
|
||||
HF_HUB_ENABLE_HF_TRANSFER: 1
|
||||
PYTEST_TIMEOUT: 600
|
||||
PIPELINE_USAGE_CUTOFF: 1000000000 # set high cutoff so that only always-test pipelines run
|
||||
|
||||
jobs:
|
||||
check_code_quality:
|
||||
runs-on: ubuntu-22.04
|
||||
steps:
|
||||
- uses: actions/checkout@v3
|
||||
- name: Set up Python
|
||||
uses: actions/setup-python@v4
|
||||
with:
|
||||
python-version: "3.8"
|
||||
- name: Install dependencies
|
||||
run: |
|
||||
python -m pip install --upgrade pip
|
||||
pip install .[quality]
|
||||
- name: Check quality
|
||||
run: make quality
|
||||
- name: Check if failure
|
||||
if: ${{ failure() }}
|
||||
run: |
|
||||
echo "Quality check failed. Please ensure the right dependency versions are installed with 'pip install -e .[quality]' and run 'make style && make quality'" >> $GITHUB_STEP_SUMMARY
|
||||
|
||||
check_repository_consistency:
|
||||
needs: check_code_quality
|
||||
runs-on: ubuntu-22.04
|
||||
steps:
|
||||
- uses: actions/checkout@v3
|
||||
- name: Set up Python
|
||||
uses: actions/setup-python@v4
|
||||
with:
|
||||
python-version: "3.8"
|
||||
- name: Install dependencies
|
||||
run: |
|
||||
python -m pip install --upgrade pip
|
||||
pip install .[quality]
|
||||
- name: Check repo consistency
|
||||
run: |
|
||||
python utils/check_copies.py
|
||||
python utils/check_dummies.py
|
||||
python utils/check_support_list.py
|
||||
make deps_table_check_updated
|
||||
- name: Check if failure
|
||||
if: ${{ failure() }}
|
||||
run: |
|
||||
echo "Repo consistency check failed. Please ensure the right dependency versions are installed with 'pip install -e .[quality]' and run 'make fix-copies'" >> $GITHUB_STEP_SUMMARY
|
||||
|
||||
setup_torch_cuda_pipeline_matrix:
|
||||
needs: [check_code_quality, check_repository_consistency]
|
||||
name: Setup Torch Pipelines CUDA Slow Tests Matrix
|
||||
runs-on:
|
||||
group: aws-general-8-plus
|
||||
container:
|
||||
image: diffusers/diffusers-pytorch-cpu
|
||||
outputs:
|
||||
pipeline_test_matrix: ${{ steps.fetch_pipeline_matrix.outputs.pipeline_test_matrix }}
|
||||
steps:
|
||||
- name: Checkout diffusers
|
||||
uses: actions/checkout@v3
|
||||
with:
|
||||
fetch-depth: 2
|
||||
- name: Install dependencies
|
||||
run: |
|
||||
python -m venv /opt/venv && export PATH="/opt/venv/bin:$PATH"
|
||||
python -m uv pip install -e [quality,test]
|
||||
- name: Environment
|
||||
run: |
|
||||
python utils/print_env.py
|
||||
- name: Fetch Pipeline Matrix
|
||||
id: fetch_pipeline_matrix
|
||||
run: |
|
||||
matrix=$(python utils/fetch_torch_cuda_pipeline_test_matrix.py)
|
||||
echo $matrix
|
||||
echo "pipeline_test_matrix=$matrix" >> $GITHUB_OUTPUT
|
||||
- name: Pipeline Tests Artifacts
|
||||
if: ${{ always() }}
|
||||
uses: actions/upload-artifact@v4
|
||||
with:
|
||||
name: test-pipelines.json
|
||||
path: reports
|
||||
|
||||
torch_pipelines_cuda_tests:
|
||||
name: Torch Pipelines CUDA Tests
|
||||
needs: setup_torch_cuda_pipeline_matrix
|
||||
strategy:
|
||||
fail-fast: false
|
||||
max-parallel: 8
|
||||
matrix:
|
||||
module: ${{ fromJson(needs.setup_torch_cuda_pipeline_matrix.outputs.pipeline_test_matrix) }}
|
||||
runs-on:
|
||||
group: aws-g4dn-2xlarge
|
||||
container:
|
||||
image: diffusers/diffusers-pytorch-cuda
|
||||
options: --shm-size "16gb" --ipc host --gpus 0
|
||||
steps:
|
||||
- name: Checkout diffusers
|
||||
uses: actions/checkout@v3
|
||||
with:
|
||||
fetch-depth: 2
|
||||
|
||||
- name: NVIDIA-SMI
|
||||
run: |
|
||||
nvidia-smi
|
||||
- name: Install dependencies
|
||||
run: |
|
||||
python -m venv /opt/venv && export PATH="/opt/venv/bin:$PATH"
|
||||
python -m uv pip install -e [quality,test]
|
||||
pip uninstall accelerate -y && python -m uv pip install -U accelerate@git+https://github.com/huggingface/accelerate.git
|
||||
pip uninstall transformers -y && python -m uv pip install -U transformers@git+https://github.com/huggingface/transformers.git --no-deps
|
||||
|
||||
- name: Environment
|
||||
run: |
|
||||
python utils/print_env.py
|
||||
- name: Extract tests
|
||||
id: extract_tests
|
||||
run: |
|
||||
pattern=$(python utils/extract_tests_from_mixin.py --type pipeline)
|
||||
echo "$pattern" > /tmp/test_pattern.txt
|
||||
echo "pattern_file=/tmp/test_pattern.txt" >> $GITHUB_OUTPUT
|
||||
|
||||
- name: PyTorch CUDA checkpoint tests on Ubuntu
|
||||
env:
|
||||
HF_TOKEN: ${{ secrets.DIFFUSERS_HF_HUB_READ_TOKEN }}
|
||||
# https://pytorch.org/docs/stable/notes/randomness.html#avoiding-nondeterministic-algorithms
|
||||
CUBLAS_WORKSPACE_CONFIG: :16:8
|
||||
run: |
|
||||
if [ "${{ matrix.module }}" = "ip_adapters" ]; then
|
||||
python -m pytest -n 1 --max-worker-restart=0 --dist=loadfile \
|
||||
-s -v -k "not Flax and not Onnx" \
|
||||
--make-reports=tests_pipeline_${{ matrix.module }}_cuda \
|
||||
tests/pipelines/${{ matrix.module }}
|
||||
else
|
||||
pattern=$(cat ${{ steps.extract_tests.outputs.pattern_file }})
|
||||
python -m pytest -n 1 --max-worker-restart=0 --dist=loadfile \
|
||||
-s -v -k "not Flax and not Onnx and $pattern" \
|
||||
--make-reports=tests_pipeline_${{ matrix.module }}_cuda \
|
||||
tests/pipelines/${{ matrix.module }}
|
||||
fi
|
||||
|
||||
- name: Failure short reports
|
||||
if: ${{ failure() }}
|
||||
run: |
|
||||
cat reports/tests_pipeline_${{ matrix.module }}_cuda_stats.txt
|
||||
cat reports/tests_pipeline_${{ matrix.module }}_cuda_failures_short.txt
|
||||
- name: Test suite reports artifacts
|
||||
if: ${{ always() }}
|
||||
uses: actions/upload-artifact@v4
|
||||
with:
|
||||
name: pipeline_${{ matrix.module }}_test_reports
|
||||
path: reports
|
||||
|
||||
torch_cuda_tests:
|
||||
name: Torch CUDA Tests
|
||||
needs: [check_code_quality, check_repository_consistency]
|
||||
runs-on:
|
||||
group: aws-g4dn-2xlarge
|
||||
container:
|
||||
image: diffusers/diffusers-pytorch-cuda
|
||||
options: --shm-size "16gb" --ipc host --gpus 0
|
||||
defaults:
|
||||
run:
|
||||
shell: bash
|
||||
strategy:
|
||||
fail-fast: false
|
||||
max-parallel: 2
|
||||
matrix:
|
||||
module: [models, schedulers, lora, others]
|
||||
steps:
|
||||
- name: Checkout diffusers
|
||||
uses: actions/checkout@v3
|
||||
with:
|
||||
fetch-depth: 2
|
||||
|
||||
- name: Install dependencies
|
||||
run: |
|
||||
python -m venv /opt/venv && export PATH="/opt/venv/bin:$PATH"
|
||||
python -m uv pip install -e [quality,test]
|
||||
python -m uv pip install peft@git+https://github.com/huggingface/peft.git
|
||||
pip uninstall accelerate -y && python -m uv pip install -U accelerate@git+https://github.com/huggingface/accelerate.git
|
||||
pip uninstall transformers -y && python -m uv pip install -U transformers@git+https://github.com/huggingface/transformers.git --no-deps
|
||||
|
||||
- name: Environment
|
||||
run: |
|
||||
python utils/print_env.py
|
||||
|
||||
- name: Extract tests
|
||||
id: extract_tests
|
||||
run: |
|
||||
pattern=$(python utils/extract_tests_from_mixin.py --type ${{ matrix.module }})
|
||||
echo "$pattern" > /tmp/test_pattern.txt
|
||||
echo "pattern_file=/tmp/test_pattern.txt" >> $GITHUB_OUTPUT
|
||||
|
||||
- name: Run PyTorch CUDA tests
|
||||
env:
|
||||
HF_TOKEN: ${{ secrets.DIFFUSERS_HF_HUB_READ_TOKEN }}
|
||||
# https://pytorch.org/docs/stable/notes/randomness.html#avoiding-nondeterministic-algorithms
|
||||
CUBLAS_WORKSPACE_CONFIG: :16:8
|
||||
run: |
|
||||
pattern=$(cat ${{ steps.extract_tests.outputs.pattern_file }})
|
||||
if [ -z "$pattern" ]; then
|
||||
python -m pytest -n 1 -sv --max-worker-restart=0 --dist=loadfile -k "not Flax and not Onnx" tests/${{ matrix.module }} \
|
||||
--make-reports=tests_torch_cuda_${{ matrix.module }}
|
||||
else
|
||||
python -m pytest -n 1 -sv --max-worker-restart=0 --dist=loadfile -k "not Flax and not Onnx and $pattern" tests/${{ matrix.module }} \
|
||||
--make-reports=tests_torch_cuda_${{ matrix.module }}
|
||||
fi
|
||||
|
||||
- name: Failure short reports
|
||||
if: ${{ failure() }}
|
||||
run: |
|
||||
cat reports/tests_torch_cuda_${{ matrix.module }}_stats.txt
|
||||
cat reports/tests_torch_cuda_${{ matrix.module }}_failures_short.txt
|
||||
|
||||
- name: Test suite reports artifacts
|
||||
if: ${{ always() }}
|
||||
uses: actions/upload-artifact@v4
|
||||
with:
|
||||
name: torch_cuda_test_reports_${{ matrix.module }}
|
||||
path: reports
|
||||
|
||||
run_examples_tests:
|
||||
name: Examples PyTorch CUDA tests on Ubuntu
|
||||
needs: [check_code_quality, check_repository_consistency]
|
||||
runs-on:
|
||||
group: aws-g4dn-2xlarge
|
||||
|
||||
container:
|
||||
image: diffusers/diffusers-pytorch-cuda
|
||||
options: --gpus 0 --shm-size "16gb" --ipc host
|
||||
steps:
|
||||
- name: Checkout diffusers
|
||||
uses: actions/checkout@v3
|
||||
with:
|
||||
fetch-depth: 2
|
||||
|
||||
- name: NVIDIA-SMI
|
||||
run: |
|
||||
nvidia-smi
|
||||
- name: Install dependencies
|
||||
run: |
|
||||
python -m venv /opt/venv && export PATH="/opt/venv/bin:$PATH"
|
||||
pip uninstall transformers -y && python -m uv pip install -U transformers@git+https://github.com/huggingface/transformers.git --no-deps
|
||||
python -m uv pip install -e [quality,test,training]
|
||||
|
||||
- name: Environment
|
||||
run: |
|
||||
python -m venv /opt/venv && export PATH="/opt/venv/bin:$PATH"
|
||||
python utils/print_env.py
|
||||
|
||||
- name: Run example tests on GPU
|
||||
env:
|
||||
HF_TOKEN: ${{ secrets.DIFFUSERS_HF_HUB_READ_TOKEN }}
|
||||
run: |
|
||||
python -m venv /opt/venv && export PATH="/opt/venv/bin:$PATH"
|
||||
python -m uv pip install timm
|
||||
python -m pytest -n 1 --max-worker-restart=0 --dist=loadfile -s -v --make-reports=examples_torch_cuda examples/
|
||||
|
||||
- name: Failure short reports
|
||||
if: ${{ failure() }}
|
||||
run: |
|
||||
cat reports/examples_torch_cuda_stats.txt
|
||||
cat reports/examples_torch_cuda_failures_short.txt
|
||||
|
||||
- name: Test suite reports artifacts
|
||||
if: ${{ always() }}
|
||||
uses: actions/upload-artifact@v4
|
||||
with:
|
||||
name: examples_test_reports
|
||||
path: reports
|
||||
|
||||
11
.github/workflows/push_tests.yml
vendored
11
.github/workflows/push_tests.yml
vendored
@@ -1,6 +1,13 @@
|
||||
name: Fast GPU Tests on main
|
||||
|
||||
on:
|
||||
pull_request:
|
||||
branches: main
|
||||
paths:
|
||||
- "src/diffusers/models/modeling_utils.py"
|
||||
- "src/diffusers/models/model_loading_utils.py"
|
||||
- "src/diffusers/pipelines/pipeline_utils.py"
|
||||
- "src/diffusers/pipeline_loading_utils.py"
|
||||
workflow_dispatch:
|
||||
push:
|
||||
branches:
|
||||
@@ -160,6 +167,7 @@ jobs:
|
||||
path: reports
|
||||
|
||||
flax_tpu_tests:
|
||||
if: ${{ github.event_name != 'pull_request' }}
|
||||
name: Flax TPU Tests
|
||||
runs-on:
|
||||
group: gcp-ct5lp-hightpu-8t
|
||||
@@ -208,6 +216,7 @@ jobs:
|
||||
path: reports
|
||||
|
||||
onnx_cuda_tests:
|
||||
if: ${{ github.event_name != 'pull_request' }}
|
||||
name: ONNX CUDA Tests
|
||||
runs-on:
|
||||
group: aws-g4dn-2xlarge
|
||||
@@ -256,6 +265,7 @@ jobs:
|
||||
path: reports
|
||||
|
||||
run_torch_compile_tests:
|
||||
if: ${{ github.event_name != 'pull_request' }}
|
||||
name: PyTorch Compile CUDA tests
|
||||
|
||||
runs-on:
|
||||
@@ -299,6 +309,7 @@ jobs:
|
||||
path: reports
|
||||
|
||||
run_xformers_tests:
|
||||
if: ${{ github.event_name != 'pull_request' }}
|
||||
name: PyTorch xformers CUDA tests
|
||||
|
||||
runs-on:
|
||||
|
||||
2
.github/workflows/release_tests_fast.yml
vendored
2
.github/workflows/release_tests_fast.yml
vendored
@@ -335,7 +335,7 @@ jobs:
|
||||
- name: Environment
|
||||
run: |
|
||||
python utils/print_env.py
|
||||
- name: Run torch compile tests on GPU
|
||||
- name: Run example tests on GPU
|
||||
env:
|
||||
HF_TOKEN: ${{ secrets.DIFFUSERS_HF_HUB_READ_TOKEN }}
|
||||
RUN_COMPILE: yes
|
||||
|
||||
@@ -28,9 +28,9 @@ ENV PATH="/opt/venv/bin:$PATH"
|
||||
# pre-install the heavy dependencies (these can later be overridden by the deps from setup.py)
|
||||
RUN python3 -m pip install --no-cache-dir --upgrade pip uv==0.1.11 && \
|
||||
python3 -m uv pip install --no-cache-dir \
|
||||
torch \
|
||||
torchvision \
|
||||
torchaudio\
|
||||
torch==2.1.2 \
|
||||
torchvision==0.16.2 \
|
||||
torchaudio==2.1.2 \
|
||||
onnxruntime \
|
||||
--extra-index-url https://download.pytorch.org/whl/cpu && \
|
||||
python3 -m uv pip install --no-cache-dir \
|
||||
|
||||
@@ -76,16 +76,6 @@
|
||||
- local: advanced_inference/outpaint
|
||||
title: Outpainting
|
||||
title: Advanced inference
|
||||
- sections:
|
||||
- local: hybrid_inference/overview
|
||||
title: Overview
|
||||
- local: hybrid_inference/vae_decode
|
||||
title: VAE Decode
|
||||
- local: hybrid_inference/vae_encode
|
||||
title: VAE Encode
|
||||
- local: hybrid_inference/api_reference
|
||||
title: API Reference
|
||||
title: Hybrid Inference
|
||||
- sections:
|
||||
- local: using-diffusers/cogvideox
|
||||
title: CogVideoX
|
||||
@@ -175,8 +165,6 @@
|
||||
title: gguf
|
||||
- local: quantization/torchao
|
||||
title: torchao
|
||||
- local: quantization/quanto
|
||||
title: quanto
|
||||
title: Quantization Methods
|
||||
- sections:
|
||||
- local: optimization/fp16
|
||||
@@ -265,23 +253,19 @@
|
||||
sections:
|
||||
- local: api/models/overview
|
||||
title: Overview
|
||||
- local: api/models/auto_model
|
||||
title: AutoModel
|
||||
- sections:
|
||||
- local: api/models/controlnet
|
||||
title: ControlNetModel
|
||||
- local: api/models/controlnet_union
|
||||
title: ControlNetUnionModel
|
||||
- local: api/models/controlnet_flux
|
||||
title: FluxControlNetModel
|
||||
- local: api/models/controlnet_hunyuandit
|
||||
title: HunyuanDiT2DControlNetModel
|
||||
- local: api/models/controlnet_sana
|
||||
title: SanaControlNetModel
|
||||
- local: api/models/controlnet_sd3
|
||||
title: SD3ControlNetModel
|
||||
- local: api/models/controlnet_sparsectrl
|
||||
title: SparseControlNetModel
|
||||
- local: api/models/controlnet_union
|
||||
title: ControlNetUnionModel
|
||||
title: ControlNets
|
||||
- sections:
|
||||
- local: api/models/allegro_transformer3d
|
||||
@@ -290,32 +274,28 @@
|
||||
title: AuraFlowTransformer2DModel
|
||||
- local: api/models/cogvideox_transformer3d
|
||||
title: CogVideoXTransformer3DModel
|
||||
- local: api/models/consisid_transformer3d
|
||||
title: ConsisIDTransformer3DModel
|
||||
- local: api/models/cogview3plus_transformer2d
|
||||
title: CogView3PlusTransformer2DModel
|
||||
- local: api/models/cogview4_transformer2d
|
||||
title: CogView4Transformer2DModel
|
||||
- local: api/models/consisid_transformer3d
|
||||
title: ConsisIDTransformer3DModel
|
||||
- local: api/models/dit_transformer2d
|
||||
title: DiTTransformer2DModel
|
||||
- local: api/models/easyanimate_transformer3d
|
||||
title: EasyAnimateTransformer3DModel
|
||||
- local: api/models/flux_transformer
|
||||
title: FluxTransformer2DModel
|
||||
- local: api/models/hidream_image_transformer
|
||||
title: HiDreamImageTransformer2DModel
|
||||
- local: api/models/hunyuan_transformer2d
|
||||
title: HunyuanDiT2DModel
|
||||
- local: api/models/hunyuan_video_transformer_3d
|
||||
title: HunyuanVideoTransformer3DModel
|
||||
- local: api/models/latte_transformer3d
|
||||
title: LatteTransformer3DModel
|
||||
- local: api/models/ltx_video_transformer3d
|
||||
title: LTXVideoTransformer3DModel
|
||||
- local: api/models/lumina2_transformer2d
|
||||
title: Lumina2Transformer2DModel
|
||||
- local: api/models/lumina_nextdit2d
|
||||
title: LuminaNextDiT2DModel
|
||||
- local: api/models/lumina2_transformer2d
|
||||
title: Lumina2Transformer2DModel
|
||||
- local: api/models/ltx_video_transformer3d
|
||||
title: LTXVideoTransformer3DModel
|
||||
- local: api/models/mochi_transformer3d
|
||||
title: MochiTransformer3DModel
|
||||
- local: api/models/omnigen_transformer
|
||||
@@ -324,28 +304,26 @@
|
||||
title: PixArtTransformer2DModel
|
||||
- local: api/models/prior_transformer
|
||||
title: PriorTransformer
|
||||
- local: api/models/sana_transformer2d
|
||||
title: SanaTransformer2DModel
|
||||
- local: api/models/sd3_transformer2d
|
||||
title: SD3Transformer2DModel
|
||||
- local: api/models/sana_transformer2d
|
||||
title: SanaTransformer2DModel
|
||||
- local: api/models/stable_audio_transformer
|
||||
title: StableAudioDiTModel
|
||||
- local: api/models/transformer2d
|
||||
title: Transformer2DModel
|
||||
- local: api/models/transformer_temporal
|
||||
title: TransformerTemporalModel
|
||||
- local: api/models/wan_transformer_3d
|
||||
title: WanTransformer3DModel
|
||||
title: Transformers
|
||||
- sections:
|
||||
- local: api/models/stable_cascade_unet
|
||||
title: StableCascadeUNet
|
||||
- local: api/models/unet
|
||||
title: UNet1DModel
|
||||
- local: api/models/unet2d-cond
|
||||
title: UNet2DConditionModel
|
||||
- local: api/models/unet2d
|
||||
title: UNet2DModel
|
||||
- local: api/models/unet2d-cond
|
||||
title: UNet2DConditionModel
|
||||
- local: api/models/unet3d-cond
|
||||
title: UNet3DConditionModel
|
||||
- local: api/models/unet-motion
|
||||
@@ -354,10 +332,6 @@
|
||||
title: UViT2DModel
|
||||
title: UNets
|
||||
- sections:
|
||||
- local: api/models/asymmetricautoencoderkl
|
||||
title: AsymmetricAutoencoderKL
|
||||
- local: api/models/autoencoder_dc
|
||||
title: AutoencoderDC
|
||||
- local: api/models/autoencoderkl
|
||||
title: AutoencoderKL
|
||||
- local: api/models/autoencoderkl_allegro
|
||||
@@ -368,12 +342,12 @@
|
||||
title: AutoencoderKLHunyuanVideo
|
||||
- local: api/models/autoencoderkl_ltx_video
|
||||
title: AutoencoderKLLTXVideo
|
||||
- local: api/models/autoencoderkl_magvit
|
||||
title: AutoencoderKLMagvit
|
||||
- local: api/models/autoencoderkl_mochi
|
||||
title: AutoencoderKLMochi
|
||||
- local: api/models/autoencoder_kl_wan
|
||||
title: AutoencoderKLWan
|
||||
- local: api/models/asymmetricautoencoderkl
|
||||
title: AsymmetricAutoencoderKL
|
||||
- local: api/models/autoencoder_dc
|
||||
title: AutoencoderDC
|
||||
- local: api/models/consistency_decoder_vae
|
||||
title: ConsistencyDecoderVAE
|
||||
- local: api/models/autoencoder_oobleck
|
||||
@@ -426,8 +400,6 @@
|
||||
title: ControlNet with Stable Diffusion 3
|
||||
- local: api/pipelines/controlnet_sdxl
|
||||
title: ControlNet with Stable Diffusion XL
|
||||
- local: api/pipelines/controlnet_sana
|
||||
title: ControlNet-Sana
|
||||
- local: api/pipelines/controlnetxs
|
||||
title: ControlNet-XS
|
||||
- local: api/pipelines/controlnetxs_sdxl
|
||||
@@ -446,14 +418,10 @@
|
||||
title: DiffEdit
|
||||
- local: api/pipelines/dit
|
||||
title: DiT
|
||||
- local: api/pipelines/easyanimate
|
||||
title: EasyAnimate
|
||||
- local: api/pipelines/flux
|
||||
title: Flux
|
||||
- local: api/pipelines/control_flux_inpaint
|
||||
title: FluxControlInpaint
|
||||
- local: api/pipelines/hidream
|
||||
title: HiDream-I1
|
||||
- local: api/pipelines/hunyuandit
|
||||
title: Hunyuan-DiT
|
||||
- local: api/pipelines/hunyuan_video
|
||||
@@ -506,8 +474,6 @@
|
||||
title: PixArt-Σ
|
||||
- local: api/pipelines/sana
|
||||
title: Sana
|
||||
- local: api/pipelines/sana_sprint
|
||||
title: Sana Sprint
|
||||
- local: api/pipelines/self_attention_guidance
|
||||
title: Self-Attention Guidance
|
||||
- local: api/pipelines/semantic_stable_diffusion
|
||||
@@ -521,40 +487,40 @@
|
||||
- sections:
|
||||
- local: api/pipelines/stable_diffusion/overview
|
||||
title: Overview
|
||||
- local: api/pipelines/stable_diffusion/depth2img
|
||||
title: Depth-to-image
|
||||
- local: api/pipelines/stable_diffusion/gligen
|
||||
title: GLIGEN (Grounded Language-to-Image Generation)
|
||||
- local: api/pipelines/stable_diffusion/image_variation
|
||||
title: Image variation
|
||||
- local: api/pipelines/stable_diffusion/text2img
|
||||
title: Text-to-image
|
||||
- local: api/pipelines/stable_diffusion/img2img
|
||||
title: Image-to-image
|
||||
- local: api/pipelines/stable_diffusion/svd
|
||||
title: Image-to-video
|
||||
- local: api/pipelines/stable_diffusion/inpaint
|
||||
title: Inpainting
|
||||
- local: api/pipelines/stable_diffusion/k_diffusion
|
||||
title: K-Diffusion
|
||||
- local: api/pipelines/stable_diffusion/latent_upscale
|
||||
title: Latent upscaler
|
||||
- local: api/pipelines/stable_diffusion/ldm3d_diffusion
|
||||
title: LDM3D Text-to-(RGB, Depth), Text-to-(RGB-pano, Depth-pano), LDM3D Upscaler
|
||||
- local: api/pipelines/stable_diffusion/depth2img
|
||||
title: Depth-to-image
|
||||
- local: api/pipelines/stable_diffusion/image_variation
|
||||
title: Image variation
|
||||
- local: api/pipelines/stable_diffusion/stable_diffusion_safe
|
||||
title: Safe Stable Diffusion
|
||||
- local: api/pipelines/stable_diffusion/sdxl_turbo
|
||||
title: SDXL Turbo
|
||||
- local: api/pipelines/stable_diffusion/stable_diffusion_2
|
||||
title: Stable Diffusion 2
|
||||
- local: api/pipelines/stable_diffusion/stable_diffusion_3
|
||||
title: Stable Diffusion 3
|
||||
- local: api/pipelines/stable_diffusion/stable_diffusion_xl
|
||||
title: Stable Diffusion XL
|
||||
- local: api/pipelines/stable_diffusion/sdxl_turbo
|
||||
title: SDXL Turbo
|
||||
- local: api/pipelines/stable_diffusion/latent_upscale
|
||||
title: Latent upscaler
|
||||
- local: api/pipelines/stable_diffusion/upscale
|
||||
title: Super-resolution
|
||||
- local: api/pipelines/stable_diffusion/k_diffusion
|
||||
title: K-Diffusion
|
||||
- local: api/pipelines/stable_diffusion/ldm3d_diffusion
|
||||
title: LDM3D Text-to-(RGB, Depth), Text-to-(RGB-pano, Depth-pano), LDM3D Upscaler
|
||||
- local: api/pipelines/stable_diffusion/adapter
|
||||
title: T2I-Adapter
|
||||
- local: api/pipelines/stable_diffusion/text2img
|
||||
title: Text-to-image
|
||||
- local: api/pipelines/stable_diffusion/gligen
|
||||
title: GLIGEN (Grounded Language-to-Image Generation)
|
||||
title: Stable Diffusion
|
||||
- local: api/pipelines/stable_unclip
|
||||
title: Stable unCLIP
|
||||
@@ -568,8 +534,6 @@
|
||||
title: UniDiffuser
|
||||
- local: api/pipelines/value_guided_sampling
|
||||
title: Value-guided sampling
|
||||
- local: api/pipelines/wan
|
||||
title: Wan
|
||||
- local: api/pipelines/wuerstchen
|
||||
title: Wuerstchen
|
||||
title: Pipelines
|
||||
@@ -579,10 +543,6 @@
|
||||
title: Overview
|
||||
- local: api/schedulers/cm_stochastic_iterative
|
||||
title: CMStochasticIterativeScheduler
|
||||
- local: api/schedulers/ddim_cogvideox
|
||||
title: CogVideoXDDIMScheduler
|
||||
- local: api/schedulers/multistep_dpm_solver_cogvideox
|
||||
title: CogVideoXDPMScheduler
|
||||
- local: api/schedulers/consistency_decoder
|
||||
title: ConsistencyDecoderScheduler
|
||||
- local: api/schedulers/cosine_dpm
|
||||
|
||||
@@ -38,33 +38,6 @@ config = PyramidAttentionBroadcastConfig(
|
||||
pipe.transformer.enable_cache(config)
|
||||
```
|
||||
|
||||
## Faster Cache
|
||||
|
||||
[FasterCache](https://huggingface.co/papers/2410.19355) from Zhengyao Lv, Chenyang Si, Junhao Song, Zhenyu Yang, Yu Qiao, Ziwei Liu, Kwan-Yee K. Wong.
|
||||
|
||||
FasterCache is a method that speeds up inference in diffusion transformers by:
|
||||
- Reusing attention states between successive inference steps, due to high similarity between them
|
||||
- Skipping unconditional branch prediction used in classifier-free guidance by revealing redundancies between unconditional and conditional branch outputs for the same timestep, and therefore approximating the unconditional branch output using the conditional branch output
|
||||
|
||||
```python
|
||||
import torch
|
||||
from diffusers import CogVideoXPipeline, FasterCacheConfig
|
||||
|
||||
pipe = CogVideoXPipeline.from_pretrained("THUDM/CogVideoX-5b", torch_dtype=torch.bfloat16)
|
||||
pipe.to("cuda")
|
||||
|
||||
config = FasterCacheConfig(
|
||||
spatial_attention_block_skip_range=2,
|
||||
spatial_attention_timestep_skip_range=(-1, 681),
|
||||
current_timestep_callback=lambda: pipe.current_timestep,
|
||||
attention_weight_callback=lambda _: 0.3,
|
||||
unconditional_batch_skip_range=5,
|
||||
unconditional_batch_timestep_skip_range=(-1, 781),
|
||||
tensor_format="BFCHW",
|
||||
)
|
||||
pipe.transformer.enable_cache(config)
|
||||
```
|
||||
|
||||
### CacheMixin
|
||||
|
||||
[[autodoc]] CacheMixin
|
||||
@@ -74,9 +47,3 @@ pipe.transformer.enable_cache(config)
|
||||
[[autodoc]] PyramidAttentionBroadcastConfig
|
||||
|
||||
[[autodoc]] apply_pyramid_attention_broadcast
|
||||
|
||||
### FasterCacheConfig
|
||||
|
||||
[[autodoc]] FasterCacheConfig
|
||||
|
||||
[[autodoc]] apply_faster_cache
|
||||
|
||||
@@ -20,15 +20,11 @@ LoRA is a fast and lightweight training method that inserts and trains a signifi
|
||||
- [`FluxLoraLoaderMixin`] provides similar functions for [Flux](https://huggingface.co/docs/diffusers/main/en/api/pipelines/flux).
|
||||
- [`CogVideoXLoraLoaderMixin`] provides similar functions for [CogVideoX](https://huggingface.co/docs/diffusers/main/en/api/pipelines/cogvideox).
|
||||
- [`Mochi1LoraLoaderMixin`] provides similar functions for [Mochi](https://huggingface.co/docs/diffusers/main/en/api/pipelines/mochi).
|
||||
- [`AuraFlowLoraLoaderMixin`] provides similar functions for [AuraFlow](https://huggingface.co/fal/AuraFlow).
|
||||
- [`LTXVideoLoraLoaderMixin`] provides similar functions for [LTX-Video](https://huggingface.co/docs/diffusers/main/en/api/pipelines/ltx_video).
|
||||
- [`SanaLoraLoaderMixin`] provides similar functions for [Sana](https://huggingface.co/docs/diffusers/main/en/api/pipelines/sana).
|
||||
- [`HunyuanVideoLoraLoaderMixin`] provides similar functions for [HunyuanVideo](https://huggingface.co/docs/diffusers/main/en/api/pipelines/hunyuan_video).
|
||||
- [`Lumina2LoraLoaderMixin`] provides similar functions for [Lumina2](https://huggingface.co/docs/diffusers/main/en/api/pipelines/lumina2).
|
||||
- [`WanLoraLoaderMixin`] provides similar functions for [Wan](https://huggingface.co/docs/diffusers/main/en/api/pipelines/wan).
|
||||
- [`CogView4LoraLoaderMixin`] provides similar functions for [CogView4](https://huggingface.co/docs/diffusers/main/en/api/pipelines/cogview4).
|
||||
- [`AmusedLoraLoaderMixin`] is for the [`AmusedPipeline`].
|
||||
- [`HiDreamImageLoraLoaderMixin`] provides similar functions for [HiDream Image](https://huggingface.co/docs/diffusers/main/en/api/pipelines/hidream)
|
||||
- [`LoraBaseMixin`] provides a base class with several utility methods to fuse, unfuse, unload, LoRAs and more.
|
||||
|
||||
<Tip>
|
||||
@@ -60,9 +56,6 @@ To learn more about how to load LoRA weights, see the [LoRA](../../using-diffuse
|
||||
## Mochi1LoraLoaderMixin
|
||||
|
||||
[[autodoc]] loaders.lora_pipeline.Mochi1LoraLoaderMixin
|
||||
## AuraFlowLoraLoaderMixin
|
||||
|
||||
[[autodoc]] loaders.lora_pipeline.AuraFlowLoraLoaderMixin
|
||||
|
||||
## LTXVideoLoraLoaderMixin
|
||||
|
||||
@@ -80,22 +73,10 @@ To learn more about how to load LoRA weights, see the [LoRA](../../using-diffuse
|
||||
|
||||
[[autodoc]] loaders.lora_pipeline.Lumina2LoraLoaderMixin
|
||||
|
||||
## CogView4LoraLoaderMixin
|
||||
|
||||
[[autodoc]] loaders.lora_pipeline.CogView4LoraLoaderMixin
|
||||
|
||||
## WanLoraLoaderMixin
|
||||
|
||||
[[autodoc]] loaders.lora_pipeline.WanLoraLoaderMixin
|
||||
|
||||
## AmusedLoraLoaderMixin
|
||||
|
||||
[[autodoc]] loaders.lora_pipeline.AmusedLoraLoaderMixin
|
||||
|
||||
## HiDreamImageLoraLoaderMixin
|
||||
|
||||
[[autodoc]] loaders.lora_pipeline.HiDreamImageLoraLoaderMixin
|
||||
|
||||
## LoraBaseMixin
|
||||
|
||||
[[autodoc]] loaders.lora_base.LoraBaseMixin
|
||||
@@ -1,29 +0,0 @@
|
||||
<!--Copyright 2024 The HuggingFace Team. All rights reserved.
|
||||
|
||||
Licensed under the Apache License, Version 2.0 (the "License"); you may not use this file except in compliance with
|
||||
the License. You may obtain a copy of the License at
|
||||
|
||||
http://www.apache.org/licenses/LICENSE-2.0
|
||||
|
||||
Unless required by applicable law or agreed to in writing, software distributed under the License is distributed on
|
||||
an "AS IS" BASIS, WITHOUT WARRANTIES OR CONDITIONS OF ANY KIND, either express or implied. See the License for the
|
||||
specific language governing permissions and limitations under the License.
|
||||
-->
|
||||
|
||||
# AutoModel
|
||||
|
||||
The `AutoModel` is designed to make it easy to load a checkpoint without needing to know the specific model class. `AutoModel` automatically retrieves the correct model class from the checkpoint `config.json` file.
|
||||
|
||||
```python
|
||||
from diffusers import AutoModel, AutoPipelineForText2Image
|
||||
|
||||
unet = AutoModel.from_pretrained("stable-diffusion-v1-5/stable-diffusion-v1-5", subfolder="unet")
|
||||
pipe = AutoPipelineForText2Image.from_pretrained("stable-diffusion-v1-5/stable-diffusion-v1-5", unet=unet)
|
||||
```
|
||||
|
||||
|
||||
## AutoModel
|
||||
|
||||
[[autodoc]] AutoModel
|
||||
- all
|
||||
- from_pretrained
|
||||
@@ -1,32 +0,0 @@
|
||||
<!-- Copyright 2024 The HuggingFace Team. All rights reserved.
|
||||
|
||||
Licensed under the Apache License, Version 2.0 (the "License"); you may not use this file except in compliance with
|
||||
the License. You may obtain a copy of the License at
|
||||
|
||||
http://www.apache.org/licenses/LICENSE-2.0
|
||||
|
||||
Unless required by applicable law or agreed to in writing, software distributed under the License is distributed on
|
||||
an "AS IS" BASIS, WITHOUT WARRANTIES OR CONDITIONS OF ANY KIND, either express or implied. See the License for the
|
||||
specific language governing permissions and limitations under the License. -->
|
||||
|
||||
# AutoencoderKLWan
|
||||
|
||||
The 3D variational autoencoder (VAE) model with KL loss used in [Wan 2.1](https://github.com/Wan-Video/Wan2.1) by the Alibaba Wan Team.
|
||||
|
||||
The model can be loaded with the following code snippet.
|
||||
|
||||
```python
|
||||
from diffusers import AutoencoderKLWan
|
||||
|
||||
vae = AutoencoderKLWan.from_pretrained("Wan-AI/Wan2.1-T2V-1.3B-Diffusers", subfolder="vae", torch_dtype=torch.float32)
|
||||
```
|
||||
|
||||
## AutoencoderKLWan
|
||||
|
||||
[[autodoc]] AutoencoderKLWan
|
||||
- decode
|
||||
- all
|
||||
|
||||
## DecoderOutput
|
||||
|
||||
[[autodoc]] models.autoencoders.vae.DecoderOutput
|
||||
@@ -18,7 +18,7 @@ The model can be loaded with the following code snippet.
|
||||
```python
|
||||
from diffusers import AutoencoderKLAllegro
|
||||
|
||||
vae = AutoencoderKLAllegro.from_pretrained("rhymes-ai/Allegro", subfolder="vae", torch_dtype=torch.float32).to("cuda")
|
||||
vae = AutoencoderKLCogVideoX.from_pretrained("rhymes-ai/Allegro", subfolder="vae", torch_dtype=torch.float32).to("cuda")
|
||||
```
|
||||
|
||||
## AutoencoderKLAllegro
|
||||
|
||||
@@ -1,37 +0,0 @@
|
||||
<!--Copyright 2025 The HuggingFace Team. All rights reserved.
|
||||
|
||||
Licensed under the Apache License, Version 2.0 (the "License"); you may not use this file except in compliance with
|
||||
the License. You may obtain a copy of the License at
|
||||
|
||||
http://www.apache.org/licenses/LICENSE-2.0
|
||||
|
||||
Unless required by applicable law or agreed to in writing, software distributed under the License is distributed on
|
||||
an "AS IS" BASIS, WITHOUT WARRANTIES OR CONDITIONS OF ANY KIND, either express or implied. See the License for the
|
||||
specific language governing permissions and limitations under the License. -->
|
||||
|
||||
# AutoencoderKLMagvit
|
||||
|
||||
The 3D variational autoencoder (VAE) model with KL loss used in [EasyAnimate](https://github.com/aigc-apps/EasyAnimate) was introduced by Alibaba PAI.
|
||||
|
||||
The model can be loaded with the following code snippet.
|
||||
|
||||
```python
|
||||
from diffusers import AutoencoderKLMagvit
|
||||
|
||||
vae = AutoencoderKLMagvit.from_pretrained("alibaba-pai/EasyAnimateV5.1-12b-zh", subfolder="vae", torch_dtype=torch.float16).to("cuda")
|
||||
```
|
||||
|
||||
## AutoencoderKLMagvit
|
||||
|
||||
[[autodoc]] AutoencoderKLMagvit
|
||||
- decode
|
||||
- encode
|
||||
- all
|
||||
|
||||
## AutoencoderKLOutput
|
||||
|
||||
[[autodoc]] models.autoencoders.autoencoder_kl.AutoencoderKLOutput
|
||||
|
||||
## DecoderOutput
|
||||
|
||||
[[autodoc]] models.autoencoders.vae.DecoderOutput
|
||||
@@ -1,29 +0,0 @@
|
||||
<!--Copyright 2024 The HuggingFace Team. All rights reserved.
|
||||
|
||||
Licensed under the Apache License, Version 2.0 (the "License"); you may not use this file except in compliance with
|
||||
the License. You may obtain a copy of the License at
|
||||
|
||||
http://www.apache.org/licenses/LICENSE-2.0
|
||||
|
||||
Unless required by applicable law or agreed to in writing, software distributed under the License is distributed on
|
||||
an "AS IS" BASIS, WITHOUT WARRANTIES OR CONDITIONS OF ANY KIND, either express or implied. See the License for the
|
||||
specific language governing permissions and limitations under the License.
|
||||
-->
|
||||
|
||||
# SanaControlNetModel
|
||||
|
||||
The ControlNet model was introduced in [Adding Conditional Control to Text-to-Image Diffusion Models](https://huggingface.co/papers/2302.05543) by Lvmin Zhang, Anyi Rao, Maneesh Agrawala. It provides a greater degree of control over text-to-image generation by conditioning the model on additional inputs such as edge maps, depth maps, segmentation maps, and keypoints for pose detection.
|
||||
|
||||
The abstract from the paper is:
|
||||
|
||||
*We present ControlNet, a neural network architecture to add spatial conditioning controls to large, pretrained text-to-image diffusion models. ControlNet locks the production-ready large diffusion models, and reuses their deep and robust encoding layers pretrained with billions of images as a strong backbone to learn a diverse set of conditional controls. The neural architecture is connected with "zero convolutions" (zero-initialized convolution layers) that progressively grow the parameters from zero and ensure that no harmful noise could affect the finetuning. We test various conditioning controls, eg, edges, depth, segmentation, human pose, etc, with Stable Diffusion, using single or multiple conditions, with or without prompts. We show that the training of ControlNets is robust with small (<50k) and large (>1m) datasets. Extensive results show that ControlNet may facilitate wider applications to control image diffusion models.*
|
||||
|
||||
This model was contributed by [ishan24](https://huggingface.co/ishan24). ❤️
|
||||
The original codebase can be found at [NVlabs/Sana](https://github.com/NVlabs/Sana), and you can find official ControlNet checkpoints on [Efficient-Large-Model's](https://huggingface.co/Efficient-Large-Model) Hub profile.
|
||||
|
||||
## SanaControlNetModel
|
||||
[[autodoc]] SanaControlNetModel
|
||||
|
||||
## SanaControlNetOutput
|
||||
[[autodoc]] models.controlnets.controlnet_sana.SanaControlNetOutput
|
||||
|
||||
@@ -1,30 +0,0 @@
|
||||
<!--Copyright 2025 The HuggingFace Team. All rights reserved.
|
||||
|
||||
Licensed under the Apache License, Version 2.0 (the "License"); you may not use this file except in compliance with
|
||||
the License. You may obtain a copy of the License at
|
||||
|
||||
http://www.apache.org/licenses/LICENSE-2.0
|
||||
|
||||
Unless required by applicable law or agreed to in writing, software distributed under the License is distributed on
|
||||
an "AS IS" BASIS, WITHOUT WARRANTIES OR CONDITIONS OF ANY KIND, either express or implied. See the License for the
|
||||
specific language governing permissions and limitations under the License. -->
|
||||
|
||||
# EasyAnimateTransformer3DModel
|
||||
|
||||
A Diffusion Transformer model for 3D data from [EasyAnimate](https://github.com/aigc-apps/EasyAnimate) was introduced by Alibaba PAI.
|
||||
|
||||
The model can be loaded with the following code snippet.
|
||||
|
||||
```python
|
||||
from diffusers import EasyAnimateTransformer3DModel
|
||||
|
||||
transformer = EasyAnimateTransformer3DModel.from_pretrained("alibaba-pai/EasyAnimateV5.1-12b-zh", subfolder="transformer", torch_dtype=torch.float16).to("cuda")
|
||||
```
|
||||
|
||||
## EasyAnimateTransformer3DModel
|
||||
|
||||
[[autodoc]] EasyAnimateTransformer3DModel
|
||||
|
||||
## Transformer2DModelOutput
|
||||
|
||||
[[autodoc]] models.modeling_outputs.Transformer2DModelOutput
|
||||
@@ -1,30 +0,0 @@
|
||||
<!-- Copyright 2024 The HuggingFace Team. All rights reserved.
|
||||
|
||||
Licensed under the Apache License, Version 2.0 (the "License"); you may not use this file except in compliance with
|
||||
the License. You may obtain a copy of the License at
|
||||
|
||||
http://www.apache.org/licenses/LICENSE-2.0
|
||||
|
||||
Unless required by applicable law or agreed to in writing, software distributed under the License is distributed on
|
||||
an "AS IS" BASIS, WITHOUT WARRANTIES OR CONDITIONS OF ANY KIND, either express or implied. See the License for the
|
||||
specific language governing permissions and limitations under the License. -->
|
||||
|
||||
# HiDreamImageTransformer2DModel
|
||||
|
||||
A Transformer model for image-like data from [HiDream-I1](https://huggingface.co/HiDream-ai).
|
||||
|
||||
The model can be loaded with the following code snippet.
|
||||
|
||||
```python
|
||||
from diffusers import HiDreamImageTransformer2DModel
|
||||
|
||||
transformer = HiDreamImageTransformer2DModel.from_pretrained("HiDream-ai/HiDream-I1-Full", subfolder="transformer", torch_dtype=torch.bfloat16)
|
||||
```
|
||||
|
||||
## HiDreamImageTransformer2DModel
|
||||
|
||||
[[autodoc]] HiDreamImageTransformer2DModel
|
||||
|
||||
## Transformer2DModelOutput
|
||||
|
||||
[[autodoc]] models.modeling_outputs.Transformer2DModelOutput
|
||||
@@ -1,30 +0,0 @@
|
||||
<!-- Copyright 2024 The HuggingFace Team. All rights reserved.
|
||||
|
||||
Licensed under the Apache License, Version 2.0 (the "License"); you may not use this file except in compliance with
|
||||
the License. You may obtain a copy of the License at
|
||||
|
||||
http://www.apache.org/licenses/LICENSE-2.0
|
||||
|
||||
Unless required by applicable law or agreed to in writing, software distributed under the License is distributed on
|
||||
an "AS IS" BASIS, WITHOUT WARRANTIES OR CONDITIONS OF ANY KIND, either express or implied. See the License for the
|
||||
specific language governing permissions and limitations under the License. -->
|
||||
|
||||
# WanTransformer3DModel
|
||||
|
||||
A Diffusion Transformer model for 3D video-like data was introduced in [Wan 2.1](https://github.com/Wan-Video/Wan2.1) by the Alibaba Wan Team.
|
||||
|
||||
The model can be loaded with the following code snippet.
|
||||
|
||||
```python
|
||||
from diffusers import WanTransformer3DModel
|
||||
|
||||
transformer = WanTransformer3DModel.from_pretrained("Wan-AI/Wan2.1-T2V-1.3B-Diffusers", subfolder="transformer", torch_dtype=torch.bfloat16)
|
||||
```
|
||||
|
||||
## WanTransformer3DModel
|
||||
|
||||
[[autodoc]] WanTransformer3DModel
|
||||
|
||||
## Transformer2DModelOutput
|
||||
|
||||
[[autodoc]] models.modeling_outputs.Transformer2DModelOutput
|
||||
@@ -12,10 +12,6 @@ specific language governing permissions and limitations under the License.
|
||||
|
||||
# Text-to-Video Generation with AnimateDiff
|
||||
|
||||
<div class="flex flex-wrap space-x-1">
|
||||
<img alt="LoRA" src="https://img.shields.io/badge/LoRA-d8b4fe?style=flat"/>
|
||||
</div>
|
||||
|
||||
## Overview
|
||||
|
||||
[AnimateDiff: Animate Your Personalized Text-to-Image Diffusion Models without Specific Tuning](https://arxiv.org/abs/2307.04725) by Yuwei Guo, Ceyuan Yang, Anyi Rao, Yaohui Wang, Yu Qiao, Dahua Lin, Bo Dai.
|
||||
|
||||
@@ -89,23 +89,6 @@ image = pipeline(prompt).images[0]
|
||||
image.save("auraflow.png")
|
||||
```
|
||||
|
||||
## Support for `torch.compile()`
|
||||
|
||||
AuraFlow can be compiled with `torch.compile()` to speed up inference latency even for different resolutions. First, install PyTorch nightly following the instructions from [here](https://pytorch.org/). The snippet below shows the changes needed to enable this:
|
||||
|
||||
```diff
|
||||
+ torch.fx.experimental._config.use_duck_shape = False
|
||||
+ pipeline.transformer = torch.compile(
|
||||
pipeline.transformer, fullgraph=True, dynamic=True
|
||||
)
|
||||
```
|
||||
|
||||
Specifying `use_duck_shape` to be `False` instructs the compiler if it should use the same symbolic variable to represent input sizes that are the same. For more details, check out [this comment](https://github.com/huggingface/diffusers/pull/11327#discussion_r2047659790).
|
||||
|
||||
This enables from 100% (on low resolutions) to a 30% (on 1536x1536 resolution) speed improvements.
|
||||
|
||||
Thanks to [AstraliteHeart](https://github.com/huggingface/diffusers/pull/11297/) who helped us rewrite the [`AuraFlowTransformer2DModel`] class so that the above works for different resolutions ([PR](https://github.com/huggingface/diffusers/pull/11297/)).
|
||||
|
||||
## AuraFlowPipeline
|
||||
|
||||
[[autodoc]] AuraFlowPipeline
|
||||
|
||||
@@ -15,10 +15,6 @@
|
||||
|
||||
# CogVideoX
|
||||
|
||||
<div class="flex flex-wrap space-x-1">
|
||||
<img alt="LoRA" src="https://img.shields.io/badge/LoRA-d8b4fe?style=flat"/>
|
||||
</div>
|
||||
|
||||
[CogVideoX: Text-to-Video Diffusion Models with An Expert Transformer](https://arxiv.org/abs/2408.06072) from Tsinghua University & ZhipuAI, by Zhuoyi Yang, Jiayan Teng, Wendi Zheng, Ming Ding, Shiyu Huang, Jiazheng Xu, Yuanming Yang, Wenyi Hong, Xiaohan Zhang, Guanyu Feng, Da Yin, Xiaotao Gu, Yuxuan Zhang, Weihan Wang, Yean Cheng, Ting Liu, Bin Xu, Yuxiao Dong, Jie Tang.
|
||||
|
||||
The abstract from the paper is:
|
||||
|
||||
@@ -15,10 +15,6 @@
|
||||
|
||||
# ConsisID
|
||||
|
||||
<div class="flex flex-wrap space-x-1">
|
||||
<img alt="LoRA" src="https://img.shields.io/badge/LoRA-d8b4fe?style=flat"/>
|
||||
</div>
|
||||
|
||||
[Identity-Preserving Text-to-Video Generation by Frequency Decomposition](https://arxiv.org/abs/2411.17440) from Peking University & University of Rochester & etc, by Shenghai Yuan, Jinfa Huang, Xianyi He, Yunyang Ge, Yujun Shi, Liuhan Chen, Jiebo Luo, Li Yuan.
|
||||
|
||||
The abstract from the paper is:
|
||||
|
||||
@@ -12,10 +12,6 @@ specific language governing permissions and limitations under the License.
|
||||
|
||||
# FluxControlInpaint
|
||||
|
||||
<div class="flex flex-wrap space-x-1">
|
||||
<img alt="LoRA" src="https://img.shields.io/badge/LoRA-d8b4fe?style=flat"/>
|
||||
</div>
|
||||
|
||||
FluxControlInpaintPipeline is an implementation of Inpainting for Flux.1 Depth/Canny models. It is a pipeline that allows you to inpaint images using the Flux.1 Depth/Canny models. The pipeline takes an image and a mask as input and returns the inpainted image.
|
||||
|
||||
FLUX.1 Depth and Canny [dev] is a 12 billion parameter rectified flow transformer capable of generating an image based on a text description while following the structure of a given input image. **This is not a ControlNet model**.
|
||||
|
||||
@@ -12,10 +12,6 @@ specific language governing permissions and limitations under the License.
|
||||
|
||||
# ControlNet
|
||||
|
||||
<div class="flex flex-wrap space-x-1">
|
||||
<img alt="LoRA" src="https://img.shields.io/badge/LoRA-d8b4fe?style=flat"/>
|
||||
</div>
|
||||
|
||||
ControlNet was introduced in [Adding Conditional Control to Text-to-Image Diffusion Models](https://huggingface.co/papers/2302.05543) by Lvmin Zhang, Anyi Rao, and Maneesh Agrawala.
|
||||
|
||||
With a ControlNet model, you can provide an additional control image to condition and control Stable Diffusion generation. For example, if you provide a depth map, the ControlNet model generates an image that'll preserve the spatial information from the depth map. It is a more flexible and accurate way to control the image generation process.
|
||||
|
||||
@@ -12,10 +12,6 @@ specific language governing permissions and limitations under the License.
|
||||
|
||||
# ControlNet with Flux.1
|
||||
|
||||
<div class="flex flex-wrap space-x-1">
|
||||
<img alt="LoRA" src="https://img.shields.io/badge/LoRA-d8b4fe?style=flat"/>
|
||||
</div>
|
||||
|
||||
FluxControlNetPipeline is an implementation of ControlNet for Flux.1.
|
||||
|
||||
ControlNet was introduced in [Adding Conditional Control to Text-to-Image Diffusion Models](https://huggingface.co/papers/2302.05543) by Lvmin Zhang, Anyi Rao, and Maneesh Agrawala.
|
||||
|
||||
@@ -1,36 +0,0 @@
|
||||
<!--Copyright 2024 The HuggingFace Team. All rights reserved.
|
||||
|
||||
Licensed under the Apache License, Version 2.0 (the "License"); you may not use this file except in compliance with
|
||||
the License. You may obtain a copy of the License at
|
||||
|
||||
http://www.apache.org/licenses/LICENSE-2.0
|
||||
|
||||
Unless required by applicable law or agreed to in writing, software distributed under the License is distributed on
|
||||
an "AS IS" BASIS, WITHOUT WARRANTIES OR CONDITIONS OF ANY KIND, either express or implied. See the License for the
|
||||
specific language governing permissions and limitations under the License.
|
||||
-->
|
||||
|
||||
# ControlNet
|
||||
|
||||
<div class="flex flex-wrap space-x-1">
|
||||
<img alt="LoRA" src="https://img.shields.io/badge/LoRA-d8b4fe?style=flat"/>
|
||||
</div>
|
||||
|
||||
ControlNet was introduced in [Adding Conditional Control to Text-to-Image Diffusion Models](https://huggingface.co/papers/2302.05543) by Lvmin Zhang, Anyi Rao, and Maneesh Agrawala.
|
||||
|
||||
With a ControlNet model, you can provide an additional control image to condition and control Stable Diffusion generation. For example, if you provide a depth map, the ControlNet model generates an image that'll preserve the spatial information from the depth map. It is a more flexible and accurate way to control the image generation process.
|
||||
|
||||
The abstract from the paper is:
|
||||
|
||||
*We present ControlNet, a neural network architecture to add spatial conditioning controls to large, pretrained text-to-image diffusion models. ControlNet locks the production-ready large diffusion models, and reuses their deep and robust encoding layers pretrained with billions of images as a strong backbone to learn a diverse set of conditional controls. The neural architecture is connected with "zero convolutions" (zero-initialized convolution layers) that progressively grow the parameters from zero and ensure that no harmful noise could affect the finetuning. We test various conditioning controls, eg, edges, depth, segmentation, human pose, etc, with Stable Diffusion, using single or multiple conditions, with or without prompts. We show that the training of ControlNets is robust with small (<50k) and large (>1m) datasets. Extensive results show that ControlNet may facilitate wider applications to control image diffusion models.*
|
||||
|
||||
This pipeline was contributed by [ishan24](https://huggingface.co/ishan24). ❤️
|
||||
The original codebase can be found at [NVlabs/Sana](https://github.com/NVlabs/Sana), and you can find official ControlNet checkpoints on [Efficient-Large-Model's](https://huggingface.co/Efficient-Large-Model) Hub profile.
|
||||
|
||||
## SanaControlNetPipeline
|
||||
[[autodoc]] SanaControlNetPipeline
|
||||
- all
|
||||
- __call__
|
||||
|
||||
## SanaPipelineOutput
|
||||
[[autodoc]] pipelines.sana.pipeline_output.SanaPipelineOutput
|
||||
@@ -12,10 +12,6 @@ specific language governing permissions and limitations under the License.
|
||||
|
||||
# ControlNet with Stable Diffusion 3
|
||||
|
||||
<div class="flex flex-wrap space-x-1">
|
||||
<img alt="LoRA" src="https://img.shields.io/badge/LoRA-d8b4fe?style=flat"/>
|
||||
</div>
|
||||
|
||||
StableDiffusion3ControlNetPipeline is an implementation of ControlNet for Stable Diffusion 3.
|
||||
|
||||
ControlNet was introduced in [Adding Conditional Control to Text-to-Image Diffusion Models](https://huggingface.co/papers/2302.05543) by Lvmin Zhang, Anyi Rao, and Maneesh Agrawala.
|
||||
|
||||
@@ -12,10 +12,6 @@ specific language governing permissions and limitations under the License.
|
||||
|
||||
# ControlNet with Stable Diffusion XL
|
||||
|
||||
<div class="flex flex-wrap space-x-1">
|
||||
<img alt="LoRA" src="https://img.shields.io/badge/LoRA-d8b4fe?style=flat"/>
|
||||
</div>
|
||||
|
||||
ControlNet was introduced in [Adding Conditional Control to Text-to-Image Diffusion Models](https://huggingface.co/papers/2302.05543) by Lvmin Zhang, Anyi Rao, and Maneesh Agrawala.
|
||||
|
||||
With a ControlNet model, you can provide an additional control image to condition and control Stable Diffusion generation. For example, if you provide a depth map, the ControlNet model generates an image that'll preserve the spatial information from the depth map. It is a more flexible and accurate way to control the image generation process.
|
||||
|
||||
@@ -12,10 +12,6 @@ specific language governing permissions and limitations under the License.
|
||||
|
||||
# ControlNetUnion
|
||||
|
||||
<div class="flex flex-wrap space-x-1">
|
||||
<img alt="LoRA" src="https://img.shields.io/badge/LoRA-d8b4fe?style=flat"/>
|
||||
</div>
|
||||
|
||||
ControlNetUnionModel is an implementation of ControlNet for Stable Diffusion XL.
|
||||
|
||||
The ControlNet model was introduced in [ControlNetPlus](https://github.com/xinsir6/ControlNetPlus) by xinsir6. It supports multiple conditioning inputs without increasing computation.
|
||||
|
||||
@@ -12,10 +12,6 @@ specific language governing permissions and limitations under the License.
|
||||
|
||||
# ControlNet-XS
|
||||
|
||||
<div class="flex flex-wrap space-x-1">
|
||||
<img alt="LoRA" src="https://img.shields.io/badge/LoRA-d8b4fe?style=flat"/>
|
||||
</div>
|
||||
|
||||
ControlNet-XS was introduced in [ControlNet-XS](https://vislearn.github.io/ControlNet-XS/) by Denis Zavadski and Carsten Rother. It is based on the observation that the control model in the [original ControlNet](https://huggingface.co/papers/2302.05543) can be made much smaller and still produce good results.
|
||||
|
||||
Like the original ControlNet model, you can provide an additional control image to condition and control Stable Diffusion generation. For example, if you provide a depth map, the ControlNet model generates an image that'll preserve the spatial information from the depth map. It is a more flexible and accurate way to control the image generation process.
|
||||
|
||||
@@ -12,11 +12,6 @@ specific language governing permissions and limitations under the License.
|
||||
|
||||
# DeepFloyd IF
|
||||
|
||||
<div class="flex flex-wrap space-x-1">
|
||||
<img alt="LoRA" src="https://img.shields.io/badge/LoRA-d8b4fe?style=flat"/>
|
||||
<img alt="MPS" src="https://img.shields.io/badge/MPS-000000?style=flat&logo=apple&logoColor=white%22">
|
||||
</div>
|
||||
|
||||
## Overview
|
||||
|
||||
DeepFloyd IF is a novel state-of-the-art open-source text-to-image model with a high degree of photorealism and language understanding.
|
||||
|
||||
@@ -1,88 +0,0 @@
|
||||
<!--Copyright 2025 The HuggingFace Team. All rights reserved.
|
||||
#
|
||||
# Licensed under the Apache License, Version 2.0 (the "License");
|
||||
# you may not use this file except in compliance with the License.
|
||||
# You may obtain a copy of the License at
|
||||
#
|
||||
# http://www.apache.org/licenses/LICENSE-2.0
|
||||
#
|
||||
# Unless required by applicable law or agreed to in writing, software
|
||||
# distributed under the License is distributed on an "AS IS" BASIS,
|
||||
# WITHOUT WARRANTIES OR CONDITIONS OF ANY KIND, either express or implied.
|
||||
# See the License for the specific language governing permissions and
|
||||
# limitations under the License.
|
||||
-->
|
||||
|
||||
# EasyAnimate
|
||||
[EasyAnimate](https://github.com/aigc-apps/EasyAnimate) by Alibaba PAI.
|
||||
|
||||
The description from it's GitHub page:
|
||||
*EasyAnimate is a pipeline based on the transformer architecture, designed for generating AI images and videos, and for training baseline models and Lora models for Diffusion Transformer. We support direct prediction from pre-trained EasyAnimate models, allowing for the generation of videos with various resolutions, approximately 6 seconds in length, at 8fps (EasyAnimateV5.1, 1 to 49 frames). Additionally, users can train their own baseline and Lora models for specific style transformations.*
|
||||
|
||||
This pipeline was contributed by [bubbliiiing](https://github.com/bubbliiiing). The original codebase can be found [here](https://huggingface.co/alibaba-pai). The original weights can be found under [hf.co/alibaba-pai](https://huggingface.co/alibaba-pai).
|
||||
|
||||
There are two official EasyAnimate checkpoints for text-to-video and video-to-video.
|
||||
|
||||
| checkpoints | recommended inference dtype |
|
||||
|:---:|:---:|
|
||||
| [`alibaba-pai/EasyAnimateV5.1-12b-zh`](https://huggingface.co/alibaba-pai/EasyAnimateV5.1-12b-zh) | torch.float16 |
|
||||
| [`alibaba-pai/EasyAnimateV5.1-12b-zh-InP`](https://huggingface.co/alibaba-pai/EasyAnimateV5.1-12b-zh-InP) | torch.float16 |
|
||||
|
||||
There is one official EasyAnimate checkpoints available for image-to-video and video-to-video.
|
||||
|
||||
| checkpoints | recommended inference dtype |
|
||||
|:---:|:---:|
|
||||
| [`alibaba-pai/EasyAnimateV5.1-12b-zh-InP`](https://huggingface.co/alibaba-pai/EasyAnimateV5.1-12b-zh-InP) | torch.float16 |
|
||||
|
||||
There are two official EasyAnimate checkpoints available for control-to-video.
|
||||
|
||||
| checkpoints | recommended inference dtype |
|
||||
|:---:|:---:|
|
||||
| [`alibaba-pai/EasyAnimateV5.1-12b-zh-Control`](https://huggingface.co/alibaba-pai/EasyAnimateV5.1-12b-zh-Control) | torch.float16 |
|
||||
| [`alibaba-pai/EasyAnimateV5.1-12b-zh-Control-Camera`](https://huggingface.co/alibaba-pai/EasyAnimateV5.1-12b-zh-Control-Camera) | torch.float16 |
|
||||
|
||||
For the EasyAnimateV5.1 series:
|
||||
- Text-to-video (T2V) and Image-to-video (I2V) works for multiple resolutions. The width and height can vary from 256 to 1024.
|
||||
- Both T2V and I2V models support generation with 1~49 frames and work best at this value. Exporting videos at 8 FPS is recommended.
|
||||
|
||||
## Quantization
|
||||
|
||||
Quantization helps reduce the memory requirements of very large models by storing model weights in a lower precision data type. However, quantization may have varying impact on video quality depending on the video model.
|
||||
|
||||
Refer to the [Quantization](../../quantization/overview) overview to learn more about supported quantization backends and selecting a quantization backend that supports your use case. The example below demonstrates how to load a quantized [`EasyAnimatePipeline`] for inference with bitsandbytes.
|
||||
|
||||
```py
|
||||
import torch
|
||||
from diffusers import BitsAndBytesConfig as DiffusersBitsAndBytesConfig, EasyAnimateTransformer3DModel, EasyAnimatePipeline
|
||||
from diffusers.utils import export_to_video
|
||||
|
||||
quant_config = DiffusersBitsAndBytesConfig(load_in_8bit=True)
|
||||
transformer_8bit = EasyAnimateTransformer3DModel.from_pretrained(
|
||||
"alibaba-pai/EasyAnimateV5.1-12b-zh",
|
||||
subfolder="transformer",
|
||||
quantization_config=quant_config,
|
||||
torch_dtype=torch.float16,
|
||||
)
|
||||
|
||||
pipeline = EasyAnimatePipeline.from_pretrained(
|
||||
"alibaba-pai/EasyAnimateV5.1-12b-zh",
|
||||
transformer=transformer_8bit,
|
||||
torch_dtype=torch.float16,
|
||||
device_map="balanced",
|
||||
)
|
||||
|
||||
prompt = "A cat walks on the grass, realistic style."
|
||||
negative_prompt = "bad detailed"
|
||||
video = pipeline(prompt=prompt, negative_prompt=negative_prompt, num_frames=49, num_inference_steps=30).frames[0]
|
||||
export_to_video(video, "cat.mp4", fps=8)
|
||||
```
|
||||
|
||||
## EasyAnimatePipeline
|
||||
|
||||
[[autodoc]] EasyAnimatePipeline
|
||||
- all
|
||||
- __call__
|
||||
|
||||
## EasyAnimatePipelineOutput
|
||||
|
||||
[[autodoc]] pipelines.easyanimate.pipeline_output.EasyAnimatePipelineOutput
|
||||
@@ -12,11 +12,6 @@ specific language governing permissions and limitations under the License.
|
||||
|
||||
# Flux
|
||||
|
||||
<div class="flex flex-wrap space-x-1">
|
||||
<img alt="LoRA" src="https://img.shields.io/badge/LoRA-d8b4fe?style=flat"/>
|
||||
<img alt="MPS" src="https://img.shields.io/badge/MPS-000000?style=flat&logo=apple&logoColor=white%22">
|
||||
</div>
|
||||
|
||||
Flux is a series of text-to-image generation models based on diffusion transformers. To know more about Flux, check out the original [blog post](https://blackforestlabs.ai/announcing-black-forest-labs/) by the creators of Flux, Black Forest Labs.
|
||||
|
||||
Original model checkpoints for Flux can be found [here](https://huggingface.co/black-forest-labs). Original inference code can be found [here](https://github.com/black-forest-labs/flux).
|
||||
@@ -347,7 +342,7 @@ image = pipe(
|
||||
height=1024,
|
||||
prompt="wearing sunglasses",
|
||||
negative_prompt="",
|
||||
true_cfg_scale=4.0,
|
||||
true_cfg=4.0,
|
||||
generator=torch.Generator().manual_seed(4444),
|
||||
ip_adapter_image=image,
|
||||
).images[0]
|
||||
@@ -360,74 +355,8 @@ image.save('flux_ip_adapter_output.jpg')
|
||||
<figcaption class="mt-2 text-sm text-center text-gray-500">IP-Adapter examples with prompt "wearing sunglasses"</figcaption>
|
||||
</div>
|
||||
|
||||
## Optimize
|
||||
|
||||
Flux is a very large model and requires ~50GB of RAM/VRAM to load all the modeling components. Enable some of the optimizations below to lower the memory requirements.
|
||||
|
||||
### Group offloading
|
||||
|
||||
[Group offloading](../../optimization/memory#group-offloading) lowers VRAM usage by offloading groups of internal layers rather than the whole model or weights. You need to use [`~hooks.apply_group_offloading`] on all the model components of a pipeline. The `offload_type` parameter allows you to toggle between block and leaf-level offloading. Setting it to `leaf_level` offloads the lowest leaf-level parameters to the CPU instead of offloading at the module-level.
|
||||
|
||||
On CUDA devices that support asynchronous data streaming, set `use_stream=True` to overlap data transfer and computation to accelerate inference.
|
||||
|
||||
> [!TIP]
|
||||
> It is possible to mix block and leaf-level offloading for different components in a pipeline.
|
||||
|
||||
```py
|
||||
import torch
|
||||
from diffusers import FluxPipeline
|
||||
from diffusers.hooks import apply_group_offloading
|
||||
|
||||
model_id = "black-forest-labs/FLUX.1-dev"
|
||||
dtype = torch.bfloat16
|
||||
pipe = FluxPipeline.from_pretrained(
|
||||
model_id,
|
||||
torch_dtype=dtype,
|
||||
)
|
||||
|
||||
apply_group_offloading(
|
||||
pipe.transformer,
|
||||
offload_type="leaf_level",
|
||||
offload_device=torch.device("cpu"),
|
||||
onload_device=torch.device("cuda"),
|
||||
use_stream=True,
|
||||
)
|
||||
apply_group_offloading(
|
||||
pipe.text_encoder,
|
||||
offload_device=torch.device("cpu"),
|
||||
onload_device=torch.device("cuda"),
|
||||
offload_type="leaf_level",
|
||||
use_stream=True,
|
||||
)
|
||||
apply_group_offloading(
|
||||
pipe.text_encoder_2,
|
||||
offload_device=torch.device("cpu"),
|
||||
onload_device=torch.device("cuda"),
|
||||
offload_type="leaf_level",
|
||||
use_stream=True,
|
||||
)
|
||||
apply_group_offloading(
|
||||
pipe.vae,
|
||||
offload_device=torch.device("cpu"),
|
||||
onload_device=torch.device("cuda"),
|
||||
offload_type="leaf_level",
|
||||
use_stream=True,
|
||||
)
|
||||
|
||||
prompt="A cat wearing sunglasses and working as a lifeguard at pool."
|
||||
|
||||
generator = torch.Generator().manual_seed(181201)
|
||||
image = pipe(
|
||||
prompt,
|
||||
width=576,
|
||||
height=1024,
|
||||
num_inference_steps=30,
|
||||
generator=generator
|
||||
).images[0]
|
||||
image
|
||||
```
|
||||
|
||||
### Running FP16 inference
|
||||
## Running FP16 inference
|
||||
|
||||
Flux can generate high-quality images with FP16 (i.e. to accelerate inference on Turing/Volta GPUs) but produces different outputs compared to FP32/BF16. The issue is that some activations in the text encoders have to be clipped when running in FP16, which affects the overall image. Forcing text encoders to run with FP32 inference thus removes this output difference. See [here](https://github.com/huggingface/diffusers/pull/9097#issuecomment-2272292516) for details.
|
||||
|
||||
@@ -456,7 +385,7 @@ out = pipe(
|
||||
out.save("image.png")
|
||||
```
|
||||
|
||||
### Quantization
|
||||
## Quantization
|
||||
|
||||
Quantization helps reduce the memory requirements of very large models by storing model weights in a lower precision data type. However, quantization may have varying impact on video quality depending on the video model.
|
||||
|
||||
|
||||
@@ -1,43 +0,0 @@
|
||||
<!-- Copyright 2024 The HuggingFace Team. All rights reserved.
|
||||
#
|
||||
# Licensed under the Apache License, Version 2.0 (the "License");
|
||||
# you may not use this file except in compliance with the License.
|
||||
# You may obtain a copy of the License at
|
||||
#
|
||||
# http://www.apache.org/licenses/LICENSE-2.0
|
||||
#
|
||||
# Unless required by applicable law or agreed to in writing, software
|
||||
# distributed under the License is distributed on an "AS IS" BASIS,
|
||||
# WITHOUT WARRANTIES OR CONDITIONS OF ANY KIND, either express or implied.
|
||||
# See the License for the specific language governing permissions and
|
||||
# limitations under the License. -->
|
||||
|
||||
# HiDreamImage
|
||||
|
||||
[HiDream-I1](https://huggingface.co/HiDream-ai) by HiDream.ai
|
||||
|
||||
<Tip>
|
||||
|
||||
Make sure to check out the Schedulers [guide](../../using-diffusers/schedulers) to learn how to explore the tradeoff between scheduler speed and quality, and see the [reuse components across pipelines](../../using-diffusers/loading#reuse-a-pipeline) section to learn how to efficiently load the same components into multiple pipelines.
|
||||
|
||||
</Tip>
|
||||
|
||||
## Available models
|
||||
|
||||
The following models are available for the [`HiDreamImagePipeline`](text-to-image) pipeline:
|
||||
|
||||
| Model name | Description |
|
||||
|:---|:---|
|
||||
| [`HiDream-ai/HiDream-I1-Full`](https://huggingface.co/HiDream-ai/HiDream-I1-Full) | - |
|
||||
| [`HiDream-ai/HiDream-I1-Dev`](https://huggingface.co/HiDream-ai/HiDream-I1-Dev) | - |
|
||||
| [`HiDream-ai/HiDream-I1-Fast`](https://huggingface.co/HiDream-ai/HiDream-I1-Fast) | - |
|
||||
|
||||
## HiDreamImagePipeline
|
||||
|
||||
[[autodoc]] HiDreamImagePipeline
|
||||
- all
|
||||
- __call__
|
||||
|
||||
## HiDreamImagePipelineOutput
|
||||
|
||||
[[autodoc]] pipelines.hidream_image.pipeline_output.HiDreamImagePipelineOutput
|
||||
@@ -14,10 +14,6 @@
|
||||
|
||||
# HunyuanVideo
|
||||
|
||||
<div class="flex flex-wrap space-x-1">
|
||||
<img alt="LoRA" src="https://img.shields.io/badge/LoRA-d8b4fe?style=flat"/>
|
||||
</div>
|
||||
|
||||
[HunyuanVideo](https://www.arxiv.org/abs/2412.03603) by Tencent.
|
||||
|
||||
*Recent advancements in video generation have significantly impacted daily life for both individuals and industries. However, the leading video generation models remain closed-source, resulting in a notable performance gap between industry capabilities and those available to the public. In this report, we introduce HunyuanVideo, an innovative open-source video foundation model that demonstrates performance in video generation comparable to, or even surpassing, that of leading closed-source models. HunyuanVideo encompasses a comprehensive framework that integrates several key elements, including data curation, advanced architectural design, progressive model scaling and training, and an efficient infrastructure tailored for large-scale model training and inference. As a result, we successfully trained a video generative model with over 13 billion parameters, making it the largest among all open-source models. We conducted extensive experiments and implemented a series of targeted designs to ensure high visual quality, motion dynamics, text-video alignment, and advanced filming techniques. According to evaluations by professionals, HunyuanVideo outperforms previous state-of-the-art models, including Runway Gen-3, Luma 1.6, and three top-performing Chinese video generative models. By releasing the code for the foundation model and its applications, we aim to bridge the gap between closed-source and open-source communities. This initiative will empower individuals within the community to experiment with their ideas, fostering a more dynamic and vibrant video generation ecosystem. The code is publicly available at [this https URL](https://github.com/tencent/HunyuanVideo).*
|
||||
@@ -49,9 +45,7 @@ The following models are available for the image-to-video pipeline:
|
||||
|
||||
| Model name | Description |
|
||||
|:---|:---|
|
||||
| [`Skywork/SkyReels-V1-Hunyuan-I2V`](https://huggingface.co/Skywork/SkyReels-V1-Hunyuan-I2V) | Skywork's custom finetune of HunyuanVideo (de-distilled). Performs best with `97x544x960` resolution. Performs best at `97x544x960` resolution, `guidance_scale=1.0`, `true_cfg_scale=6.0` and a negative prompt. |
|
||||
| [`hunyuanvideo-community/HunyuanVideo-I2V-33ch`](https://huggingface.co/hunyuanvideo-community/HunyuanVideo-I2V) | Tecent's official HunyuanVideo 33-channel I2V model. Performs best at resolutions of 480, 720, 960, 1280. A higher `shift` value when initializing the scheduler is recommended (good values are between 7 and 20). |
|
||||
| [`hunyuanvideo-community/HunyuanVideo-I2V`](https://huggingface.co/hunyuanvideo-community/HunyuanVideo-I2V) | Tecent's official HunyuanVideo 16-channel I2V model. Performs best at resolutions of 480, 720, 960, 1280. A higher `shift` value when initializing the scheduler is recommended (good values are between 7 and 20) |
|
||||
| [`https://huggingface.co/Skywork/SkyReels-V1-Hunyuan-I2V`](https://huggingface.co/Skywork/SkyReels-V1-Hunyuan-I2V) | Skywork's custom finetune of HunyuanVideo (de-distilled). Performs best with `97x544x960` resolution. Performs best at `97x544x960` resolution, `guidance_scale=1.0`, `true_cfg_scale=6.0` and a negative prompt. |
|
||||
|
||||
## Quantization
|
||||
|
||||
|
||||
@@ -9,10 +9,6 @@ specific language governing permissions and limitations under the License.
|
||||
|
||||
# Kandinsky 3
|
||||
|
||||
<div class="flex flex-wrap space-x-1">
|
||||
<img alt="LoRA" src="https://img.shields.io/badge/LoRA-d8b4fe?style=flat"/>
|
||||
</div>
|
||||
|
||||
Kandinsky 3 is created by [Vladimir Arkhipkin](https://github.com/oriBetelgeuse),[Anastasia Maltseva](https://github.com/NastyaMittseva),[Igor Pavlov](https://github.com/boomb0om),[Andrei Filatov](https://github.com/anvilarth),[Arseniy Shakhmatov](https://github.com/cene555),[Andrey Kuznetsov](https://github.com/kuznetsoffandrey),[Denis Dimitrov](https://github.com/denndimitrov), [Zein Shaheen](https://github.com/zeinsh)
|
||||
|
||||
The description from it's GitHub page:
|
||||
|
||||
@@ -12,11 +12,6 @@ specific language governing permissions and limitations under the License.
|
||||
|
||||
# Kolors: Effective Training of Diffusion Model for Photorealistic Text-to-Image Synthesis
|
||||
|
||||
<div class="flex flex-wrap space-x-1">
|
||||
<img alt="LoRA" src="https://img.shields.io/badge/LoRA-d8b4fe?style=flat"/>
|
||||
<img alt="MPS" src="https://img.shields.io/badge/MPS-000000?style=flat&logo=apple&logoColor=white%22">
|
||||
</div>
|
||||
|
||||

|
||||
|
||||
Kolors is a large-scale text-to-image generation model based on latent diffusion, developed by [the Kuaishou Kolors team](https://github.com/Kwai-Kolors/Kolors). Trained on billions of text-image pairs, Kolors exhibits significant advantages over both open-source and closed-source models in visual quality, complex semantic accuracy, and text rendering for both Chinese and English characters. Furthermore, Kolors supports both Chinese and English inputs, demonstrating strong performance in understanding and generating Chinese-specific content. For more details, please refer to this [technical report](https://github.com/Kwai-Kolors/Kolors/blob/master/imgs/Kolors_paper.pdf).
|
||||
|
||||
@@ -12,10 +12,6 @@ specific language governing permissions and limitations under the License.
|
||||
|
||||
# Latent Consistency Models
|
||||
|
||||
<div class="flex flex-wrap space-x-1">
|
||||
<img alt="LoRA" src="https://img.shields.io/badge/LoRA-d8b4fe?style=flat"/>
|
||||
</div>
|
||||
|
||||
Latent Consistency Models (LCMs) were proposed in [Latent Consistency Models: Synthesizing High-Resolution Images with Few-Step Inference](https://huggingface.co/papers/2310.04378) by Simian Luo, Yiqin Tan, Longbo Huang, Jian Li, and Hang Zhao.
|
||||
|
||||
The abstract of the paper is as follows:
|
||||
|
||||
@@ -12,10 +12,6 @@ specific language governing permissions and limitations under the License.
|
||||
|
||||
# LEDITS++
|
||||
|
||||
<div class="flex flex-wrap space-x-1">
|
||||
<img alt="LoRA" src="https://img.shields.io/badge/LoRA-d8b4fe?style=flat"/>
|
||||
</div>
|
||||
|
||||
LEDITS++ was proposed in [LEDITS++: Limitless Image Editing using Text-to-Image Models](https://huggingface.co/papers/2311.16711) by Manuel Brack, Felix Friedrich, Katharina Kornmeier, Linoy Tsaban, Patrick Schramowski, Kristian Kersting, Apolinário Passos.
|
||||
|
||||
The abstract from the paper is:
|
||||
|
||||
@@ -14,11 +14,6 @@
|
||||
|
||||
# LTX Video
|
||||
|
||||
<div class="flex flex-wrap space-x-1">
|
||||
<img alt="LoRA" src="https://img.shields.io/badge/LoRA-d8b4fe?style=flat"/>
|
||||
<img alt="MPS" src="https://img.shields.io/badge/MPS-000000?style=flat&logo=apple&logoColor=white%22">
|
||||
</div>
|
||||
|
||||
[LTX Video](https://huggingface.co/Lightricks/LTX-Video) is the first DiT-based video generation model capable of generating high-quality videos in real-time. It produces 24 FPS videos at a 768x512 resolution faster than they can be watched. Trained on a large-scale dataset of diverse videos, the model generates high-resolution videos with realistic and varied content. We provide a model for both text-to-video as well as image + text-to-video usecases.
|
||||
|
||||
<Tip>
|
||||
@@ -33,7 +28,6 @@ Available models:
|
||||
|:-------------:|:-----------------:|
|
||||
| [`LTX Video 0.9.0`](https://huggingface.co/Lightricks/LTX-Video/blob/main/ltx-video-2b-v0.9.safetensors) | `torch.bfloat16` |
|
||||
| [`LTX Video 0.9.1`](https://huggingface.co/Lightricks/LTX-Video/blob/main/ltx-video-2b-v0.9.1.safetensors) | `torch.bfloat16` |
|
||||
| [`LTX Video 0.9.5`](https://huggingface.co/Lightricks/LTX-Video/blob/main/ltx-video-2b-v0.9.5.safetensors) | `torch.bfloat16` |
|
||||
|
||||
Note: The recommended dtype is for the transformer component. The VAE and text encoders can be either `torch.float32`, `torch.bfloat16` or `torch.float16` but the recommended dtype is `torch.bfloat16` as used in the original repository.
|
||||
|
||||
@@ -198,12 +192,6 @@ export_to_video(video, "ship.mp4", fps=24)
|
||||
- all
|
||||
- __call__
|
||||
|
||||
## LTXConditionPipeline
|
||||
|
||||
[[autodoc]] LTXConditionPipeline
|
||||
- all
|
||||
- __call__
|
||||
|
||||
## LTXPipelineOutput
|
||||
|
||||
[[autodoc]] pipelines.ltx.pipeline_output.LTXPipelineOutput
|
||||
|
||||
@@ -58,10 +58,10 @@ Use [`torch.compile`](https://huggingface.co/docs/diffusers/main/en/tutorials/fa
|
||||
First, load the pipeline:
|
||||
|
||||
```python
|
||||
from diffusers import LuminaPipeline
|
||||
from diffusers import LuminaText2ImgPipeline
|
||||
import torch
|
||||
|
||||
pipeline = LuminaPipeline.from_pretrained(
|
||||
pipeline = LuminaText2ImgPipeline.from_pretrained(
|
||||
"Alpha-VLLM/Lumina-Next-SFT-diffusers", torch_dtype=torch.bfloat16
|
||||
).to("cuda")
|
||||
```
|
||||
@@ -86,11 +86,11 @@ image = pipeline(prompt="Upper body of a young woman in a Victorian-era outfit w
|
||||
|
||||
Quantization helps reduce the memory requirements of very large models by storing model weights in a lower precision data type. However, quantization may have varying impact on video quality depending on the video model.
|
||||
|
||||
Refer to the [Quantization](../../quantization/overview) overview to learn more about supported quantization backends and selecting a quantization backend that supports your use case. The example below demonstrates how to load a quantized [`LuminaPipeline`] for inference with bitsandbytes.
|
||||
Refer to the [Quantization](../../quantization/overview) overview to learn more about supported quantization backends and selecting a quantization backend that supports your use case. The example below demonstrates how to load a quantized [`LuminaText2ImgPipeline`] for inference with bitsandbytes.
|
||||
|
||||
```py
|
||||
import torch
|
||||
from diffusers import BitsAndBytesConfig as DiffusersBitsAndBytesConfig, Transformer2DModel, LuminaPipeline
|
||||
from diffusers import BitsAndBytesConfig as DiffusersBitsAndBytesConfig, Transformer2DModel, LuminaText2ImgPipeline
|
||||
from transformers import BitsAndBytesConfig as BitsAndBytesConfig, T5EncoderModel
|
||||
|
||||
quant_config = BitsAndBytesConfig(load_in_8bit=True)
|
||||
@@ -109,7 +109,7 @@ transformer_8bit = Transformer2DModel.from_pretrained(
|
||||
torch_dtype=torch.float16,
|
||||
)
|
||||
|
||||
pipeline = LuminaPipeline.from_pretrained(
|
||||
pipeline = LuminaText2ImgPipeline.from_pretrained(
|
||||
"Alpha-VLLM/Lumina-Next-SFT-diffusers",
|
||||
text_encoder=text_encoder_8bit,
|
||||
transformer=transformer_8bit,
|
||||
@@ -122,9 +122,9 @@ image = pipeline(prompt).images[0]
|
||||
image.save("lumina.png")
|
||||
```
|
||||
|
||||
## LuminaPipeline
|
||||
## LuminaText2ImgPipeline
|
||||
|
||||
[[autodoc]] LuminaPipeline
|
||||
[[autodoc]] LuminaText2ImgPipeline
|
||||
- all
|
||||
- __call__
|
||||
|
||||
|
||||
@@ -14,10 +14,6 @@
|
||||
|
||||
# Lumina2
|
||||
|
||||
<div class="flex flex-wrap space-x-1">
|
||||
<img alt="LoRA" src="https://img.shields.io/badge/LoRA-d8b4fe?style=flat"/>
|
||||
</div>
|
||||
|
||||
[Lumina Image 2.0: A Unified and Efficient Image Generative Model](https://huggingface.co/Alpha-VLLM/Lumina-Image-2.0) is a 2 billion parameter flow-based diffusion transformer capable of generating diverse images from text descriptions.
|
||||
|
||||
The abstract from the paper is:
|
||||
@@ -36,14 +32,14 @@ Single file loading for Lumina Image 2.0 is available for the `Lumina2Transforme
|
||||
|
||||
```python
|
||||
import torch
|
||||
from diffusers import Lumina2Transformer2DModel, Lumina2Pipeline
|
||||
from diffusers import Lumina2Transformer2DModel, Lumina2Text2ImgPipeline
|
||||
|
||||
ckpt_path = "https://huggingface.co/Alpha-VLLM/Lumina-Image-2.0/blob/main/consolidated.00-of-01.pth"
|
||||
transformer = Lumina2Transformer2DModel.from_single_file(
|
||||
ckpt_path, torch_dtype=torch.bfloat16
|
||||
)
|
||||
|
||||
pipe = Lumina2Pipeline.from_pretrained(
|
||||
pipe = Lumina2Text2ImgPipeline.from_pretrained(
|
||||
"Alpha-VLLM/Lumina-Image-2.0", transformer=transformer, torch_dtype=torch.bfloat16
|
||||
)
|
||||
pipe.enable_model_cpu_offload()
|
||||
@@ -60,7 +56,7 @@ image.save("lumina-single-file.png")
|
||||
GGUF Quantized checkpoints for the `Lumina2Transformer2DModel` can be loaded via `from_single_file` with the `GGUFQuantizationConfig`
|
||||
|
||||
```python
|
||||
from diffusers import Lumina2Transformer2DModel, Lumina2Pipeline, GGUFQuantizationConfig
|
||||
from diffusers import Lumina2Transformer2DModel, Lumina2Text2ImgPipeline, GGUFQuantizationConfig
|
||||
|
||||
ckpt_path = "https://huggingface.co/calcuis/lumina-gguf/blob/main/lumina2-q4_0.gguf"
|
||||
transformer = Lumina2Transformer2DModel.from_single_file(
|
||||
@@ -69,7 +65,7 @@ transformer = Lumina2Transformer2DModel.from_single_file(
|
||||
torch_dtype=torch.bfloat16,
|
||||
)
|
||||
|
||||
pipe = Lumina2Pipeline.from_pretrained(
|
||||
pipe = Lumina2Text2ImgPipeline.from_pretrained(
|
||||
"Alpha-VLLM/Lumina-Image-2.0", transformer=transformer, torch_dtype=torch.bfloat16
|
||||
)
|
||||
pipe.enable_model_cpu_offload()
|
||||
@@ -80,8 +76,8 @@ image = pipe(
|
||||
image.save("lumina-gguf.png")
|
||||
```
|
||||
|
||||
## Lumina2Pipeline
|
||||
## Lumina2Text2ImgPipeline
|
||||
|
||||
[[autodoc]] Lumina2Pipeline
|
||||
[[autodoc]] Lumina2Text2ImgPipeline
|
||||
- all
|
||||
- __call__
|
||||
|
||||
@@ -1,6 +1,4 @@
|
||||
<!--
|
||||
Copyright 2023-2025 Marigold Team, ETH Zürich. All rights reserved.
|
||||
Copyright 2024-2025 The HuggingFace Team. All rights reserved.
|
||||
<!--Copyright 2024 Marigold authors and The HuggingFace Team. All rights reserved.
|
||||
|
||||
Licensed under the Apache License, Version 2.0 (the "License"); you may not use this file except in compliance with
|
||||
the License. You may obtain a copy of the License at
|
||||
@@ -12,120 +10,67 @@ an "AS IS" BASIS, WITHOUT WARRANTIES OR CONDITIONS OF ANY KIND, either express o
|
||||
specific language governing permissions and limitations under the License.
|
||||
-->
|
||||
|
||||
# Marigold Computer Vision
|
||||
# Marigold Pipelines for Computer Vision Tasks
|
||||
|
||||
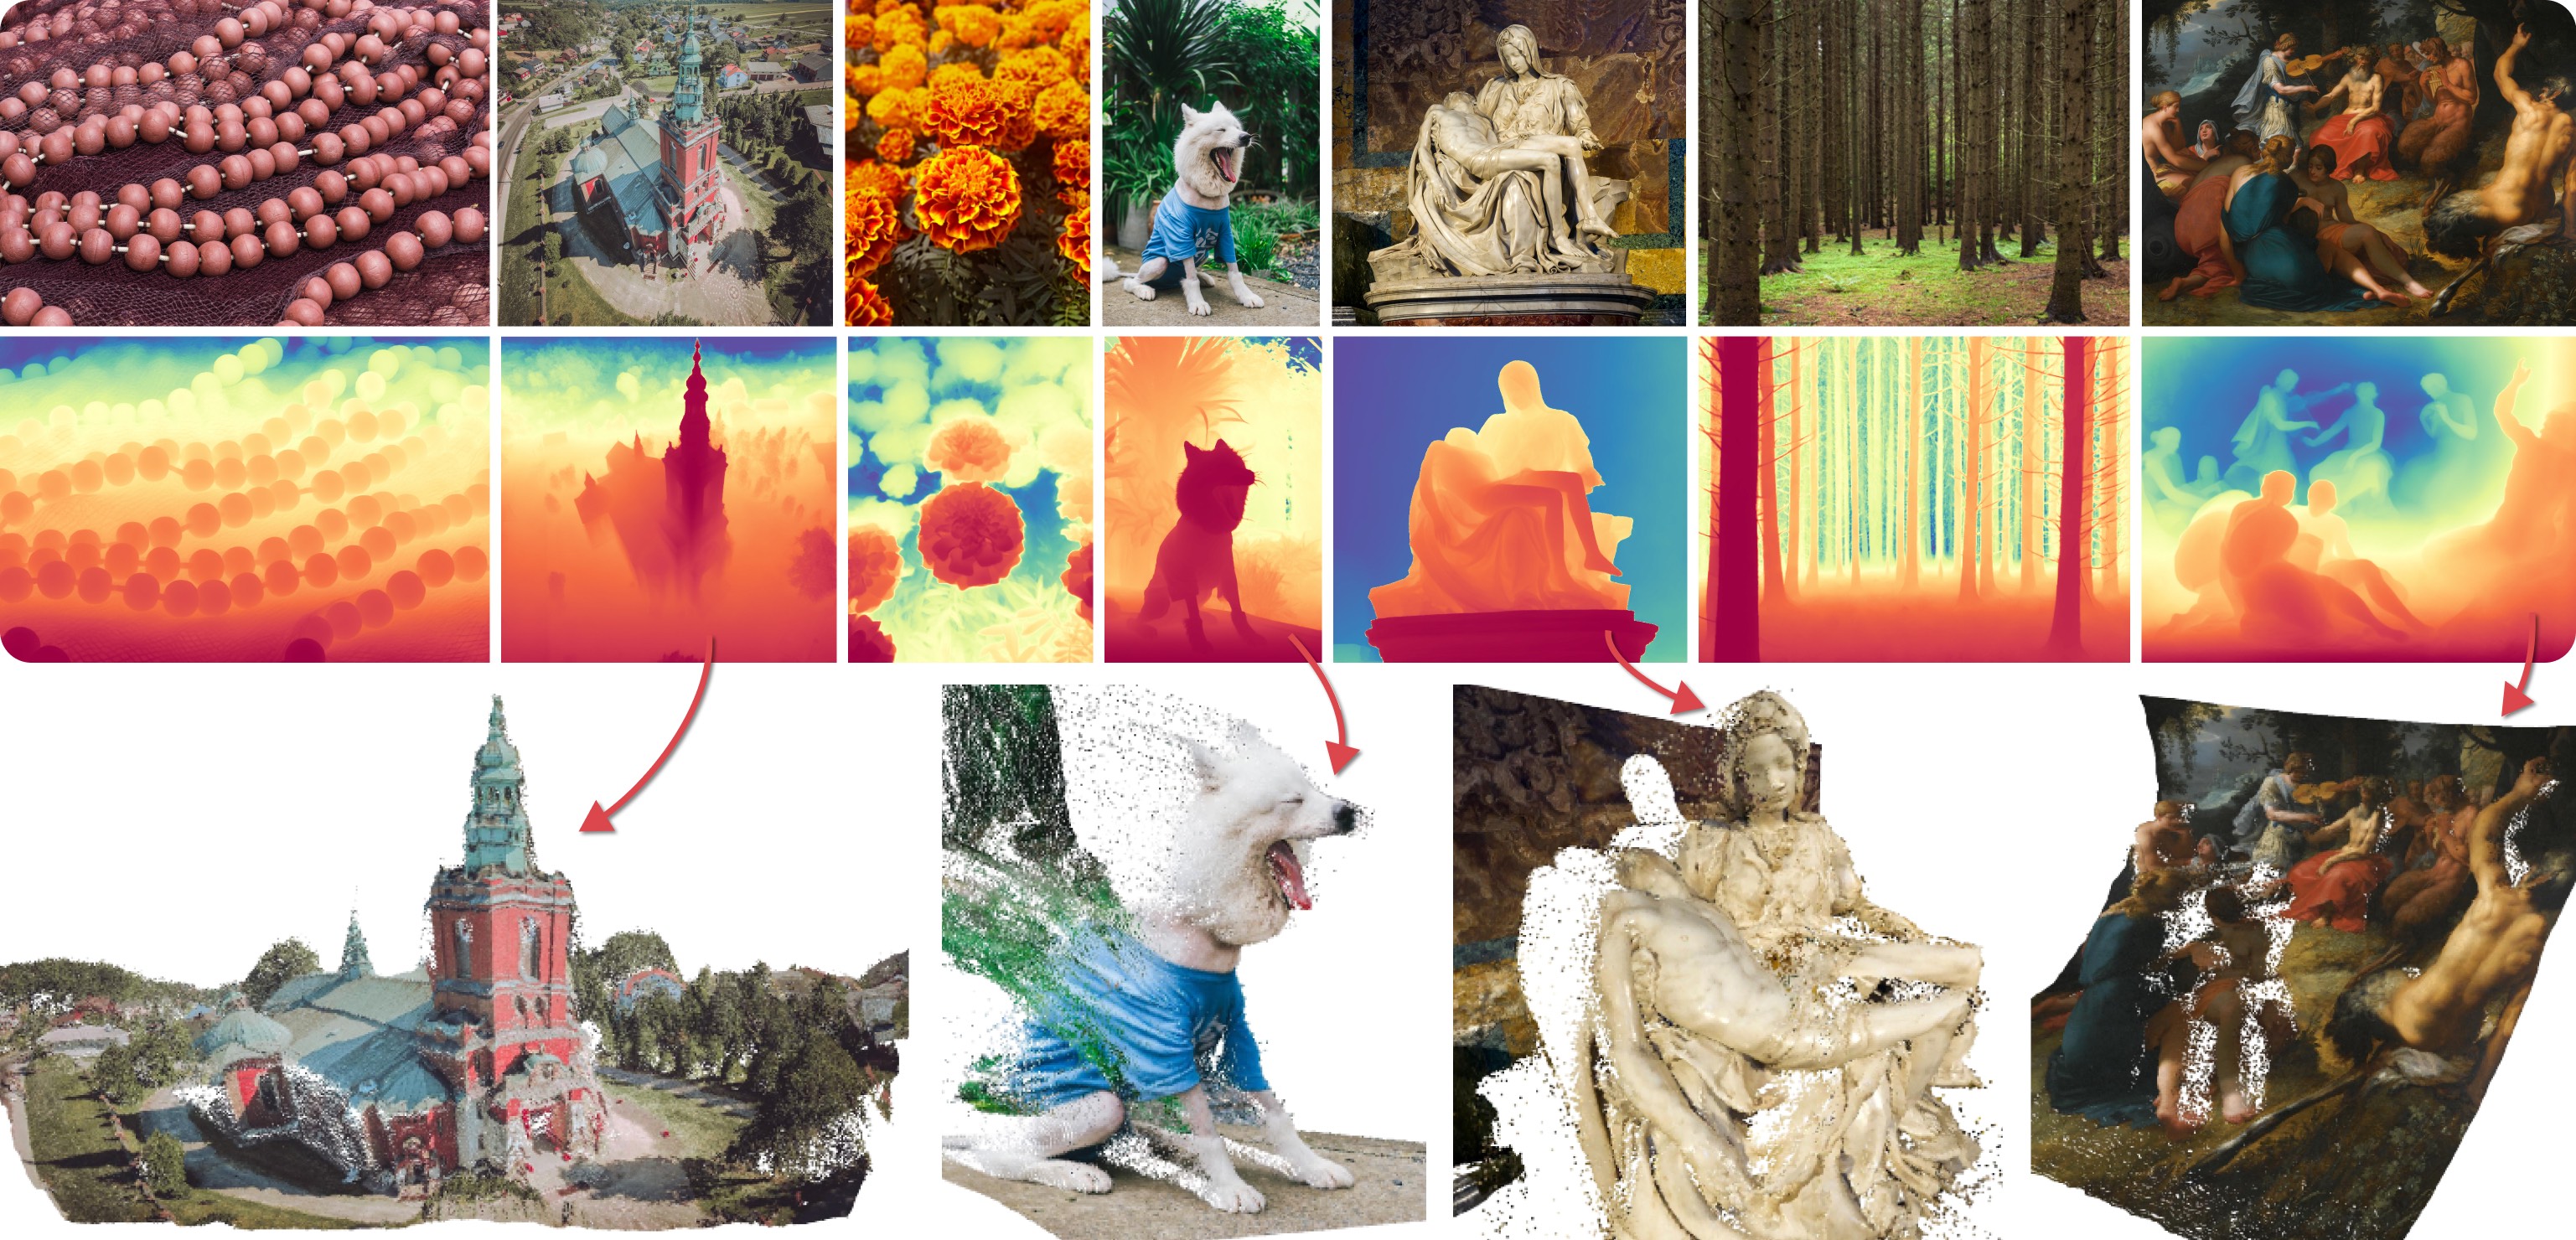
|
||||
|
||||
Marigold was proposed in
|
||||
[Repurposing Diffusion-Based Image Generators for Monocular Depth Estimation](https://huggingface.co/papers/2312.02145),
|
||||
a CVPR 2024 Oral paper by
|
||||
[Bingxin Ke](http://www.kebingxin.com/),
|
||||
[Anton Obukhov](https://www.obukhov.ai/),
|
||||
[Shengyu Huang](https://shengyuh.github.io/),
|
||||
[Nando Metzger](https://nandometzger.github.io/),
|
||||
[Rodrigo Caye Daudt](https://rcdaudt.github.io/), and
|
||||
[Konrad Schindler](https://scholar.google.com/citations?user=FZuNgqIAAAAJ&hl=en).
|
||||
The core idea is to **repurpose the generative prior of Text-to-Image Latent Diffusion Models (LDMs) for traditional
|
||||
computer vision tasks**.
|
||||
This approach was explored by fine-tuning Stable Diffusion for **Monocular Depth Estimation**, as demonstrated in the
|
||||
teaser above.
|
||||
Marigold was proposed in [Repurposing Diffusion-Based Image Generators for Monocular Depth Estimation](https://huggingface.co/papers/2312.02145), a CVPR 2024 Oral paper by [Bingxin Ke](http://www.kebingxin.com/), [Anton Obukhov](https://www.obukhov.ai/), [Shengyu Huang](https://shengyuh.github.io/), [Nando Metzger](https://nandometzger.github.io/), [Rodrigo Caye Daudt](https://rcdaudt.github.io/), and [Konrad Schindler](https://scholar.google.com/citations?user=FZuNgqIAAAAJ&hl=en).
|
||||
The idea is to repurpose the rich generative prior of Text-to-Image Latent Diffusion Models (LDMs) for traditional computer vision tasks.
|
||||
Initially, this idea was explored to fine-tune Stable Diffusion for Monocular Depth Estimation, as shown in the teaser above.
|
||||
Later,
|
||||
- [Tianfu Wang](https://tianfwang.github.io/) trained the first Latent Consistency Model (LCM) of Marigold, which unlocked fast single-step inference;
|
||||
- [Kevin Qu](https://www.linkedin.com/in/kevin-qu-b3417621b/?locale=en_US) extended the approach to Surface Normals Estimation;
|
||||
- [Anton Obukhov](https://www.obukhov.ai/) contributed the pipelines and documentation into diffusers (enabled and supported by [YiYi Xu](https://yiyixuxu.github.io/) and [Sayak Paul](https://sayak.dev/)).
|
||||
|
||||
Marigold was later extended in the follow-up paper,
|
||||
[Marigold: Affordable Adaptation of Diffusion-Based Image Generators for Image Analysis](https://huggingface.co/papers/2312.02145),
|
||||
authored by
|
||||
[Bingxin Ke](http://www.kebingxin.com/),
|
||||
[Kevin Qu](https://www.linkedin.com/in/kevin-qu-b3417621b/?locale=en_US),
|
||||
[Tianfu Wang](https://tianfwang.github.io/),
|
||||
[Nando Metzger](https://nandometzger.github.io/),
|
||||
[Shengyu Huang](https://shengyuh.github.io/),
|
||||
[Bo Li](https://www.linkedin.com/in/bobboli0202/),
|
||||
[Anton Obukhov](https://www.obukhov.ai/), and
|
||||
[Konrad Schindler](https://scholar.google.com/citations?user=FZuNgqIAAAAJ&hl=en).
|
||||
This work expanded Marigold to support new modalities such as **Surface Normals** and **Intrinsic Image Decomposition**
|
||||
(IID), introduced a training protocol for **Latent Consistency Models** (LCM), and demonstrated **High-Resolution** (HR)
|
||||
processing capability.
|
||||
The abstract from the paper is:
|
||||
|
||||
<Tip>
|
||||
|
||||
The early Marigold models (`v1-0` and earlier) were optimized for best results with at least 10 inference steps.
|
||||
LCM models were later developed to enable high-quality inference in just 1 to 4 steps.
|
||||
Marigold models `v1-1` and later use the DDIM scheduler to achieve optimal
|
||||
results in as few as 1 to 4 steps.
|
||||
|
||||
</Tip>
|
||||
*Monocular depth estimation is a fundamental computer vision task. Recovering 3D depth from a single image is geometrically ill-posed and requires scene understanding, so it is not surprising that the rise of deep learning has led to a breakthrough. The impressive progress of monocular depth estimators has mirrored the growth in model capacity, from relatively modest CNNs to large Transformer architectures. Still, monocular depth estimators tend to struggle when presented with images with unfamiliar content and layout, since their knowledge of the visual world is restricted by the data seen during training, and challenged by zero-shot generalization to new domains. This motivates us to explore whether the extensive priors captured in recent generative diffusion models can enable better, more generalizable depth estimation. We introduce Marigold, a method for affine-invariant monocular depth estimation that is derived from Stable Diffusion and retains its rich prior knowledge. The estimator can be fine-tuned in a couple of days on a single GPU using only synthetic training data. It delivers state-of-the-art performance across a wide range of datasets, including over 20% performance gains in specific cases. Project page: https://marigoldmonodepth.github.io.*
|
||||
|
||||
## Available Pipelines
|
||||
|
||||
Each pipeline is tailored for a specific computer vision task, processing an input RGB image and generating a
|
||||
corresponding prediction.
|
||||
Currently, the following computer vision tasks are implemented:
|
||||
Each pipeline supports one Computer Vision task, which takes an input RGB image as input and produces a *prediction* of the modality of interest, such as a depth map of the input image.
|
||||
Currently, the following tasks are implemented:
|
||||
|
||||
| Pipeline | Predicted Modalities | Demos |
|
||||
|---------------------------------------------------------------------------------------------------------------------------------------------|------------------------------------------------------------------------------------------------------------------|:--------------------------------------------------------------------------------------------------------------------------------------------------:|
|
||||
| [MarigoldDepthPipeline](https://github.com/huggingface/diffusers/blob/main/src/diffusers/pipelines/marigold/pipeline_marigold_depth.py) | [Depth](https://en.wikipedia.org/wiki/Depth_map), [Disparity](https://en.wikipedia.org/wiki/Binocular_disparity) | [Fast Demo (LCM)](https://huggingface.co/spaces/prs-eth/marigold-lcm), [Slow Original Demo (DDIM)](https://huggingface.co/spaces/prs-eth/marigold) |
|
||||
| [MarigoldNormalsPipeline](https://github.com/huggingface/diffusers/blob/main/src/diffusers/pipelines/marigold/pipeline_marigold_normals.py) | [Surface normals](https://en.wikipedia.org/wiki/Normal_mapping) | [Fast Demo (LCM)](https://huggingface.co/spaces/prs-eth/marigold-normals-lcm) |
|
||||
|
||||
| Pipeline | Recommended Model Checkpoints | Spaces (Interactive Apps) | Predicted Modalities |
|
||||
|---------------------------------------------------------------------------------------------------------------------------------------------------|---------------------------------------------------------------------------------------------------------------------------------------------------------------------------------------------------------|:------------------------------------------------------------------------------------:|------------------------------------------------------------------------------------------------------------------------------------------------------------------------------------|
|
||||
| [MarigoldDepthPipeline](https://github.com/huggingface/diffusers/blob/main/src/diffusers/pipelines/marigold/pipeline_marigold_depth.py) | [prs-eth/marigold-depth-v1-1](https://huggingface.co/prs-eth/marigold-depth-v1-1) | [Depth Estimation](https://huggingface.co/spaces/prs-eth/marigold) | [Depth](https://en.wikipedia.org/wiki/Depth_map), [Disparity](https://en.wikipedia.org/wiki/Binocular_disparity) |
|
||||
| [MarigoldNormalsPipeline](https://github.com/huggingface/diffusers/blob/main/src/diffusers/pipelines/marigold/pipeline_marigold_normals.py) | [prs-eth/marigold-normals-v1-1](https://huggingface.co/prs-eth/marigold-normals-v1-1) | [Surface Normals Estimation](https://huggingface.co/spaces/prs-eth/marigold-normals) | [Surface normals](https://en.wikipedia.org/wiki/Normal_mapping) |
|
||||
| [MarigoldIntrinsicsPipeline](https://github.com/huggingface/diffusers/blob/main/src/diffusers/pipelines/marigold/pipeline_marigold_intrinsics.py) | [prs-eth/marigold-iid-appearance-v1-1](https://huggingface.co/prs-eth/marigold-iid-appearance-v1-1),<br>[prs-eth/marigold-iid-lighting-v1-1](https://huggingface.co/prs-eth/marigold-iid-lighting-v1-1) | [Intrinsic Image Decomposition](https://huggingface.co/spaces/prs-eth/marigold-iid) | [Albedo](https://en.wikipedia.org/wiki/Albedo), [Materials](https://www.n.aiq3d.com/wiki/roughnessmetalnessao-map), [Lighting](https://en.wikipedia.org/wiki/Diffuse_reflection) |
|
||||
|
||||
## Available Checkpoints
|
||||
|
||||
All original checkpoints are available under the [PRS-ETH](https://huggingface.co/prs-eth/) organization on Hugging Face.
|
||||
They are designed for use with diffusers pipelines and the [original codebase](https://github.com/prs-eth/marigold), which can also be used to train
|
||||
new model checkpoints.
|
||||
The following is a summary of the recommended checkpoints, all of which produce reliable results with 1 to 4 steps.
|
||||
|
||||
| Checkpoint | Modality | Comment |
|
||||
|-----------------------------------------------------------------------------------------------------|--------------|--------------------------------------------------------------------------------------------------------------------------------------------------------------------------------------|
|
||||
| [prs-eth/marigold-depth-v1-1](https://huggingface.co/prs-eth/marigold-depth-v1-1) | Depth | Affine-invariant depth prediction assigns each pixel a value between 0 (near plane) and 1 (far plane), with both planes determined by the model during inference. |
|
||||
| [prs-eth/marigold-normals-v0-1](https://huggingface.co/prs-eth/marigold-normals-v0-1) | Normals | The surface normals predictions are unit-length 3D vectors in the screen space camera, with values in the range from -1 to 1. |
|
||||
| [prs-eth/marigold-iid-appearance-v1-1](https://huggingface.co/prs-eth/marigold-iid-appearance-v1-1) | Intrinsics | InteriorVerse decomposition is comprised of Albedo and two BRDF material properties: Roughness and Metallicity. |
|
||||
| [prs-eth/marigold-iid-lighting-v1-1](https://huggingface.co/prs-eth/marigold-iid-lighting-v1-1) | Intrinsics | HyperSim decomposition of an image  \\(I\\)  is comprised of Albedo  \\(A\\), Diffuse shading  \\(S\\), and Non-diffuse residual  \\(R\\):  \\(I = A*S+R\\). |
|
||||
The original checkpoints can be found under the [PRS-ETH](https://huggingface.co/prs-eth/) Hugging Face organization.
|
||||
|
||||
<Tip>
|
||||
|
||||
Make sure to check out the Schedulers [guide](../../using-diffusers/schedulers) to learn how to explore the tradeoff
|
||||
between scheduler speed and quality, and see the [reuse components across pipelines](../../using-diffusers/loading#reuse-a-pipeline) section to learn how to
|
||||
efficiently load the same components into multiple pipelines.
|
||||
Also, to know more about reducing the memory usage of this pipeline, refer to the ["Reduce memory usage"] section
|
||||
[here](../../using-diffusers/svd#reduce-memory-usage).
|
||||
Make sure to check out the Schedulers [guide](../../using-diffusers/schedulers) to learn how to explore the tradeoff between scheduler speed and quality, and see the [reuse components across pipelines](../../using-diffusers/loading#reuse-a-pipeline) section to learn how to efficiently load the same components into multiple pipelines. Also, to know more about reducing the memory usage of this pipeline, refer to the ["Reduce memory usage"] section [here](../../using-diffusers/svd#reduce-memory-usage).
|
||||
|
||||
</Tip>
|
||||
|
||||
<Tip warning={true}>
|
||||
|
||||
Marigold pipelines were designed and tested with the scheduler embedded in the model checkpoint.
|
||||
The optimal number of inference steps varies by scheduler, with no universal value that works best across all cases.
|
||||
To accommodate this, the `num_inference_steps` parameter in the pipeline's `__call__` method defaults to `None` (see the
|
||||
API reference).
|
||||
Unless set explicitly, it inherits the value from the `default_denoising_steps` field in the checkpoint configuration
|
||||
file (`model_index.json`).
|
||||
This ensures high-quality predictions when invoking the pipeline with only the `image` argument.
|
||||
Marigold pipelines were designed and tested only with `DDIMScheduler` and `LCMScheduler`.
|
||||
Depending on the scheduler, the number of inference steps required to get reliable predictions varies, and there is no universal value that works best across schedulers.
|
||||
Because of that, the default value of `num_inference_steps` in the `__call__` method of the pipeline is set to `None` (see the API reference).
|
||||
Unless set explicitly, its value will be taken from the checkpoint configuration `model_index.json`.
|
||||
This is done to ensure high-quality predictions when calling the pipeline with just the `image` argument.
|
||||
|
||||
</Tip>
|
||||
|
||||
See also Marigold [usage examples](../../using-diffusers/marigold_usage).
|
||||
|
||||
## Marigold Depth Prediction API
|
||||
See also Marigold [usage examples](marigold_usage).
|
||||
|
||||
## MarigoldDepthPipeline
|
||||
[[autodoc]] MarigoldDepthPipeline
|
||||
- all
|
||||
- __call__
|
||||
|
||||
## MarigoldNormalsPipeline
|
||||
[[autodoc]] MarigoldNormalsPipeline
|
||||
- all
|
||||
- __call__
|
||||
|
||||
## MarigoldDepthOutput
|
||||
[[autodoc]] pipelines.marigold.pipeline_marigold_depth.MarigoldDepthOutput
|
||||
|
||||
[[autodoc]] pipelines.marigold.marigold_image_processing.MarigoldImageProcessor.visualize_depth
|
||||
|
||||
## Marigold Normals Estimation API
|
||||
[[autodoc]] MarigoldNormalsPipeline
|
||||
- __call__
|
||||
|
||||
[[autodoc]] pipelines.marigold.pipeline_marigold_normals.MarigoldNormalsOutput
|
||||
|
||||
[[autodoc]] pipelines.marigold.marigold_image_processing.MarigoldImageProcessor.visualize_normals
|
||||
|
||||
## Marigold Intrinsic Image Decomposition API
|
||||
|
||||
[[autodoc]] MarigoldIntrinsicsPipeline
|
||||
- __call__
|
||||
|
||||
[[autodoc]] pipelines.marigold.pipeline_marigold_intrinsics.MarigoldIntrinsicsOutput
|
||||
|
||||
[[autodoc]] pipelines.marigold.marigold_image_processing.MarigoldImageProcessor.visualize_intrinsics
|
||||
## MarigoldNormalsOutput
|
||||
[[autodoc]] pipelines.marigold.pipeline_marigold_normals.MarigoldNormalsOutput
|
||||
@@ -15,10 +15,6 @@
|
||||
|
||||
# Mochi 1 Preview
|
||||
|
||||
<div class="flex flex-wrap space-x-1">
|
||||
<img alt="LoRA" src="https://img.shields.io/badge/LoRA-d8b4fe?style=flat"/>
|
||||
</div>
|
||||
|
||||
> [!TIP]
|
||||
> Only a research preview of the model weights is available at the moment.
|
||||
|
||||
|
||||
@@ -65,7 +65,7 @@ The table below lists all the pipelines currently available in 🤗 Diffusers an
|
||||
| [Latte](latte) | text2image |
|
||||
| [LEDITS++](ledits_pp) | image editing |
|
||||
| [Lumina-T2X](lumina) | text2image |
|
||||
| [Marigold](marigold) | depth-estimation, normals-estimation, intrinsic-decomposition |
|
||||
| [Marigold](marigold) | depth |
|
||||
| [MultiDiffusion](panorama) | text2image |
|
||||
| [MusicLDM](musicldm) | text2audio |
|
||||
| [PAG](pag) | text2image |
|
||||
|
||||
@@ -12,10 +12,6 @@ specific language governing permissions and limitations under the License.
|
||||
|
||||
# Perturbed-Attention Guidance
|
||||
|
||||
<div class="flex flex-wrap space-x-1">
|
||||
<img alt="LoRA" src="https://img.shields.io/badge/LoRA-d8b4fe?style=flat"/>
|
||||
</div>
|
||||
|
||||
[Perturbed-Attention Guidance (PAG)](https://ku-cvlab.github.io/Perturbed-Attention-Guidance/) is a new diffusion sampling guidance that improves sample quality across both unconditional and conditional settings, achieving this without requiring further training or the integration of external modules.
|
||||
|
||||
PAG was introduced in [Self-Rectifying Diffusion Sampling with Perturbed-Attention Guidance](https://huggingface.co/papers/2403.17377) by Donghoon Ahn, Hyoungwon Cho, Jaewon Min, Wooseok Jang, Jungwoo Kim, SeonHwa Kim, Hyun Hee Park, Kyong Hwan Jin and Seungryong Kim.
|
||||
|
||||
@@ -12,10 +12,6 @@ specific language governing permissions and limitations under the License.
|
||||
|
||||
# MultiDiffusion
|
||||
|
||||
<div class="flex flex-wrap space-x-1">
|
||||
<img alt="LoRA" src="https://img.shields.io/badge/LoRA-d8b4fe?style=flat"/>
|
||||
</div>
|
||||
|
||||
[MultiDiffusion: Fusing Diffusion Paths for Controlled Image Generation](https://huggingface.co/papers/2302.08113) is by Omer Bar-Tal, Lior Yariv, Yaron Lipman, and Tali Dekel.
|
||||
|
||||
The abstract from the paper is:
|
||||
|
||||
@@ -12,10 +12,6 @@ specific language governing permissions and limitations under the License.
|
||||
|
||||
# Image-to-Video Generation with PIA (Personalized Image Animator)
|
||||
|
||||
<div class="flex flex-wrap space-x-1">
|
||||
<img alt="LoRA" src="https://img.shields.io/badge/LoRA-d8b4fe?style=flat"/>
|
||||
</div>
|
||||
|
||||
## Overview
|
||||
|
||||
[PIA: Your Personalized Image Animator via Plug-and-Play Modules in Text-to-Image Models](https://arxiv.org/abs/2312.13964) by Yiming Zhang, Zhening Xing, Yanhong Zeng, Youqing Fang, Kai Chen
|
||||
|
||||
@@ -12,10 +12,6 @@ specific language governing permissions and limitations under the License.
|
||||
|
||||
# InstructPix2Pix
|
||||
|
||||
<div class="flex flex-wrap space-x-1">
|
||||
<img alt="LoRA" src="https://img.shields.io/badge/LoRA-d8b4fe?style=flat"/>
|
||||
</div>
|
||||
|
||||
[InstructPix2Pix: Learning to Follow Image Editing Instructions](https://huggingface.co/papers/2211.09800) is by Tim Brooks, Aleksander Holynski and Alexei A. Efros.
|
||||
|
||||
The abstract from the paper is:
|
||||
|
||||
@@ -14,11 +14,6 @@
|
||||
|
||||
# SanaPipeline
|
||||
|
||||
<div class="flex flex-wrap space-x-1">
|
||||
<img alt="LoRA" src="https://img.shields.io/badge/LoRA-d8b4fe?style=flat"/>
|
||||
<img alt="MPS" src="https://img.shields.io/badge/MPS-000000?style=flat&logo=apple&logoColor=white%22">
|
||||
</div>
|
||||
|
||||
[SANA: Efficient High-Resolution Image Synthesis with Linear Diffusion Transformers](https://huggingface.co/papers/2410.10629) from NVIDIA and MIT HAN Lab, by Enze Xie, Junsong Chen, Junyu Chen, Han Cai, Haotian Tang, Yujun Lin, Zhekai Zhang, Muyang Li, Ligeng Zhu, Yao Lu, Song Han.
|
||||
|
||||
The abstract from the paper is:
|
||||
|
||||
@@ -1,100 +0,0 @@
|
||||
<!-- Copyright 2024 The HuggingFace Team. All rights reserved.
|
||||
#
|
||||
# Licensed under the Apache License, Version 2.0 (the "License");
|
||||
# you may not use this file except in compliance with the License.
|
||||
# You may obtain a copy of the License at
|
||||
#
|
||||
# http://www.apache.org/licenses/LICENSE-2.0
|
||||
#
|
||||
# Unless required by applicable law or agreed to in writing, software
|
||||
# distributed under the License is distributed on an "AS IS" BASIS,
|
||||
# WITHOUT WARRANTIES OR CONDITIONS OF ANY KIND, either express or implied.
|
||||
# See the License for the specific language governing permissions and
|
||||
# limitations under the License. -->
|
||||
|
||||
# SANA-Sprint
|
||||
|
||||
<div class="flex flex-wrap space-x-1">
|
||||
<img alt="LoRA" src="https://img.shields.io/badge/LoRA-d8b4fe?style=flat"/>
|
||||
</div>
|
||||
|
||||
[SANA-Sprint: One-Step Diffusion with Continuous-Time Consistency Distillation](https://huggingface.co/papers/2503.09641) from NVIDIA, MIT HAN Lab, and Hugging Face by Junsong Chen, Shuchen Xue, Yuyang Zhao, Jincheng Yu, Sayak Paul, Junyu Chen, Han Cai, Enze Xie, Song Han
|
||||
|
||||
The abstract from the paper is:
|
||||
|
||||
*This paper presents SANA-Sprint, an efficient diffusion model for ultra-fast text-to-image (T2I) generation. SANA-Sprint is built on a pre-trained foundation model and augmented with hybrid distillation, dramatically reducing inference steps from 20 to 1-4. We introduce three key innovations: (1) We propose a training-free approach that transforms a pre-trained flow-matching model for continuous-time consistency distillation (sCM), eliminating costly training from scratch and achieving high training efficiency. Our hybrid distillation strategy combines sCM with latent adversarial distillation (LADD): sCM ensures alignment with the teacher model, while LADD enhances single-step generation fidelity. (2) SANA-Sprint is a unified step-adaptive model that achieves high-quality generation in 1-4 steps, eliminating step-specific training and improving efficiency. (3) We integrate ControlNet with SANA-Sprint for real-time interactive image generation, enabling instant visual feedback for user interaction. SANA-Sprint establishes a new Pareto frontier in speed-quality tradeoffs, achieving state-of-the-art performance with 7.59 FID and 0.74 GenEval in only 1 step — outperforming FLUX-schnell (7.94 FID / 0.71 GenEval) while being 10× faster (0.1s vs 1.1s on H100). It also achieves 0.1s (T2I) and 0.25s (ControlNet) latency for 1024×1024 images on H100, and 0.31s (T2I) on an RTX 4090, showcasing its exceptional efficiency and potential for AI-powered consumer applications (AIPC). Code and pre-trained models will be open-sourced.*
|
||||
|
||||
<Tip>
|
||||
|
||||
Make sure to check out the Schedulers [guide](../../using-diffusers/schedulers) to learn how to explore the tradeoff between scheduler speed and quality, and see the [reuse components across pipelines](../../using-diffusers/loading#reuse-a-pipeline) section to learn how to efficiently load the same components into multiple pipelines.
|
||||
|
||||
</Tip>
|
||||
|
||||
This pipeline was contributed by [lawrence-cj](https://github.com/lawrence-cj), [shuchen Xue](https://github.com/scxue) and [Enze Xie](https://github.com/xieenze). The original codebase can be found [here](https://github.com/NVlabs/Sana). The original weights can be found under [hf.co/Efficient-Large-Model](https://huggingface.co/Efficient-Large-Model/).
|
||||
|
||||
Available models:
|
||||
|
||||
| Model | Recommended dtype |
|
||||
|:-------------------------------------------------------------------------------------------------------------------------------------------:|:-----------------:|
|
||||
| [`Efficient-Large-Model/Sana_Sprint_1.6B_1024px_diffusers`](https://huggingface.co/Efficient-Large-Model/Sana_Sprint_1.6B_1024px_diffusers) | `torch.bfloat16` |
|
||||
| [`Efficient-Large-Model/Sana_Sprint_0.6B_1024px_diffusers`](https://huggingface.co/Efficient-Large-Model/Sana_Sprint_0.6B_1024px_diffusers) | `torch.bfloat16` |
|
||||
|
||||
Refer to [this](https://huggingface.co/collections/Efficient-Large-Model/sana-sprint-67d6810d65235085b3b17c76) collection for more information.
|
||||
|
||||
Note: The recommended dtype mentioned is for the transformer weights. The text encoder must stay in `torch.bfloat16` and VAE weights must stay in `torch.bfloat16` or `torch.float32` for the model to work correctly. Please refer to the inference example below to see how to load the model with the recommended dtype.
|
||||
|
||||
|
||||
## Quantization
|
||||
|
||||
Quantization helps reduce the memory requirements of very large models by storing model weights in a lower precision data type. However, quantization may have varying impact on video quality depending on the video model.
|
||||
|
||||
Refer to the [Quantization](../../quantization/overview) overview to learn more about supported quantization backends and selecting a quantization backend that supports your use case. The example below demonstrates how to load a quantized [`SanaSprintPipeline`] for inference with bitsandbytes.
|
||||
|
||||
```py
|
||||
import torch
|
||||
from diffusers import BitsAndBytesConfig as DiffusersBitsAndBytesConfig, SanaTransformer2DModel, SanaSprintPipeline
|
||||
from transformers import BitsAndBytesConfig as BitsAndBytesConfig, AutoModel
|
||||
|
||||
quant_config = BitsAndBytesConfig(load_in_8bit=True)
|
||||
text_encoder_8bit = AutoModel.from_pretrained(
|
||||
"Efficient-Large-Model/Sana_Sprint_1.6B_1024px_diffusers",
|
||||
subfolder="text_encoder",
|
||||
quantization_config=quant_config,
|
||||
torch_dtype=torch.bfloat16,
|
||||
)
|
||||
|
||||
quant_config = DiffusersBitsAndBytesConfig(load_in_8bit=True)
|
||||
transformer_8bit = SanaTransformer2DModel.from_pretrained(
|
||||
"Efficient-Large-Model/Sana_Sprint_1.6B_1024px_diffusers",
|
||||
subfolder="transformer",
|
||||
quantization_config=quant_config,
|
||||
torch_dtype=torch.bfloat16,
|
||||
)
|
||||
|
||||
pipeline = SanaSprintPipeline.from_pretrained(
|
||||
"Efficient-Large-Model/Sana_Sprint_1.6B_1024px_diffusers",
|
||||
text_encoder=text_encoder_8bit,
|
||||
transformer=transformer_8bit,
|
||||
torch_dtype=torch.bfloat16,
|
||||
device_map="balanced",
|
||||
)
|
||||
|
||||
prompt = "a tiny astronaut hatching from an egg on the moon"
|
||||
image = pipeline(prompt).images[0]
|
||||
image.save("sana.png")
|
||||
```
|
||||
|
||||
## Setting `max_timesteps`
|
||||
|
||||
Users can tweak the `max_timesteps` value for experimenting with the visual quality of the generated outputs. The default `max_timesteps` value was obtained with an inference-time search process. For more details about it, check out the paper.
|
||||
|
||||
## SanaSprintPipeline
|
||||
|
||||
[[autodoc]] SanaSprintPipeline
|
||||
- all
|
||||
- __call__
|
||||
|
||||
|
||||
## SanaPipelineOutput
|
||||
|
||||
[[autodoc]] pipelines.sana.pipeline_output.SanaPipelineOutput
|
||||
@@ -12,10 +12,6 @@ specific language governing permissions and limitations under the License.
|
||||
|
||||
# Depth-to-image
|
||||
|
||||
<div class="flex flex-wrap space-x-1">
|
||||
<img alt="LoRA" src="https://img.shields.io/badge/LoRA-d8b4fe?style=flat"/>
|
||||
</div>
|
||||
|
||||
The Stable Diffusion model can also infer depth based on an image using [MiDaS](https://github.com/isl-org/MiDaS). This allows you to pass a text prompt and an initial image to condition the generation of new images as well as a `depth_map` to preserve the image structure.
|
||||
|
||||
<Tip>
|
||||
|
||||
@@ -12,10 +12,6 @@ specific language governing permissions and limitations under the License.
|
||||
|
||||
# Image-to-image
|
||||
|
||||
<div class="flex flex-wrap space-x-1">
|
||||
<img alt="LoRA" src="https://img.shields.io/badge/LoRA-d8b4fe?style=flat"/>
|
||||
</div>
|
||||
|
||||
The Stable Diffusion model can also be applied to image-to-image generation by passing a text prompt and an initial image to condition the generation of new images.
|
||||
|
||||
The [`StableDiffusionImg2ImgPipeline`] uses the diffusion-denoising mechanism proposed in [SDEdit: Guided Image Synthesis and Editing with Stochastic Differential Equations](https://huggingface.co/papers/2108.01073) by Chenlin Meng, Yutong He, Yang Song, Jiaming Song, Jiajun Wu, Jun-Yan Zhu, Stefano Ermon.
|
||||
|
||||
@@ -12,10 +12,6 @@ specific language governing permissions and limitations under the License.
|
||||
|
||||
# Inpainting
|
||||
|
||||
<div class="flex flex-wrap space-x-1">
|
||||
<img alt="LoRA" src="https://img.shields.io/badge/LoRA-d8b4fe?style=flat"/>
|
||||
</div>
|
||||
|
||||
The Stable Diffusion model can also be applied to inpainting which lets you edit specific parts of an image by providing a mask and a text prompt using Stable Diffusion.
|
||||
|
||||
## Tips
|
||||
|
||||
@@ -12,10 +12,6 @@ specific language governing permissions and limitations under the License.
|
||||
|
||||
# Text-to-(RGB, depth)
|
||||
|
||||
<div class="flex flex-wrap space-x-1">
|
||||
<img alt="LoRA" src="https://img.shields.io/badge/LoRA-d8b4fe?style=flat"/>
|
||||
</div>
|
||||
|
||||
LDM3D was proposed in [LDM3D: Latent Diffusion Model for 3D](https://huggingface.co/papers/2305.10853) by Gabriela Ben Melech Stan, Diana Wofk, Scottie Fox, Alex Redden, Will Saxton, Jean Yu, Estelle Aflalo, Shao-Yen Tseng, Fabio Nonato, Matthias Muller, and Vasudev Lal. LDM3D generates an image and a depth map from a given text prompt unlike the existing text-to-image diffusion models such as [Stable Diffusion](./overview) which only generates an image. With almost the same number of parameters, LDM3D achieves to create a latent space that can compress both the RGB images and the depth maps.
|
||||
|
||||
Two checkpoints are available for use:
|
||||
|
||||
@@ -12,10 +12,6 @@ specific language governing permissions and limitations under the License.
|
||||
|
||||
# Stable Diffusion pipelines
|
||||
|
||||
<div class="flex flex-wrap space-x-1">
|
||||
<img alt="LoRA" src="https://img.shields.io/badge/LoRA-d8b4fe?style=flat"/>
|
||||
</div>
|
||||
|
||||
Stable Diffusion is a text-to-image latent diffusion model created by the researchers and engineers from [CompVis](https://github.com/CompVis), [Stability AI](https://stability.ai/) and [LAION](https://laion.ai/). Latent diffusion applies the diffusion process over a lower dimensional latent space to reduce memory and compute complexity. This specific type of diffusion model was proposed in [High-Resolution Image Synthesis with Latent Diffusion Models](https://huggingface.co/papers/2112.10752) by Robin Rombach, Andreas Blattmann, Dominik Lorenz, Patrick Esser, Björn Ommer.
|
||||
|
||||
Stable Diffusion is trained on 512x512 images from a subset of the LAION-5B dataset. This model uses a frozen CLIP ViT-L/14 text encoder to condition the model on text prompts. With its 860M UNet and 123M text encoder, the model is relatively lightweight and can run on consumer GPUs.
|
||||
|
||||
@@ -12,11 +12,6 @@ specific language governing permissions and limitations under the License.
|
||||
|
||||
# Stable Diffusion 3
|
||||
|
||||
<div class="flex flex-wrap space-x-1">
|
||||
<img alt="LoRA" src="https://img.shields.io/badge/LoRA-d8b4fe?style=flat"/>
|
||||
<img alt="MPS" src="https://img.shields.io/badge/MPS-000000?style=flat&logo=apple&logoColor=white%22">
|
||||
</div>
|
||||
|
||||
Stable Diffusion 3 (SD3) was proposed in [Scaling Rectified Flow Transformers for High-Resolution Image Synthesis](https://arxiv.org/pdf/2403.03206.pdf) by Patrick Esser, Sumith Kulal, Andreas Blattmann, Rahim Entezari, Jonas Muller, Harry Saini, Yam Levi, Dominik Lorenz, Axel Sauer, Frederic Boesel, Dustin Podell, Tim Dockhorn, Zion English, Kyle Lacey, Alex Goodwin, Yannik Marek, and Robin Rombach.
|
||||
|
||||
The abstract from the paper is:
|
||||
|
||||
@@ -12,11 +12,6 @@ specific language governing permissions and limitations under the License.
|
||||
|
||||
# Stable Diffusion XL
|
||||
|
||||
<div class="flex flex-wrap space-x-1">
|
||||
<img alt="LoRA" src="https://img.shields.io/badge/LoRA-d8b4fe?style=flat"/>
|
||||
<img alt="MPS" src="https://img.shields.io/badge/MPS-000000?style=flat&logo=apple&logoColor=white%22">
|
||||
</div>
|
||||
|
||||
Stable Diffusion XL (SDXL) was proposed in [SDXL: Improving Latent Diffusion Models for High-Resolution Image Synthesis](https://huggingface.co/papers/2307.01952) by Dustin Podell, Zion English, Kyle Lacey, Andreas Blattmann, Tim Dockhorn, Jonas Müller, Joe Penna, and Robin Rombach.
|
||||
|
||||
The abstract from the paper is:
|
||||
|
||||
@@ -12,10 +12,6 @@ specific language governing permissions and limitations under the License.
|
||||
|
||||
# Text-to-image
|
||||
|
||||
<div class="flex flex-wrap space-x-1">
|
||||
<img alt="LoRA" src="https://img.shields.io/badge/LoRA-d8b4fe?style=flat"/>
|
||||
</div>
|
||||
|
||||
The Stable Diffusion model was created by researchers and engineers from [CompVis](https://github.com/CompVis), [Stability AI](https://stability.ai/), [Runway](https://github.com/runwayml), and [LAION](https://laion.ai/). The [`StableDiffusionPipeline`] is capable of generating photorealistic images given any text input. It's trained on 512x512 images from a subset of the LAION-5B dataset. This model uses a frozen CLIP ViT-L/14 text encoder to condition the model on text prompts. With its 860M UNet and 123M text encoder, the model is relatively lightweight and can run on consumer GPUs. Latent diffusion is the research on top of which Stable Diffusion was built. It was proposed in [High-Resolution Image Synthesis with Latent Diffusion Models](https://huggingface.co/papers/2112.10752) by Robin Rombach, Andreas Blattmann, Dominik Lorenz, Patrick Esser, Björn Ommer.
|
||||
|
||||
The abstract from the paper is:
|
||||
|
||||
@@ -12,10 +12,6 @@ specific language governing permissions and limitations under the License.
|
||||
|
||||
# Super-resolution
|
||||
|
||||
<div class="flex flex-wrap space-x-1">
|
||||
<img alt="LoRA" src="https://img.shields.io/badge/LoRA-d8b4fe?style=flat"/>
|
||||
</div>
|
||||
|
||||
The Stable Diffusion upscaler diffusion model was created by the researchers and engineers from [CompVis](https://github.com/CompVis), [Stability AI](https://stability.ai/), and [LAION](https://laion.ai/). It is used to enhance the resolution of input images by a factor of 4.
|
||||
|
||||
<Tip>
|
||||
|
||||
@@ -12,10 +12,6 @@ specific language governing permissions and limitations under the License.
|
||||
|
||||
# Stable unCLIP
|
||||
|
||||
<div class="flex flex-wrap space-x-1">
|
||||
<img alt="LoRA" src="https://img.shields.io/badge/LoRA-d8b4fe?style=flat"/>
|
||||
</div>
|
||||
|
||||
Stable unCLIP checkpoints are finetuned from [Stable Diffusion 2.1](./stable_diffusion/stable_diffusion_2) checkpoints to condition on CLIP image embeddings.
|
||||
Stable unCLIP still conditions on text embeddings. Given the two separate conditionings, stable unCLIP can be used
|
||||
for text guided image variation. When combined with an unCLIP prior, it can also be used for full text to image generation.
|
||||
|
||||
@@ -18,10 +18,6 @@ specific language governing permissions and limitations under the License.
|
||||
|
||||
# Text-to-video
|
||||
|
||||
<div class="flex flex-wrap space-x-1">
|
||||
<img alt="LoRA" src="https://img.shields.io/badge/LoRA-d8b4fe?style=flat"/>
|
||||
</div>
|
||||
|
||||
[ModelScope Text-to-Video Technical Report](https://arxiv.org/abs/2308.06571) is by Jiuniu Wang, Hangjie Yuan, Dayou Chen, Yingya Zhang, Xiang Wang, Shiwei Zhang.
|
||||
|
||||
The abstract from the paper is:
|
||||
|
||||
@@ -12,10 +12,6 @@ specific language governing permissions and limitations under the License.
|
||||
|
||||
# Text2Video-Zero
|
||||
|
||||
<div class="flex flex-wrap space-x-1">
|
||||
<img alt="LoRA" src="https://img.shields.io/badge/LoRA-d8b4fe?style=flat"/>
|
||||
</div>
|
||||
|
||||
[Text2Video-Zero: Text-to-Image Diffusion Models are Zero-Shot Video Generators](https://huggingface.co/papers/2303.13439) is by Levon Khachatryan, Andranik Movsisyan, Vahram Tadevosyan, Roberto Henschel, [Zhangyang Wang](https://www.ece.utexas.edu/people/faculty/atlas-wang), Shant Navasardyan, [Humphrey Shi](https://www.humphreyshi.com).
|
||||
|
||||
Text2Video-Zero enables zero-shot video generation using either:
|
||||
|
||||
@@ -12,10 +12,6 @@ specific language governing permissions and limitations under the License.
|
||||
|
||||
# UniDiffuser
|
||||
|
||||
<div class="flex flex-wrap space-x-1">
|
||||
<img alt="LoRA" src="https://img.shields.io/badge/LoRA-d8b4fe?style=flat"/>
|
||||
</div>
|
||||
|
||||
The UniDiffuser model was proposed in [One Transformer Fits All Distributions in Multi-Modal Diffusion at Scale](https://huggingface.co/papers/2303.06555) by Fan Bao, Shen Nie, Kaiwen Xue, Chongxuan Li, Shi Pu, Yaole Wang, Gang Yue, Yue Cao, Hang Su, Jun Zhu.
|
||||
|
||||
The abstract from the paper is:
|
||||
|
||||
@@ -1,519 +0,0 @@
|
||||
<!-- Copyright 2024 The HuggingFace Team. All rights reserved.
|
||||
#
|
||||
# Licensed under the Apache License, Version 2.0 (the "License");
|
||||
# you may not use this file except in compliance with the License.
|
||||
# You may obtain a copy of the License at
|
||||
#
|
||||
# http://www.apache.org/licenses/LICENSE-2.0
|
||||
#
|
||||
# Unless required by applicable law or agreed to in writing, software
|
||||
# distributed under the License is distributed on an "AS IS" BASIS,
|
||||
# WITHOUT WARRANTIES OR CONDITIONS OF ANY KIND, either express or implied.
|
||||
# See the License for the specific language governing permissions and
|
||||
# limitations under the License. -->
|
||||
|
||||
# Wan
|
||||
|
||||
<div class="flex flex-wrap space-x-1">
|
||||
<img alt="LoRA" src="https://img.shields.io/badge/LoRA-d8b4fe?style=flat"/>
|
||||
</div>
|
||||
|
||||
[Wan 2.1](https://github.com/Wan-Video/Wan2.1) by the Alibaba Wan Team.
|
||||
|
||||
<!-- TODO(aryan): update abstract once paper is out -->
|
||||
|
||||
## Generating Videos with Wan 2.1
|
||||
|
||||
We will first need to install some additional dependencies.
|
||||
|
||||
```shell
|
||||
pip install -u ftfy imageio-ffmpeg imageio
|
||||
```
|
||||
|
||||
### Text to Video Generation
|
||||
|
||||
The following example requires 11GB VRAM to run and uses the smaller `Wan-AI/Wan2.1-T2V-1.3B-Diffusers` model. You can switch it out
|
||||
for the larger `Wan2.1-I2V-14B-720P-Diffusers` or `Wan-AI/Wan2.1-I2V-14B-480P-Diffusers` if you have at least 35GB VRAM available.
|
||||
|
||||
```python
|
||||
from diffusers import WanPipeline
|
||||
from diffusers.utils import export_to_video
|
||||
|
||||
# Available models: Wan-AI/Wan2.1-I2V-14B-720P-Diffusers or Wan-AI/Wan2.1-I2V-14B-480P-Diffusers
|
||||
model_id = "Wan-AI/Wan2.1-T2V-1.3B-Diffusers"
|
||||
|
||||
pipe = WanPipeline.from_pretrained(model_id, torch_dtype=torch.bfloat16)
|
||||
pipe.enable_model_cpu_offload()
|
||||
|
||||
prompt = "A cat and a dog baking a cake together in a kitchen. The cat is carefully measuring flour, while the dog is stirring the batter with a wooden spoon. The kitchen is cozy, with sunlight streaming through the window."
|
||||
negative_prompt = "Bright tones, overexposed, static, blurred details, subtitles, style, works, paintings, images, static, overall gray, worst quality, low quality, JPEG compression residue, ugly, incomplete, extra fingers, poorly drawn hands, poorly drawn faces, deformed, disfigured, misshapen limbs, fused fingers, still picture, messy background, three legs, many people in the background, walking backwards"
|
||||
num_frames = 33
|
||||
|
||||
frames = pipe(prompt=prompt, negative_prompt=negative_prompt, num_frames=num_frames).frames[0]
|
||||
export_to_video(frames, "wan-t2v.mp4", fps=16)
|
||||
```
|
||||
|
||||
<Tip>
|
||||
You can improve the quality of the generated video by running the decoding step in full precision.
|
||||
</Tip>
|
||||
|
||||
```python
|
||||
from diffusers import WanPipeline, AutoencoderKLWan
|
||||
from diffusers.utils import export_to_video
|
||||
|
||||
model_id = "Wan-AI/Wan2.1-T2V-1.3B-Diffusers"
|
||||
|
||||
vae = AutoencoderKLWan.from_pretrained(model_id, subfolder="vae", torch_dtype=torch.float32)
|
||||
pipe = WanPipeline.from_pretrained(model_id, vae=vae, torch_dtype=torch.bfloat16)
|
||||
|
||||
# replace this with pipe.to("cuda") if you have sufficient VRAM
|
||||
pipe.enable_model_cpu_offload()
|
||||
|
||||
prompt = "A cat and a dog baking a cake together in a kitchen. The cat is carefully measuring flour, while the dog is stirring the batter with a wooden spoon. The kitchen is cozy, with sunlight streaming through the window."
|
||||
negative_prompt = "Bright tones, overexposed, static, blurred details, subtitles, style, works, paintings, images, static, overall gray, worst quality, low quality, JPEG compression residue, ugly, incomplete, extra fingers, poorly drawn hands, poorly drawn faces, deformed, disfigured, misshapen limbs, fused fingers, still picture, messy background, three legs, many people in the background, walking backwards"
|
||||
num_frames = 33
|
||||
|
||||
frames = pipe(prompt=prompt, num_frames=num_frames).frames[0]
|
||||
export_to_video(frames, "wan-t2v.mp4", fps=16)
|
||||
```
|
||||
|
||||
### Image to Video Generation
|
||||
|
||||
The Image to Video pipeline requires loading the `AutoencoderKLWan` and the `CLIPVisionModel` components in full precision. The following example will need at least
|
||||
35GB of VRAM to run.
|
||||
|
||||
```python
|
||||
import torch
|
||||
import numpy as np
|
||||
from diffusers import AutoencoderKLWan, WanImageToVideoPipeline
|
||||
from diffusers.utils import export_to_video, load_image
|
||||
from transformers import CLIPVisionModel
|
||||
|
||||
# Available models: Wan-AI/Wan2.1-I2V-14B-480P-Diffusers, Wan-AI/Wan2.1-I2V-14B-720P-Diffusers
|
||||
model_id = "Wan-AI/Wan2.1-I2V-14B-480P-Diffusers"
|
||||
image_encoder = CLIPVisionModel.from_pretrained(
|
||||
model_id, subfolder="image_encoder", torch_dtype=torch.float32
|
||||
)
|
||||
vae = AutoencoderKLWan.from_pretrained(model_id, subfolder="vae", torch_dtype=torch.float32)
|
||||
pipe = WanImageToVideoPipeline.from_pretrained(
|
||||
model_id, vae=vae, image_encoder=image_encoder, torch_dtype=torch.bfloat16
|
||||
)
|
||||
|
||||
# replace this with pipe.to("cuda") if you have sufficient VRAM
|
||||
pipe.enable_model_cpu_offload()
|
||||
|
||||
image = load_image(
|
||||
"https://huggingface.co/datasets/huggingface/documentation-images/resolve/main/diffusers/astronaut.jpg"
|
||||
)
|
||||
|
||||
max_area = 480 * 832
|
||||
aspect_ratio = image.height / image.width
|
||||
mod_value = pipe.vae_scale_factor_spatial * pipe.transformer.config.patch_size[1]
|
||||
height = round(np.sqrt(max_area * aspect_ratio)) // mod_value * mod_value
|
||||
width = round(np.sqrt(max_area / aspect_ratio)) // mod_value * mod_value
|
||||
image = image.resize((width, height))
|
||||
|
||||
prompt = (
|
||||
"An astronaut hatching from an egg, on the surface of the moon, the darkness and depth of space realised in "
|
||||
"the background. High quality, ultrarealistic detail and breath-taking movie-like camera shot."
|
||||
)
|
||||
negative_prompt = "Bright tones, overexposed, static, blurred details, subtitles, style, works, paintings, images, static, overall gray, worst quality, low quality, JPEG compression residue, ugly, incomplete, extra fingers, poorly drawn hands, poorly drawn faces, deformed, disfigured, misshapen limbs, fused fingers, still picture, messy background, three legs, many people in the background, walking backwards"
|
||||
|
||||
num_frames = 33
|
||||
|
||||
output = pipe(
|
||||
image=image,
|
||||
prompt=prompt,
|
||||
negative_prompt=negative_prompt,
|
||||
height=height,
|
||||
width=width,
|
||||
num_frames=num_frames,
|
||||
guidance_scale=5.0,
|
||||
).frames[0]
|
||||
export_to_video(output, "wan-i2v.mp4", fps=16)
|
||||
```
|
||||
|
||||
### First and Last Frame Interpolation
|
||||
|
||||
```python
|
||||
import numpy as np
|
||||
import torch
|
||||
import torchvision.transforms.functional as TF
|
||||
from diffusers import AutoencoderKLWan, WanImageToVideoPipeline
|
||||
from diffusers.utils import export_to_video, load_image
|
||||
from transformers import CLIPVisionModel
|
||||
|
||||
|
||||
model_id = "Wan-AI/Wan2.1-FLF2V-14B-720P-diffusers"
|
||||
image_encoder = CLIPVisionModel.from_pretrained(model_id, subfolder="image_encoder", torch_dtype=torch.float32)
|
||||
vae = AutoencoderKLWan.from_pretrained(model_id, subfolder="vae", torch_dtype=torch.float32)
|
||||
pipe = WanImageToVideoPipeline.from_pretrained(
|
||||
model_id, vae=vae, image_encoder=image_encoder, torch_dtype=torch.bfloat16
|
||||
)
|
||||
pipe.to("cuda")
|
||||
|
||||
first_frame = load_image("https://huggingface.co/datasets/huggingface/documentation-images/resolve/main/diffusers/flf2v_input_first_frame.png")
|
||||
last_frame = load_image("https://huggingface.co/datasets/huggingface/documentation-images/resolve/main/diffusers/flf2v_input_last_frame.png")
|
||||
|
||||
def aspect_ratio_resize(image, pipe, max_area=720 * 1280):
|
||||
aspect_ratio = image.height / image.width
|
||||
mod_value = pipe.vae_scale_factor_spatial * pipe.transformer.config.patch_size[1]
|
||||
height = round(np.sqrt(max_area * aspect_ratio)) // mod_value * mod_value
|
||||
width = round(np.sqrt(max_area / aspect_ratio)) // mod_value * mod_value
|
||||
image = image.resize((width, height))
|
||||
return image, height, width
|
||||
|
||||
def center_crop_resize(image, height, width):
|
||||
# Calculate resize ratio to match first frame dimensions
|
||||
resize_ratio = max(width / image.width, height / image.height)
|
||||
|
||||
# Resize the image
|
||||
width = round(image.width * resize_ratio)
|
||||
height = round(image.height * resize_ratio)
|
||||
size = [width, height]
|
||||
image = TF.center_crop(image, size)
|
||||
|
||||
return image, height, width
|
||||
|
||||
first_frame, height, width = aspect_ratio_resize(first_frame, pipe)
|
||||
if last_frame.size != first_frame.size:
|
||||
last_frame, _, _ = center_crop_resize(last_frame, height, width)
|
||||
|
||||
prompt = "CG animation style, a small blue bird takes off from the ground, flapping its wings. The bird's feathers are delicate, with a unique pattern on its chest. The background shows a blue sky with white clouds under bright sunshine. The camera follows the bird upward, capturing its flight and the vastness of the sky from a close-up, low-angle perspective."
|
||||
|
||||
output = pipe(
|
||||
image=first_frame, last_image=last_frame, prompt=prompt, height=height, width=width, guidance_scale=5.5
|
||||
).frames[0]
|
||||
export_to_video(output, "output.mp4", fps=16)
|
||||
```
|
||||
|
||||
### Video to Video Generation
|
||||
|
||||
```python
|
||||
import torch
|
||||
from diffusers.utils import load_video, export_to_video
|
||||
from diffusers import AutoencoderKLWan, WanVideoToVideoPipeline, UniPCMultistepScheduler
|
||||
|
||||
# Available models: Wan-AI/Wan2.1-T2V-14B-Diffusers, Wan-AI/Wan2.1-T2V-1.3B-Diffusers
|
||||
model_id = "Wan-AI/Wan2.1-T2V-1.3B-Diffusers"
|
||||
vae = AutoencoderKLWan.from_pretrained(
|
||||
model_id, subfolder="vae", torch_dtype=torch.float32
|
||||
)
|
||||
pipe = WanVideoToVideoPipeline.from_pretrained(
|
||||
model_id, vae=vae, torch_dtype=torch.bfloat16
|
||||
)
|
||||
flow_shift = 3.0 # 5.0 for 720P, 3.0 for 480P
|
||||
pipe.scheduler = UniPCMultistepScheduler.from_config(
|
||||
pipe.scheduler.config, flow_shift=flow_shift
|
||||
)
|
||||
# change to pipe.to("cuda") if you have sufficient VRAM
|
||||
pipe.enable_model_cpu_offload()
|
||||
|
||||
prompt = "A robot standing on a mountain top. The sun is setting in the background"
|
||||
negative_prompt = "Bright tones, overexposed, static, blurred details, subtitles, style, works, paintings, images, static, overall gray, worst quality, low quality, JPEG compression residue, ugly, incomplete, extra fingers, poorly drawn hands, poorly drawn faces, deformed, disfigured, misshapen limbs, fused fingers, still picture, messy background, three legs, many people in the background, walking backwards"
|
||||
video = load_video(
|
||||
"https://huggingface.co/datasets/huggingface/documentation-images/resolve/main/diffusers/hiker.mp4"
|
||||
)
|
||||
output = pipe(
|
||||
video=video,
|
||||
prompt=prompt,
|
||||
negative_prompt=negative_prompt,
|
||||
height=480,
|
||||
width=512,
|
||||
guidance_scale=7.0,
|
||||
strength=0.7,
|
||||
).frames[0]
|
||||
|
||||
export_to_video(output, "wan-v2v.mp4", fps=16)
|
||||
```
|
||||
|
||||
## Memory Optimizations for Wan 2.1
|
||||
|
||||
Base inference with the large 14B Wan 2.1 models can take up to 35GB of VRAM when generating videos at 720p resolution. We'll outline a few memory optimizations we can apply to reduce the VRAM required to run the model.
|
||||
|
||||
We'll use `Wan-AI/Wan2.1-I2V-14B-720P-Diffusers` model in these examples to demonstrate the memory savings, but the techniques are applicable to all model checkpoints.
|
||||
|
||||
### Group Offloading the Transformer and UMT5 Text Encoder
|
||||
|
||||
Find more information about group offloading [here](../optimization/memory.md)
|
||||
|
||||
#### Block Level Group Offloading
|
||||
|
||||
We can reduce our VRAM requirements by applying group offloading to the larger model components of the pipeline; the `WanTransformer3DModel` and `UMT5EncoderModel`. Group offloading will break up the individual modules of a model and offload/onload them onto your GPU as needed during inference. In this example, we'll apply `block_level` offloading, which will group the modules in a model into blocks of size `num_blocks_per_group` and offload/onload them to GPU. Moving to between CPU and GPU does add latency to the inference process. You can trade off between latency and memory savings by increasing or decreasing the `num_blocks_per_group`.
|
||||
|
||||
The following example will now only require 14GB of VRAM to run, but will take approximately 30 minutes to generate a video.
|
||||
|
||||
```python
|
||||
import torch
|
||||
import numpy as np
|
||||
from diffusers import AutoencoderKLWan, WanTransformer3DModel, WanImageToVideoPipeline
|
||||
from diffusers.hooks.group_offloading import apply_group_offloading
|
||||
from diffusers.utils import export_to_video, load_image
|
||||
from transformers import UMT5EncoderModel, CLIPVisionModel
|
||||
|
||||
# Available models: Wan-AI/Wan2.1-I2V-14B-480P-Diffusers, Wan-AI/Wan2.1-I2V-14B-720P-Diffusers
|
||||
model_id = "Wan-AI/Wan2.1-I2V-14B-720P-Diffusers"
|
||||
image_encoder = CLIPVisionModel.from_pretrained(
|
||||
model_id, subfolder="image_encoder", torch_dtype=torch.float32
|
||||
)
|
||||
|
||||
text_encoder = UMT5EncoderModel.from_pretrained(model_id, subfolder="text_encoder", torch_dtype=torch.bfloat16)
|
||||
vae = AutoencoderKLWan.from_pretrained(model_id, subfolder="vae", torch_dtype=torch.float32)
|
||||
transformer = WanTransformer3DModel.from_pretrained(model_id, subfolder="transformer", torch_dtype=torch.bfloat16)
|
||||
|
||||
onload_device = torch.device("cuda")
|
||||
offload_device = torch.device("cpu")
|
||||
|
||||
apply_group_offloading(text_encoder,
|
||||
onload_device=onload_device,
|
||||
offload_device=offload_device,
|
||||
offload_type="block_level",
|
||||
num_blocks_per_group=4
|
||||
)
|
||||
|
||||
transformer.enable_group_offload(
|
||||
onload_device=onload_device,
|
||||
offload_device=offload_device,
|
||||
offload_type="block_level",
|
||||
num_blocks_per_group=4,
|
||||
)
|
||||
pipe = WanImageToVideoPipeline.from_pretrained(
|
||||
model_id,
|
||||
vae=vae,
|
||||
transformer=transformer,
|
||||
text_encoder=text_encoder,
|
||||
image_encoder=image_encoder,
|
||||
torch_dtype=torch.bfloat16
|
||||
)
|
||||
# Since we've offloaded the larger models alrady, we can move the rest of the model components to GPU
|
||||
pipe.to("cuda")
|
||||
|
||||
image = load_image(
|
||||
"https://huggingface.co/datasets/huggingface/documentation-images/resolve/main/diffusers/astronaut.jpg"
|
||||
)
|
||||
|
||||
max_area = 720 * 832
|
||||
aspect_ratio = image.height / image.width
|
||||
mod_value = pipe.vae_scale_factor_spatial * pipe.transformer.config.patch_size[1]
|
||||
height = round(np.sqrt(max_area * aspect_ratio)) // mod_value * mod_value
|
||||
width = round(np.sqrt(max_area / aspect_ratio)) // mod_value * mod_value
|
||||
image = image.resize((width, height))
|
||||
|
||||
prompt = (
|
||||
"An astronaut hatching from an egg, on the surface of the moon, the darkness and depth of space realised in "
|
||||
"the background. High quality, ultrarealistic detail and breath-taking movie-like camera shot."
|
||||
)
|
||||
negative_prompt = "Bright tones, overexposed, static, blurred details, subtitles, style, works, paintings, images, static, overall gray, worst quality, low quality, JPEG compression residue, ugly, incomplete, extra fingers, poorly drawn hands, poorly drawn faces, deformed, disfigured, misshapen limbs, fused fingers, still picture, messy background, three legs, many people in the background, walking backwards"
|
||||
|
||||
num_frames = 33
|
||||
|
||||
output = pipe(
|
||||
image=image,
|
||||
prompt=prompt,
|
||||
negative_prompt=negative_prompt,
|
||||
height=height,
|
||||
width=width,
|
||||
num_frames=num_frames,
|
||||
guidance_scale=5.0,
|
||||
).frames[0]
|
||||
|
||||
export_to_video(output, "wan-i2v.mp4", fps=16)
|
||||
```
|
||||
|
||||
#### Block Level Group Offloading with CUDA Streams
|
||||
|
||||
We can speed up group offloading inference, by enabling the use of [CUDA streams](https://pytorch.org/docs/stable/generated/torch.cuda.Stream.html). However, using CUDA streams requires moving the model parameters into pinned memory. This allocation is handled by Pytorch under the hood, and can result in a significant spike in CPU RAM usage. Please consider this option if your CPU RAM is atleast 2X the size of the model you are group offloading.
|
||||
|
||||
In the following example we will use CUDA streams when group offloading the `WanTransformer3DModel`. When testing on an A100, this example will require 14GB of VRAM, 52GB of CPU RAM, but will generate a video in approximately 9 minutes.
|
||||
|
||||
```python
|
||||
import torch
|
||||
import numpy as np
|
||||
from diffusers import AutoencoderKLWan, WanTransformer3DModel, WanImageToVideoPipeline
|
||||
from diffusers.hooks.group_offloading import apply_group_offloading
|
||||
from diffusers.utils import export_to_video, load_image
|
||||
from transformers import UMT5EncoderModel, CLIPVisionModel
|
||||
|
||||
# Available models: Wan-AI/Wan2.1-I2V-14B-480P-Diffusers, Wan-AI/Wan2.1-I2V-14B-720P-Diffusers
|
||||
model_id = "Wan-AI/Wan2.1-I2V-14B-720P-Diffusers"
|
||||
image_encoder = CLIPVisionModel.from_pretrained(
|
||||
model_id, subfolder="image_encoder", torch_dtype=torch.float32
|
||||
)
|
||||
|
||||
text_encoder = UMT5EncoderModel.from_pretrained(model_id, subfolder="text_encoder", torch_dtype=torch.bfloat16)
|
||||
vae = AutoencoderKLWan.from_pretrained(model_id, subfolder="vae", torch_dtype=torch.float32)
|
||||
transformer = WanTransformer3DModel.from_pretrained(model_id, subfolder="transformer", torch_dtype=torch.bfloat16)
|
||||
|
||||
onload_device = torch.device("cuda")
|
||||
offload_device = torch.device("cpu")
|
||||
|
||||
apply_group_offloading(text_encoder,
|
||||
onload_device=onload_device,
|
||||
offload_device=offload_device,
|
||||
offload_type="block_level",
|
||||
num_blocks_per_group=4
|
||||
)
|
||||
|
||||
transformer.enable_group_offload(
|
||||
onload_device=onload_device,
|
||||
offload_device=offload_device,
|
||||
offload_type="leaf_level",
|
||||
use_stream=True
|
||||
)
|
||||
pipe = WanImageToVideoPipeline.from_pretrained(
|
||||
model_id,
|
||||
vae=vae,
|
||||
transformer=transformer,
|
||||
text_encoder=text_encoder,
|
||||
image_encoder=image_encoder,
|
||||
torch_dtype=torch.bfloat16
|
||||
)
|
||||
# Since we've offloaded the larger models alrady, we can move the rest of the model components to GPU
|
||||
pipe.to("cuda")
|
||||
|
||||
image = load_image(
|
||||
"https://huggingface.co/datasets/huggingface/documentation-images/resolve/main/diffusers/astronaut.jpg"
|
||||
)
|
||||
|
||||
max_area = 720 * 832
|
||||
aspect_ratio = image.height / image.width
|
||||
mod_value = pipe.vae_scale_factor_spatial * pipe.transformer.config.patch_size[1]
|
||||
height = round(np.sqrt(max_area * aspect_ratio)) // mod_value * mod_value
|
||||
width = round(np.sqrt(max_area / aspect_ratio)) // mod_value * mod_value
|
||||
image = image.resize((width, height))
|
||||
|
||||
prompt = (
|
||||
"An astronaut hatching from an egg, on the surface of the moon, the darkness and depth of space realised in "
|
||||
"the background. High quality, ultrarealistic detail and breath-taking movie-like camera shot."
|
||||
)
|
||||
negative_prompt = "Bright tones, overexposed, static, blurred details, subtitles, style, works, paintings, images, static, overall gray, worst quality, low quality, JPEG compression residue, ugly, incomplete, extra fingers, poorly drawn hands, poorly drawn faces, deformed, disfigured, misshapen limbs, fused fingers, still picture, messy background, three legs, many people in the background, walking backwards"
|
||||
|
||||
num_frames = 33
|
||||
|
||||
output = pipe(
|
||||
image=image,
|
||||
prompt=prompt,
|
||||
negative_prompt=negative_prompt,
|
||||
height=height,
|
||||
width=width,
|
||||
num_frames=num_frames,
|
||||
guidance_scale=5.0,
|
||||
).frames[0]
|
||||
|
||||
export_to_video(output, "wan-i2v.mp4", fps=16)
|
||||
```
|
||||
|
||||
### Applying Layerwise Casting to the Transformer
|
||||
|
||||
Find more information about layerwise casting [here](../optimization/memory.md)
|
||||
|
||||
In this example, we will model offloading with layerwise casting. Layerwise casting will downcast each layer's weights to `torch.float8_e4m3fn`, temporarily upcast to `torch.bfloat16` during the forward pass of the layer, then revert to `torch.float8_e4m3fn` afterward. This approach reduces memory requirements by approximately 50% while introducing a minor quality reduction in the generated video due to the precision trade-off.
|
||||
|
||||
This example will require 20GB of VRAM.
|
||||
|
||||
```python
|
||||
import torch
|
||||
import numpy as np
|
||||
from diffusers import AutoencoderKLWan, WanTransformer3DModel, WanImageToVideoPipeline
|
||||
from diffusers.hooks.group_offloading import apply_group_offloading
|
||||
from diffusers.utils import export_to_video, load_image
|
||||
from transformers import UMT5EncoderModel, CLIPVisionModel
|
||||
|
||||
model_id = "Wan-AI/Wan2.1-I2V-14B-720P-Diffusers"
|
||||
image_encoder = CLIPVisionModel.from_pretrained(
|
||||
model_id, subfolder="image_encoder", torch_dtype=torch.float32
|
||||
)
|
||||
text_encoder = UMT5EncoderModel.from_pretrained(model_id, subfolder="text_encoder", torch_dtype=torch.bfloat16)
|
||||
vae = AutoencoderKLWan.from_pretrained(model_id, subfolder="vae", torch_dtype=torch.float32)
|
||||
|
||||
transformer = WanTransformer3DModel.from_pretrained(model_id, subfolder="transformer", torch_dtype=torch.bfloat16)
|
||||
transformer.enable_layerwise_casting(storage_dtype=torch.float8_e4m3fn, compute_dtype=torch.bfloat16)
|
||||
|
||||
pipe = WanImageToVideoPipeline.from_pretrained(
|
||||
model_id,
|
||||
vae=vae,
|
||||
transformer=transformer,
|
||||
text_encoder=text_encoder,
|
||||
image_encoder=image_encoder,
|
||||
torch_dtype=torch.bfloat16
|
||||
)
|
||||
pipe.enable_model_cpu_offload()
|
||||
image = load_image("https://huggingface.co/datasets/huggingface/documentation-images/resolve/main/diffusers/astronaut.jpg")
|
||||
|
||||
max_area = 720 * 832
|
||||
aspect_ratio = image.height / image.width
|
||||
mod_value = pipe.vae_scale_factor_spatial * pipe.transformer.config.patch_size[1]
|
||||
height = round(np.sqrt(max_area * aspect_ratio)) // mod_value * mod_value
|
||||
width = round(np.sqrt(max_area / aspect_ratio)) // mod_value * mod_value
|
||||
image = image.resize((width, height))
|
||||
prompt = (
|
||||
"An astronaut hatching from an egg, on the surface of the moon, the darkness and depth of space realised in "
|
||||
"the background. High quality, ultrarealistic detail and breath-taking movie-like camera shot."
|
||||
)
|
||||
negative_prompt = "Bright tones, overexposed, static, blurred details, subtitles, style, works, paintings, images, static, overall gray, worst quality, low quality, JPEG compression residue, ugly, incomplete, extra fingers, poorly drawn hands, poorly drawn faces, deformed, disfigured, misshapen limbs, fused fingers, still picture, messy background, three legs, many people in the background, walking backwards"
|
||||
num_frames = 33
|
||||
|
||||
output = pipe(
|
||||
image=image,
|
||||
prompt=prompt,
|
||||
negative_prompt=negative_prompt,
|
||||
height=height,
|
||||
width=width,
|
||||
num_frames=num_frames,
|
||||
num_inference_steps=50,
|
||||
guidance_scale=5.0,
|
||||
).frames[0]
|
||||
export_to_video(output, "wan-i2v.mp4", fps=16)
|
||||
```
|
||||
|
||||
## Using a Custom Scheduler
|
||||
|
||||
Wan can be used with many different schedulers, each with their own benefits regarding speed and generation quality. By default, Wan uses the `UniPCMultistepScheduler(prediction_type="flow_prediction", use_flow_sigmas=True, flow_shift=3.0)` scheduler. You can use a different scheduler as follows:
|
||||
|
||||
```python
|
||||
from diffusers import FlowMatchEulerDiscreteScheduler, UniPCMultistepScheduler, WanPipeline
|
||||
|
||||
scheduler_a = FlowMatchEulerDiscreteScheduler(shift=5.0)
|
||||
scheduler_b = UniPCMultistepScheduler(prediction_type="flow_prediction", use_flow_sigmas=True, flow_shift=4.0)
|
||||
|
||||
pipe = WanPipeline.from_pretrained("Wan-AI/Wan2.1-T2V-1.3B-Diffusers", scheduler=<CUSTOM_SCHEDULER_HERE>)
|
||||
|
||||
# or,
|
||||
pipe.scheduler = <CUSTOM_SCHEDULER_HERE>
|
||||
```
|
||||
|
||||
## Using Single File Loading with Wan 2.1
|
||||
|
||||
The `WanTransformer3DModel` and `AutoencoderKLWan` models support loading checkpoints in their original format via the `from_single_file` loading
|
||||
method.
|
||||
|
||||
```python
|
||||
import torch
|
||||
from diffusers import WanPipeline, WanTransformer3DModel
|
||||
|
||||
ckpt_path = "https://huggingface.co/Comfy-Org/Wan_2.1_ComfyUI_repackaged/blob/main/split_files/diffusion_models/wan2.1_t2v_1.3B_bf16.safetensors"
|
||||
transformer = WanTransformer3DModel.from_single_file(ckpt_path, torch_dtype=torch.bfloat16)
|
||||
|
||||
pipe = WanPipeline.from_pretrained("Wan-AI/Wan2.1-T2V-1.3B-Diffusers", transformer=transformer)
|
||||
```
|
||||
|
||||
## Recommendations for Inference
|
||||
- Keep `AutencoderKLWan` in `torch.float32` for better decoding quality.
|
||||
- `num_frames` should satisfy the following constraint: `(num_frames - 1) % 4 == 0`
|
||||
- For smaller resolution videos, try lower values of `shift` (between `2.0` to `5.0`) in the [Scheduler](https://huggingface.co/docs/diffusers/main/en/api/schedulers/flow_match_euler_discrete#diffusers.FlowMatchEulerDiscreteScheduler.shift). For larger resolution videos, try higher values (between `7.0` and `12.0`). The default value is `3.0` for Wan.
|
||||
|
||||
## WanPipeline
|
||||
|
||||
[[autodoc]] WanPipeline
|
||||
- all
|
||||
- __call__
|
||||
|
||||
## WanImageToVideoPipeline
|
||||
|
||||
[[autodoc]] WanImageToVideoPipeline
|
||||
- all
|
||||
- __call__
|
||||
|
||||
## WanPipelineOutput
|
||||
|
||||
[[autodoc]] pipelines.wan.pipeline_output.WanPipelineOutput
|
||||
@@ -12,10 +12,6 @@ specific language governing permissions and limitations under the License.
|
||||
|
||||
# Würstchen
|
||||
|
||||
<div class="flex flex-wrap space-x-1">
|
||||
<img alt="LoRA" src="https://img.shields.io/badge/LoRA-d8b4fe?style=flat"/>
|
||||
</div>
|
||||
|
||||
<img src="https://github.com/dome272/Wuerstchen/assets/61938694/0617c863-165a-43ee-9303-2a17299a0cf9">
|
||||
|
||||
[Wuerstchen: An Efficient Architecture for Large-Scale Text-to-Image Diffusion Models](https://huggingface.co/papers/2306.00637) is by Pablo Pernias, Dominic Rampas, Mats L. Richter and Christopher Pal and Marc Aubreville.
|
||||
|
||||
@@ -31,11 +31,6 @@ Learn how to quantize models in the [Quantization](../quantization/overview) gui
|
||||
## GGUFQuantizationConfig
|
||||
|
||||
[[autodoc]] GGUFQuantizationConfig
|
||||
|
||||
## QuantoConfig
|
||||
|
||||
[[autodoc]] QuantoConfig
|
||||
|
||||
## TorchAoConfig
|
||||
|
||||
[[autodoc]] TorchAoConfig
|
||||
|
||||
@@ -1,19 +0,0 @@
|
||||
<!--Copyright 2024 The HuggingFace Team. All rights reserved.
|
||||
|
||||
Licensed under the Apache License, Version 2.0 (the "License"); you may not use this file except in compliance with
|
||||
the License. You may obtain a copy of the License at
|
||||
|
||||
http://www.apache.org/licenses/LICENSE-2.0
|
||||
|
||||
Unless required by applicable law or agreed to in writing, software distributed under the License is distributed on
|
||||
an "AS IS" BASIS, WITHOUT WARRANTIES OR CONDITIONS OF ANY KIND, either express or implied. See the License for the
|
||||
specific language governing permissions and limitations under the License.
|
||||
-->
|
||||
|
||||
# CogVideoXDDIMScheduler
|
||||
|
||||
`CogVideoXDDIMScheduler` is based on [Denoising Diffusion Implicit Models](https://huggingface.co/papers/2010.02502), specifically for CogVideoX models.
|
||||
|
||||
## CogVideoXDDIMScheduler
|
||||
|
||||
[[autodoc]] CogVideoXDDIMScheduler
|
||||
@@ -1,19 +0,0 @@
|
||||
<!--Copyright 2024 The HuggingFace Team. All rights reserved.
|
||||
|
||||
Licensed under the Apache License, Version 2.0 (the "License"); you may not use this file except in compliance with
|
||||
the License. You may obtain a copy of the License at
|
||||
|
||||
http://www.apache.org/licenses/LICENSE-2.0
|
||||
|
||||
Unless required by applicable law or agreed to in writing, software distributed under the License is distributed on
|
||||
an "AS IS" BASIS, WITHOUT WARRANTIES OR CONDITIONS OF ANY KIND, either express or implied. See the License for the
|
||||
specific language governing permissions and limitations under the License.
|
||||
-->
|
||||
|
||||
# CogVideoXDPMScheduler
|
||||
|
||||
`CogVideoXDPMScheduler` is based on [DPM-Solver: A Fast ODE Solver for Diffusion Probabilistic Model Sampling in Around 10 Steps](https://huggingface.co/papers/2206.00927) and [DPM-Solver++: Fast Solver for Guided Sampling of Diffusion Probabilistic Models](https://huggingface.co/papers/2211.01095), specifically for CogVideoX models.
|
||||
|
||||
## CogVideoXDPMScheduler
|
||||
|
||||
[[autodoc]] CogVideoXDPMScheduler
|
||||
@@ -83,8 +83,4 @@ Happy exploring, and thank you for being part of the Diffusers community!
|
||||
<td><a href="https://github.com/suzukimain/auto_diffusers"> Model Search </a></td>
|
||||
<td>Search models on Civitai and Hugging Face</td>
|
||||
</tr>
|
||||
<tr style="border-top: 2px solid black">
|
||||
<td><a href="https://github.com/beinsezii/skrample"> Skrample </a></td>
|
||||
<td>Fully modular scheduler functions with 1st class diffusers integration.</td>
|
||||
</tr>
|
||||
</table>
|
||||
|
||||
@@ -16,11 +16,6 @@ specific language governing permissions and limitations under the License.
|
||||
<img src="https://colab.research.google.com/assets/colab-badge.svg" alt="Open In Colab"/>
|
||||
</a>
|
||||
|
||||
> [!TIP]
|
||||
> This document has now grown outdated given the emergence of existing evaluation frameworks for diffusion models for image generation. Please check
|
||||
> out works like [HEIM](https://crfm.stanford.edu/helm/heim/latest/), [T2I-Compbench](https://arxiv.org/abs/2307.06350),
|
||||
> [GenEval](https://arxiv.org/abs/2310.11513).
|
||||
|
||||
Evaluation of generative models like [Stable Diffusion](https://huggingface.co/docs/diffusers/stable_diffusion) is subjective in nature. But as practitioners and researchers, we often have to make careful choices amongst many different possibilities. So, when working with different generative models (like GANs, Diffusion, etc.), how do we choose one over the other?
|
||||
|
||||
Qualitative evaluation of such models can be error-prone and might incorrectly influence a decision.
|
||||
|
||||
@@ -1,9 +0,0 @@
|
||||
# Hybrid Inference API Reference
|
||||
|
||||
## Remote Decode
|
||||
|
||||
[[autodoc]] utils.remote_utils.remote_decode
|
||||
|
||||
## Remote Encode
|
||||
|
||||
[[autodoc]] utils.remote_utils.remote_encode
|
||||
@@ -1,60 +0,0 @@
|
||||
<!--Copyright 2024 The HuggingFace Team. All rights reserved.
|
||||
|
||||
Licensed under the Apache License, Version 2.0 (the "License"); you may not use this file except in compliance with
|
||||
the License. You may obtain a copy of the License at
|
||||
|
||||
http://www.apache.org/licenses/LICENSE-2.0
|
||||
|
||||
Unless required by applicable law or agreed to in writing, software distributed under the License is distributed on
|
||||
an "AS IS" BASIS, WITHOUT WARRANTIES OR CONDITIONS OF ANY KIND, either express or implied. See the License for the
|
||||
specific language governing permissions and limitations under the License.
|
||||
-->
|
||||
|
||||
# Hybrid Inference
|
||||
|
||||
**Empowering local AI builders with Hybrid Inference**
|
||||
|
||||
|
||||
> [!TIP]
|
||||
> Hybrid Inference is an [experimental feature](https://huggingface.co/blog/remote_vae).
|
||||
> Feedback can be provided [here](https://github.com/huggingface/diffusers/issues/new?template=remote-vae-pilot-feedback.yml).
|
||||
|
||||
|
||||
|
||||
## Why use Hybrid Inference?
|
||||
|
||||
Hybrid Inference offers a fast and simple way to offload local generation requirements.
|
||||
|
||||
- 🚀 **Reduced Requirements:** Access powerful models without expensive hardware.
|
||||
- 💎 **Without Compromise:** Achieve the highest quality without sacrificing performance.
|
||||
- 💰 **Cost Effective:** It's free! 🤑
|
||||
- 🎯 **Diverse Use Cases:** Fully compatible with Diffusers 🧨 and the wider community.
|
||||
- 🔧 **Developer-Friendly:** Simple requests, fast responses.
|
||||
|
||||
---
|
||||
|
||||
## Available Models
|
||||
|
||||
* **VAE Decode 🖼️:** Quickly decode latent representations into high-quality images without compromising performance or workflow speed.
|
||||
* **VAE Encode 🔢:** Efficiently encode images into latent representations for generation and training.
|
||||
* **Text Encoders 📃 (coming soon):** Compute text embeddings for your prompts quickly and accurately, ensuring a smooth and high-quality workflow.
|
||||
|
||||
---
|
||||
|
||||
## Integrations
|
||||
|
||||
* **[SD.Next](https://github.com/vladmandic/sdnext):** All-in-one UI with direct supports Hybrid Inference.
|
||||
* **[ComfyUI-HFRemoteVae](https://github.com/kijai/ComfyUI-HFRemoteVae):** ComfyUI node for Hybrid Inference.
|
||||
|
||||
## Changelog
|
||||
|
||||
- March 10 2025: Added VAE encode
|
||||
- March 2 2025: Initial release with VAE decoding
|
||||
|
||||
## Contents
|
||||
|
||||
The documentation is organized into three sections:
|
||||
|
||||
* **VAE Decode** Learn the basics of how to use VAE Decode with Hybrid Inference.
|
||||
* **VAE Encode** Learn the basics of how to use VAE Encode with Hybrid Inference.
|
||||
* **API Reference** Dive into task-specific settings and parameters.
|
||||
@@ -1,345 +0,0 @@
|
||||
# Getting Started: VAE Decode with Hybrid Inference
|
||||
|
||||
VAE decode is an essential component of diffusion models - turning latent representations into images or videos.
|
||||
|
||||
## Memory
|
||||
|
||||
These tables demonstrate the VRAM requirements for VAE decode with SD v1 and SD XL on different GPUs.
|
||||
|
||||
For the majority of these GPUs the memory usage % dictates other models (text encoders, UNet/Transformer) must be offloaded, or tiled decoding has to be used which increases time taken and impacts quality.
|
||||
|
||||
<details><summary>SD v1.5</summary>
|
||||
|
||||
| GPU | Resolution | Time (seconds) | Memory (%) | Tiled Time (secs) | Tiled Memory (%) |
|
||||
| --- | --- | --- | --- | --- | --- |
|
||||
| NVIDIA GeForce RTX 4090 | 512x512 | 0.031 | 5.60% | 0.031 (0%) | 5.60% |
|
||||
| NVIDIA GeForce RTX 4090 | 1024x1024 | 0.148 | 20.00% | 0.301 (+103%) | 5.60% |
|
||||
| NVIDIA GeForce RTX 4080 | 512x512 | 0.05 | 8.40% | 0.050 (0%) | 8.40% |
|
||||
| NVIDIA GeForce RTX 4080 | 1024x1024 | 0.224 | 30.00% | 0.356 (+59%) | 8.40% |
|
||||
| NVIDIA GeForce RTX 4070 Ti | 512x512 | 0.066 | 11.30% | 0.066 (0%) | 11.30% |
|
||||
| NVIDIA GeForce RTX 4070 Ti | 1024x1024 | 0.284 | 40.50% | 0.454 (+60%) | 11.40% |
|
||||
| NVIDIA GeForce RTX 3090 | 512x512 | 0.062 | 5.20% | 0.062 (0%) | 5.20% |
|
||||
| NVIDIA GeForce RTX 3090 | 1024x1024 | 0.253 | 18.50% | 0.464 (+83%) | 5.20% |
|
||||
| NVIDIA GeForce RTX 3080 | 512x512 | 0.07 | 12.80% | 0.070 (0%) | 12.80% |
|
||||
| NVIDIA GeForce RTX 3080 | 1024x1024 | 0.286 | 45.30% | 0.466 (+63%) | 12.90% |
|
||||
| NVIDIA GeForce RTX 3070 | 512x512 | 0.102 | 15.90% | 0.102 (0%) | 15.90% |
|
||||
| NVIDIA GeForce RTX 3070 | 1024x1024 | 0.421 | 56.30% | 0.746 (+77%) | 16.00% |
|
||||
|
||||
</details>
|
||||
|
||||
<details><summary>SDXL</summary>
|
||||
|
||||
| GPU | Resolution | Time (seconds) | Memory Consumed (%) | Tiled Time (seconds) | Tiled Memory (%) |
|
||||
| --- | --- | --- | --- | --- | --- |
|
||||
| NVIDIA GeForce RTX 4090 | 512x512 | 0.057 | 10.00% | 0.057 (0%) | 10.00% |
|
||||
| NVIDIA GeForce RTX 4090 | 1024x1024 | 0.256 | 35.50% | 0.257 (+0.4%) | 35.50% |
|
||||
| NVIDIA GeForce RTX 4080 | 512x512 | 0.092 | 15.00% | 0.092 (0%) | 15.00% |
|
||||
| NVIDIA GeForce RTX 4080 | 1024x1024 | 0.406 | 53.30% | 0.406 (0%) | 53.30% |
|
||||
| NVIDIA GeForce RTX 4070 Ti | 512x512 | 0.121 | 20.20% | 0.120 (-0.8%) | 20.20% |
|
||||
| NVIDIA GeForce RTX 4070 Ti | 1024x1024 | 0.519 | 72.00% | 0.519 (0%) | 72.00% |
|
||||
| NVIDIA GeForce RTX 3090 | 512x512 | 0.107 | 10.50% | 0.107 (0%) | 10.50% |
|
||||
| NVIDIA GeForce RTX 3090 | 1024x1024 | 0.459 | 38.00% | 0.460 (+0.2%) | 38.00% |
|
||||
| NVIDIA GeForce RTX 3080 | 512x512 | 0.121 | 25.60% | 0.121 (0%) | 25.60% |
|
||||
| NVIDIA GeForce RTX 3080 | 1024x1024 | 0.524 | 93.00% | 0.524 (0%) | 93.00% |
|
||||
| NVIDIA GeForce RTX 3070 | 512x512 | 0.183 | 31.80% | 0.183 (0%) | 31.80% |
|
||||
| NVIDIA GeForce RTX 3070 | 1024x1024 | 0.794 | 96.40% | 0.794 (0%) | 96.40% |
|
||||
|
||||
</details>
|
||||
|
||||
## Available VAEs
|
||||
|
||||
| | **Endpoint** | **Model** |
|
||||
|:-:|:-----------:|:--------:|
|
||||
| **Stable Diffusion v1** | [https://q1bj3bpq6kzilnsu.us-east-1.aws.endpoints.huggingface.cloud](https://q1bj3bpq6kzilnsu.us-east-1.aws.endpoints.huggingface.cloud) | [`stabilityai/sd-vae-ft-mse`](https://hf.co/stabilityai/sd-vae-ft-mse) |
|
||||
| **Stable Diffusion XL** | [https://x2dmsqunjd6k9prw.us-east-1.aws.endpoints.huggingface.cloud](https://x2dmsqunjd6k9prw.us-east-1.aws.endpoints.huggingface.cloud) | [`madebyollin/sdxl-vae-fp16-fix`](https://hf.co/madebyollin/sdxl-vae-fp16-fix) |
|
||||
| **Flux** | [https://whhx50ex1aryqvw6.us-east-1.aws.endpoints.huggingface.cloud](https://whhx50ex1aryqvw6.us-east-1.aws.endpoints.huggingface.cloud) | [`black-forest-labs/FLUX.1-schnell`](https://hf.co/black-forest-labs/FLUX.1-schnell) |
|
||||
| **HunyuanVideo** | [https://o7ywnmrahorts457.us-east-1.aws.endpoints.huggingface.cloud](https://o7ywnmrahorts457.us-east-1.aws.endpoints.huggingface.cloud) | [`hunyuanvideo-community/HunyuanVideo`](https://hf.co/hunyuanvideo-community/HunyuanVideo) |
|
||||
|
||||
|
||||
> [!TIP]
|
||||
> Model support can be requested [here](https://github.com/huggingface/diffusers/issues/new?template=remote-vae-pilot-feedback.yml).
|
||||
|
||||
|
||||
## Code
|
||||
|
||||
> [!TIP]
|
||||
> Install `diffusers` from `main` to run the code: `pip install git+https://github.com/huggingface/diffusers@main`
|
||||
|
||||
|
||||
A helper method simplifies interacting with Hybrid Inference.
|
||||
|
||||
```python
|
||||
from diffusers.utils.remote_utils import remote_decode
|
||||
```
|
||||
|
||||
### Basic example
|
||||
|
||||
Here, we show how to use the remote VAE on random tensors.
|
||||
|
||||
<details><summary>Code</summary>
|
||||
|
||||
```python
|
||||
image = remote_decode(
|
||||
endpoint="https://q1bj3bpq6kzilnsu.us-east-1.aws.endpoints.huggingface.cloud/",
|
||||
tensor=torch.randn([1, 4, 64, 64], dtype=torch.float16),
|
||||
scaling_factor=0.18215,
|
||||
)
|
||||
```
|
||||
|
||||
</details>
|
||||
|
||||
<figure class="image flex flex-col items-center justify-center text-center m-0 w-full">
|
||||
<img src="https://huggingface.co/datasets/huggingface/documentation-images/resolve/main/blog/remote_vae/output.png"/>
|
||||
</figure>
|
||||
|
||||
Usage for Flux is slightly different. Flux latents are packed so we need to send the `height` and `width`.
|
||||
|
||||
<details><summary>Code</summary>
|
||||
|
||||
```python
|
||||
image = remote_decode(
|
||||
endpoint="https://whhx50ex1aryqvw6.us-east-1.aws.endpoints.huggingface.cloud/",
|
||||
tensor=torch.randn([1, 4096, 64], dtype=torch.float16),
|
||||
height=1024,
|
||||
width=1024,
|
||||
scaling_factor=0.3611,
|
||||
shift_factor=0.1159,
|
||||
)
|
||||
```
|
||||
|
||||
</details>
|
||||
|
||||
<figure class="image flex flex-col items-center justify-center text-center m-0 w-full">
|
||||
<img src="https://huggingface.co/datasets/huggingface/documentation-images/resolve/main/blog/remote_vae/flux_random_latent.png"/>
|
||||
</figure>
|
||||
|
||||
Finally, an example for HunyuanVideo.
|
||||
|
||||
<details><summary>Code</summary>
|
||||
|
||||
```python
|
||||
video = remote_decode(
|
||||
endpoint="https://o7ywnmrahorts457.us-east-1.aws.endpoints.huggingface.cloud/",
|
||||
tensor=torch.randn([1, 16, 3, 40, 64], dtype=torch.float16),
|
||||
output_type="mp4",
|
||||
)
|
||||
with open("video.mp4", "wb") as f:
|
||||
f.write(video)
|
||||
```
|
||||
|
||||
</details>
|
||||
|
||||
<figure class="image flex flex-col items-center justify-center text-center m-0 w-full">
|
||||
<video
|
||||
alt="queue.mp4"
|
||||
autoplay loop autobuffer muted playsinline
|
||||
>
|
||||
<source src="https://huggingface.co/datasets/huggingface/documentation-images/resolve/main/blog/remote_vae/video_1.mp4" type="video/mp4">
|
||||
</video>
|
||||
</figure>
|
||||
|
||||
|
||||
### Generation
|
||||
|
||||
But we want to use the VAE on an actual pipeline to get an actual image, not random noise. The example below shows how to do it with SD v1.5.
|
||||
|
||||
<details><summary>Code</summary>
|
||||
|
||||
```python
|
||||
from diffusers import StableDiffusionPipeline
|
||||
|
||||
pipe = StableDiffusionPipeline.from_pretrained(
|
||||
"stable-diffusion-v1-5/stable-diffusion-v1-5",
|
||||
torch_dtype=torch.float16,
|
||||
variant="fp16",
|
||||
vae=None,
|
||||
).to("cuda")
|
||||
|
||||
prompt = "Strawberry ice cream, in a stylish modern glass, coconut, splashing milk cream and honey, in a gradient purple background, fluid motion, dynamic movement, cinematic lighting, Mysterious"
|
||||
|
||||
latent = pipe(
|
||||
prompt=prompt,
|
||||
output_type="latent",
|
||||
).images
|
||||
image = remote_decode(
|
||||
endpoint="https://q1bj3bpq6kzilnsu.us-east-1.aws.endpoints.huggingface.cloud/",
|
||||
tensor=latent,
|
||||
scaling_factor=0.18215,
|
||||
)
|
||||
image.save("test.jpg")
|
||||
```
|
||||
|
||||
</details>
|
||||
|
||||
<figure class="image flex flex-col items-center justify-center text-center m-0 w-full">
|
||||
<img src="https://huggingface.co/datasets/huggingface/documentation-images/resolve/main/blog/remote_vae/test.jpg"/>
|
||||
</figure>
|
||||
|
||||
Here’s another example with Flux.
|
||||
|
||||
<details><summary>Code</summary>
|
||||
|
||||
```python
|
||||
from diffusers import FluxPipeline
|
||||
|
||||
pipe = FluxPipeline.from_pretrained(
|
||||
"black-forest-labs/FLUX.1-schnell",
|
||||
torch_dtype=torch.bfloat16,
|
||||
vae=None,
|
||||
).to("cuda")
|
||||
|
||||
prompt = "Strawberry ice cream, in a stylish modern glass, coconut, splashing milk cream and honey, in a gradient purple background, fluid motion, dynamic movement, cinematic lighting, Mysterious"
|
||||
|
||||
latent = pipe(
|
||||
prompt=prompt,
|
||||
guidance_scale=0.0,
|
||||
num_inference_steps=4,
|
||||
output_type="latent",
|
||||
).images
|
||||
image = remote_decode(
|
||||
endpoint="https://whhx50ex1aryqvw6.us-east-1.aws.endpoints.huggingface.cloud/",
|
||||
tensor=latent,
|
||||
height=1024,
|
||||
width=1024,
|
||||
scaling_factor=0.3611,
|
||||
shift_factor=0.1159,
|
||||
)
|
||||
image.save("test.jpg")
|
||||
```
|
||||
|
||||
</details>
|
||||
|
||||
<figure class="image flex flex-col items-center justify-center text-center m-0 w-full">
|
||||
<img src="https://huggingface.co/datasets/huggingface/documentation-images/resolve/main/blog/remote_vae/test_1.jpg"/>
|
||||
</figure>
|
||||
|
||||
Here’s an example with HunyuanVideo.
|
||||
|
||||
<details><summary>Code</summary>
|
||||
|
||||
```python
|
||||
from diffusers import HunyuanVideoPipeline, HunyuanVideoTransformer3DModel
|
||||
|
||||
model_id = "hunyuanvideo-community/HunyuanVideo"
|
||||
transformer = HunyuanVideoTransformer3DModel.from_pretrained(
|
||||
model_id, subfolder="transformer", torch_dtype=torch.bfloat16
|
||||
)
|
||||
pipe = HunyuanVideoPipeline.from_pretrained(
|
||||
model_id, transformer=transformer, vae=None, torch_dtype=torch.float16
|
||||
).to("cuda")
|
||||
|
||||
latent = pipe(
|
||||
prompt="A cat walks on the grass, realistic",
|
||||
height=320,
|
||||
width=512,
|
||||
num_frames=61,
|
||||
num_inference_steps=30,
|
||||
output_type="latent",
|
||||
).frames
|
||||
|
||||
video = remote_decode(
|
||||
endpoint="https://o7ywnmrahorts457.us-east-1.aws.endpoints.huggingface.cloud/",
|
||||
tensor=latent,
|
||||
output_type="mp4",
|
||||
)
|
||||
|
||||
if isinstance(video, bytes):
|
||||
with open("video.mp4", "wb") as f:
|
||||
f.write(video)
|
||||
```
|
||||
|
||||
</details>
|
||||
|
||||
<figure class="image flex flex-col items-center justify-center text-center m-0 w-full">
|
||||
<video
|
||||
alt="queue.mp4"
|
||||
autoplay loop autobuffer muted playsinline
|
||||
>
|
||||
<source src="https://huggingface.co/datasets/huggingface/documentation-images/resolve/main/blog/remote_vae/video.mp4" type="video/mp4">
|
||||
</video>
|
||||
</figure>
|
||||
|
||||
|
||||
### Queueing
|
||||
|
||||
One of the great benefits of using a remote VAE is that we can queue multiple generation requests. While the current latent is being processed for decoding, we can already queue another one. This helps improve concurrency.
|
||||
|
||||
|
||||
<details><summary>Code</summary>
|
||||
|
||||
```python
|
||||
import queue
|
||||
import threading
|
||||
from IPython.display import display
|
||||
from diffusers import StableDiffusionPipeline
|
||||
|
||||
def decode_worker(q: queue.Queue):
|
||||
while True:
|
||||
item = q.get()
|
||||
if item is None:
|
||||
break
|
||||
image = remote_decode(
|
||||
endpoint="https://q1bj3bpq6kzilnsu.us-east-1.aws.endpoints.huggingface.cloud/",
|
||||
tensor=item,
|
||||
scaling_factor=0.18215,
|
||||
)
|
||||
display(image)
|
||||
q.task_done()
|
||||
|
||||
q = queue.Queue()
|
||||
thread = threading.Thread(target=decode_worker, args=(q,), daemon=True)
|
||||
thread.start()
|
||||
|
||||
def decode(latent: torch.Tensor):
|
||||
q.put(latent)
|
||||
|
||||
prompts = [
|
||||
"Blueberry ice cream, in a stylish modern glass , ice cubes, nuts, mint leaves, splashing milk cream, in a gradient purple background, fluid motion, dynamic movement, cinematic lighting, Mysterious",
|
||||
"Lemonade in a glass, mint leaves, in an aqua and white background, flowers, ice cubes, halo, fluid motion, dynamic movement, soft lighting, digital painting, rule of thirds composition, Art by Greg rutkowski, Coby whitmore",
|
||||
"Comic book art, beautiful, vintage, pastel neon colors, extremely detailed pupils, delicate features, light on face, slight smile, Artgerm, Mary Blair, Edmund Dulac, long dark locks, bangs, glowing, fashionable style, fairytale ambience, hot pink.",
|
||||
"Masterpiece, vanilla cone ice cream garnished with chocolate syrup, crushed nuts, choco flakes, in a brown background, gold, cinematic lighting, Art by WLOP",
|
||||
"A bowl of milk, falling cornflakes, berries, blueberries, in a white background, soft lighting, intricate details, rule of thirds, octane render, volumetric lighting",
|
||||
"Cold Coffee with cream, crushed almonds, in a glass, choco flakes, ice cubes, wet, in a wooden background, cinematic lighting, hyper realistic painting, art by Carne Griffiths, octane render, volumetric lighting, fluid motion, dynamic movement, muted colors,",
|
||||
]
|
||||
|
||||
pipe = StableDiffusionPipeline.from_pretrained(
|
||||
"Lykon/dreamshaper-8",
|
||||
torch_dtype=torch.float16,
|
||||
vae=None,
|
||||
).to("cuda")
|
||||
|
||||
pipe.unet = pipe.unet.to(memory_format=torch.channels_last)
|
||||
pipe.unet = torch.compile(pipe.unet, mode="reduce-overhead", fullgraph=True)
|
||||
|
||||
_ = pipe(
|
||||
prompt=prompts[0],
|
||||
output_type="latent",
|
||||
)
|
||||
|
||||
for prompt in prompts:
|
||||
latent = pipe(
|
||||
prompt=prompt,
|
||||
output_type="latent",
|
||||
).images
|
||||
decode(latent)
|
||||
|
||||
q.put(None)
|
||||
thread.join()
|
||||
```
|
||||
|
||||
</details>
|
||||
|
||||
|
||||
<figure class="image flex flex-col items-center justify-center text-center m-0 w-full">
|
||||
<video
|
||||
alt="queue.mp4"
|
||||
autoplay loop autobuffer muted playsinline
|
||||
>
|
||||
<source src="https://huggingface.co/datasets/huggingface/documentation-images/resolve/main/blog/remote_vae/queue.mp4" type="video/mp4">
|
||||
</video>
|
||||
</figure>
|
||||
|
||||
## Integrations
|
||||
|
||||
* **[SD.Next](https://github.com/vladmandic/sdnext):** All-in-one UI with direct supports Hybrid Inference.
|
||||
* **[ComfyUI-HFRemoteVae](https://github.com/kijai/ComfyUI-HFRemoteVae):** ComfyUI node for Hybrid Inference.
|
||||
@@ -1,183 +0,0 @@
|
||||
# Getting Started: VAE Encode with Hybrid Inference
|
||||
|
||||
VAE encode is used for training, image-to-image and image-to-video - turning into images or videos into latent representations.
|
||||
|
||||
## Memory
|
||||
|
||||
These tables demonstrate the VRAM requirements for VAE encode with SD v1 and SD XL on different GPUs.
|
||||
|
||||
For the majority of these GPUs the memory usage % dictates other models (text encoders, UNet/Transformer) must be offloaded, or tiled encoding has to be used which increases time taken and impacts quality.
|
||||
|
||||
<details><summary>SD v1.5</summary>
|
||||
|
||||
| GPU | Resolution | Time (seconds) | Memory (%) | Tiled Time (secs) | Tiled Memory (%) |
|
||||
|:------------------------------|:-------------|-----------------:|-------------:|--------------------:|-------------------:|
|
||||
| NVIDIA GeForce RTX 4090 | 512x512 | 0.015 | 3.51901 | 0.015 | 3.51901 |
|
||||
| NVIDIA GeForce RTX 4090 | 256x256 | 0.004 | 1.3154 | 0.005 | 1.3154 |
|
||||
| NVIDIA GeForce RTX 4090 | 2048x2048 | 0.402 | 47.1852 | 0.496 | 3.51901 |
|
||||
| NVIDIA GeForce RTX 4090 | 1024x1024 | 0.078 | 12.2658 | 0.094 | 3.51901 |
|
||||
| NVIDIA GeForce RTX 4080 SUPER | 512x512 | 0.023 | 5.30105 | 0.023 | 5.30105 |
|
||||
| NVIDIA GeForce RTX 4080 SUPER | 256x256 | 0.006 | 1.98152 | 0.006 | 1.98152 |
|
||||
| NVIDIA GeForce RTX 4080 SUPER | 2048x2048 | 0.574 | 71.08 | 0.656 | 5.30105 |
|
||||
| NVIDIA GeForce RTX 4080 SUPER | 1024x1024 | 0.111 | 18.4772 | 0.14 | 5.30105 |
|
||||
| NVIDIA GeForce RTX 3090 | 512x512 | 0.032 | 3.52782 | 0.032 | 3.52782 |
|
||||
| NVIDIA GeForce RTX 3090 | 256x256 | 0.01 | 1.31869 | 0.009 | 1.31869 |
|
||||
| NVIDIA GeForce RTX 3090 | 2048x2048 | 0.742 | 47.3033 | 0.954 | 3.52782 |
|
||||
| NVIDIA GeForce RTX 3090 | 1024x1024 | 0.136 | 12.2965 | 0.207 | 3.52782 |
|
||||
| NVIDIA GeForce RTX 3080 | 512x512 | 0.036 | 8.51761 | 0.036 | 8.51761 |
|
||||
| NVIDIA GeForce RTX 3080 | 256x256 | 0.01 | 3.18387 | 0.01 | 3.18387 |
|
||||
| NVIDIA GeForce RTX 3080 | 2048x2048 | 0.863 | 86.7424 | 1.191 | 8.51761 |
|
||||
| NVIDIA GeForce RTX 3080 | 1024x1024 | 0.157 | 29.6888 | 0.227 | 8.51761 |
|
||||
| NVIDIA GeForce RTX 3070 | 512x512 | 0.051 | 10.6941 | 0.051 | 10.6941 |
|
||||
| NVIDIA GeForce RTX 3070 | 256x256 | 0.015 | 3.99743 | 0.015 | 3.99743 |
|
||||
| NVIDIA GeForce RTX 3070 | 2048x2048 | 1.217 | 96.054 | 1.482 | 10.6941 |
|
||||
| NVIDIA GeForce RTX 3070 | 1024x1024 | 0.223 | 37.2751 | 0.327 | 10.6941 |
|
||||
|
||||
|
||||
</details>
|
||||
|
||||
<details><summary>SDXL</summary>
|
||||
|
||||
| GPU | Resolution | Time (seconds) | Memory Consumed (%) | Tiled Time (seconds) | Tiled Memory (%) |
|
||||
|:------------------------------|:-------------|-----------------:|----------------------:|-----------------------:|-------------------:|
|
||||
| NVIDIA GeForce RTX 4090 | 512x512 | 0.029 | 4.95707 | 0.029 | 4.95707 |
|
||||
| NVIDIA GeForce RTX 4090 | 256x256 | 0.007 | 2.29666 | 0.007 | 2.29666 |
|
||||
| NVIDIA GeForce RTX 4090 | 2048x2048 | 0.873 | 66.3452 | 0.863 | 15.5649 |
|
||||
| NVIDIA GeForce RTX 4090 | 1024x1024 | 0.142 | 15.5479 | 0.143 | 15.5479 |
|
||||
| NVIDIA GeForce RTX 4080 SUPER | 512x512 | 0.044 | 7.46735 | 0.044 | 7.46735 |
|
||||
| NVIDIA GeForce RTX 4080 SUPER | 256x256 | 0.01 | 3.4597 | 0.01 | 3.4597 |
|
||||
| NVIDIA GeForce RTX 4080 SUPER | 2048x2048 | 1.317 | 87.1615 | 1.291 | 23.447 |
|
||||
| NVIDIA GeForce RTX 4080 SUPER | 1024x1024 | 0.213 | 23.4215 | 0.214 | 23.4215 |
|
||||
| NVIDIA GeForce RTX 3090 | 512x512 | 0.058 | 5.65638 | 0.058 | 5.65638 |
|
||||
| NVIDIA GeForce RTX 3090 | 256x256 | 0.016 | 2.45081 | 0.016 | 2.45081 |
|
||||
| NVIDIA GeForce RTX 3090 | 2048x2048 | 1.755 | 77.8239 | 1.614 | 18.4193 |
|
||||
| NVIDIA GeForce RTX 3090 | 1024x1024 | 0.265 | 18.4023 | 0.265 | 18.4023 |
|
||||
| NVIDIA GeForce RTX 3080 | 512x512 | 0.064 | 13.6568 | 0.064 | 13.6568 |
|
||||
| NVIDIA GeForce RTX 3080 | 256x256 | 0.018 | 5.91728 | 0.018 | 5.91728 |
|
||||
| NVIDIA GeForce RTX 3080 | 2048x2048 | OOM | OOM | 1.866 | 44.4717 |
|
||||
| NVIDIA GeForce RTX 3080 | 1024x1024 | 0.302 | 44.4308 | 0.302 | 44.4308 |
|
||||
| NVIDIA GeForce RTX 3070 | 512x512 | 0.093 | 17.1465 | 0.093 | 17.1465 |
|
||||
| NVIDIA GeForce RTX 3070 | 256x256 | 0.025 | 7.42931 | 0.026 | 7.42931 |
|
||||
| NVIDIA GeForce RTX 3070 | 2048x2048 | OOM | OOM | 2.674 | 55.8355 |
|
||||
| NVIDIA GeForce RTX 3070 | 1024x1024 | 0.443 | 55.7841 | 0.443 | 55.7841 |
|
||||
|
||||
</details>
|
||||
|
||||
## Available VAEs
|
||||
|
||||
| | **Endpoint** | **Model** |
|
||||
|:-:|:-----------:|:--------:|
|
||||
| **Stable Diffusion v1** | [https://qc6479g0aac6qwy9.us-east-1.aws.endpoints.huggingface.cloud](https://qc6479g0aac6qwy9.us-east-1.aws.endpoints.huggingface.cloud) | [`stabilityai/sd-vae-ft-mse`](https://hf.co/stabilityai/sd-vae-ft-mse) |
|
||||
| **Stable Diffusion XL** | [https://xjqqhmyn62rog84g.us-east-1.aws.endpoints.huggingface.cloud](https://xjqqhmyn62rog84g.us-east-1.aws.endpoints.huggingface.cloud) | [`madebyollin/sdxl-vae-fp16-fix`](https://hf.co/madebyollin/sdxl-vae-fp16-fix) |
|
||||
| **Flux** | [https://ptccx55jz97f9zgo.us-east-1.aws.endpoints.huggingface.cloud](https://ptccx55jz97f9zgo.us-east-1.aws.endpoints.huggingface.cloud) | [`black-forest-labs/FLUX.1-schnell`](https://hf.co/black-forest-labs/FLUX.1-schnell) |
|
||||
|
||||
|
||||
> [!TIP]
|
||||
> Model support can be requested [here](https://github.com/huggingface/diffusers/issues/new?template=remote-vae-pilot-feedback.yml).
|
||||
|
||||
|
||||
## Code
|
||||
|
||||
> [!TIP]
|
||||
> Install `diffusers` from `main` to run the code: `pip install git+https://github.com/huggingface/diffusers@main`
|
||||
|
||||
|
||||
A helper method simplifies interacting with Hybrid Inference.
|
||||
|
||||
```python
|
||||
from diffusers.utils.remote_utils import remote_encode
|
||||
```
|
||||
|
||||
### Basic example
|
||||
|
||||
Let's encode an image, then decode it to demonstrate.
|
||||
|
||||
<figure class="image flex flex-col items-center justify-center text-center m-0 w-full">
|
||||
<img src="https://huggingface.co/datasets/huggingface/documentation-images/resolve/main/diffusers/astronaut.jpg"/>
|
||||
</figure>
|
||||
|
||||
<details><summary>Code</summary>
|
||||
|
||||
```python
|
||||
from diffusers.utils import load_image
|
||||
from diffusers.utils.remote_utils import remote_decode
|
||||
|
||||
image = load_image("https://huggingface.co/datasets/huggingface/documentation-images/resolve/main/diffusers/astronaut.jpg?download=true")
|
||||
|
||||
latent = remote_encode(
|
||||
endpoint="https://ptccx55jz97f9zgo.us-east-1.aws.endpoints.huggingface.cloud/",
|
||||
scaling_factor=0.3611,
|
||||
shift_factor=0.1159,
|
||||
)
|
||||
|
||||
decoded = remote_decode(
|
||||
endpoint="https://whhx50ex1aryqvw6.us-east-1.aws.endpoints.huggingface.cloud/",
|
||||
tensor=latent,
|
||||
scaling_factor=0.3611,
|
||||
shift_factor=0.1159,
|
||||
)
|
||||
```
|
||||
|
||||
</details>
|
||||
|
||||
<figure class="image flex flex-col items-center justify-center text-center m-0 w-full">
|
||||
<img src="https://huggingface.co/datasets/huggingface/documentation-images/resolve/main/blog/remote_vae/decoded.png"/>
|
||||
</figure>
|
||||
|
||||
|
||||
### Generation
|
||||
|
||||
Now let's look at a generation example, we'll encode the image, generate then remotely decode too!
|
||||
|
||||
<details><summary>Code</summary>
|
||||
|
||||
```python
|
||||
import torch
|
||||
from diffusers import StableDiffusionImg2ImgPipeline
|
||||
from diffusers.utils import load_image
|
||||
from diffusers.utils.remote_utils import remote_decode, remote_encode
|
||||
|
||||
pipe = StableDiffusionImg2ImgPipeline.from_pretrained(
|
||||
"stable-diffusion-v1-5/stable-diffusion-v1-5",
|
||||
torch_dtype=torch.float16,
|
||||
variant="fp16",
|
||||
vae=None,
|
||||
).to("cuda")
|
||||
|
||||
init_image = load_image(
|
||||
"https://raw.githubusercontent.com/CompVis/stable-diffusion/main/assets/stable-samples/img2img/sketch-mountains-input.jpg"
|
||||
)
|
||||
init_image = init_image.resize((768, 512))
|
||||
|
||||
init_latent = remote_encode(
|
||||
endpoint="https://qc6479g0aac6qwy9.us-east-1.aws.endpoints.huggingface.cloud/",
|
||||
image=init_image,
|
||||
scaling_factor=0.18215,
|
||||
)
|
||||
|
||||
prompt = "A fantasy landscape, trending on artstation"
|
||||
latent = pipe(
|
||||
prompt=prompt,
|
||||
image=init_latent,
|
||||
strength=0.75,
|
||||
output_type="latent",
|
||||
).images
|
||||
|
||||
image = remote_decode(
|
||||
endpoint="https://q1bj3bpq6kzilnsu.us-east-1.aws.endpoints.huggingface.cloud/",
|
||||
tensor=latent,
|
||||
scaling_factor=0.18215,
|
||||
)
|
||||
image.save("fantasy_landscape.jpg")
|
||||
```
|
||||
|
||||
</details>
|
||||
|
||||
<figure class="image flex flex-col items-center justify-center text-center m-0 w-full">
|
||||
<img src="https://huggingface.co/datasets/huggingface/documentation-images/resolve/main/blog/remote_vae/fantasy_landscape.png"/>
|
||||
</figure>
|
||||
|
||||
## Integrations
|
||||
|
||||
* **[SD.Next](https://github.com/vladmandic/sdnext):** All-in-one UI with direct supports Hybrid Inference.
|
||||
* **[ComfyUI-HFRemoteVae](https://github.com/kijai/ComfyUI-HFRemoteVae):** ComfyUI node for Hybrid Inference.
|
||||
@@ -161,10 +161,10 @@ Your Python environment will find the `main` version of 🤗 Diffusers on the ne
|
||||
|
||||
Model weights and files are downloaded from the Hub to a cache which is usually your home directory. You can change the cache location by specifying the `HF_HOME` or `HUGGINFACE_HUB_CACHE` environment variables or configuring the `cache_dir` parameter in methods like [`~DiffusionPipeline.from_pretrained`].
|
||||
|
||||
Cached files allow you to run 🤗 Diffusers offline. To prevent 🤗 Diffusers from connecting to the internet, set the `HF_HUB_OFFLINE` environment variable to `1` and 🤗 Diffusers will only load previously downloaded files in the cache.
|
||||
Cached files allow you to run 🤗 Diffusers offline. To prevent 🤗 Diffusers from connecting to the internet, set the `HF_HUB_OFFLINE` environment variable to `True` and 🤗 Diffusers will only load previously downloaded files in the cache.
|
||||
|
||||
```shell
|
||||
export HF_HUB_OFFLINE=1
|
||||
export HF_HUB_OFFLINE=True
|
||||
```
|
||||
|
||||
For more details about managing and cleaning the cache, take a look at the [caching](https://huggingface.co/docs/huggingface_hub/guides/manage-cache) guide.
|
||||
@@ -179,16 +179,14 @@ Telemetry is only sent when loading models and pipelines from the Hub,
|
||||
and it is not collected if you're loading local files.
|
||||
|
||||
We understand that not everyone wants to share additional information,and we respect your privacy.
|
||||
You can disable telemetry collection by setting the `HF_HUB_DISABLE_TELEMETRY` environment variable from your terminal:
|
||||
You can disable telemetry collection by setting the `DISABLE_TELEMETRY` environment variable from your terminal:
|
||||
|
||||
On Linux/MacOS:
|
||||
|
||||
```bash
|
||||
export HF_HUB_DISABLE_TELEMETRY=1
|
||||
export DISABLE_TELEMETRY=YES
|
||||
```
|
||||
|
||||
On Windows:
|
||||
|
||||
```bash
|
||||
set HF_HUB_DISABLE_TELEMETRY=1
|
||||
set DISABLE_TELEMETRY=YES
|
||||
```
|
||||
|
||||
@@ -178,9 +178,6 @@ pipe = CogVideoXPipeline.from_pretrained("THUDM/CogVideoX-5b", torch_dtype=torch
|
||||
# We can utilize the enable_group_offload method for Diffusers model implementations
|
||||
pipe.transformer.enable_group_offload(onload_device=onload_device, offload_device=offload_device, offload_type="leaf_level", use_stream=True)
|
||||
|
||||
# Uncomment the following to also allow recording the current streams.
|
||||
# pipe.transformer.enable_group_offload(onload_device=onload_device, offload_device=offload_device, offload_type="leaf_level", use_stream=True, record_stream=True)
|
||||
|
||||
# For any other model implementations, the apply_group_offloading function can be used
|
||||
apply_group_offloading(pipe.text_encoder, onload_device=onload_device, offload_type="block_level", num_blocks_per_group=2)
|
||||
apply_group_offloading(pipe.vae, onload_device=onload_device, offload_type="leaf_level")
|
||||
@@ -201,19 +198,6 @@ export_to_video(video, "output.mp4", fps=8)
|
||||
|
||||
Group offloading (for CUDA devices with support for asynchronous data transfer streams) overlaps data transfer and computation to reduce the overall execution time compared to sequential offloading. This is enabled using layer prefetching with CUDA streams. The next layer to be executed is loaded onto the accelerator device while the current layer is being executed - this increases the memory requirements slightly. Group offloading also supports leaf-level offloading (equivalent to sequential CPU offloading) but can be made much faster when using streams.
|
||||
|
||||
<Tip>
|
||||
|
||||
- Group offloading may not work with all models out-of-the-box. If the forward implementations of the model contain weight-dependent device-casting of inputs, it may clash with the offloading mechanism's handling of device-casting.
|
||||
- The `offload_type` parameter can be set to either `block_level` or `leaf_level`. `block_level` offloads groups of `torch::nn::ModuleList` or `torch::nn:Sequential` modules based on a configurable attribute `num_blocks_per_group`. For example, if you set `num_blocks_per_group=2` on a standard transformer model containing 40 layers, it will onload/offload 2 layers at a time for a total of 20 onload/offloads. This drastically reduces the VRAM requirements. `leaf_level` offloads individual layers at the lowest level, which is equivalent to sequential offloading. However, unlike sequential offloading, group offloading can be made much faster when using streams, with minimal compromise to end-to-end generation time.
|
||||
- The `use_stream` parameter can be used with CUDA devices to enable prefetching layers for onload. It defaults to `False`. Layer prefetching allows overlapping computation and data transfer of model weights, which drastically reduces the overall execution time compared to other offloading methods. However, it can increase the CPU RAM usage significantly. Ensure that available CPU RAM that is at least twice the size of the model when setting `use_stream=True`. You can find more information about CUDA streams [here](https://pytorch.org/docs/stable/generated/torch.cuda.Stream.html)
|
||||
- If specifying `use_stream=True` on VAEs with tiling enabled, make sure to do a dummy forward pass (possibly with dummy inputs) before the actual inference to avoid device-mismatch errors. This may not work on all implementations. Please open an issue if you encounter any problems.
|
||||
- The parameter `low_cpu_mem_usage` can be set to `True` to reduce CPU memory usage when using streams for group offloading. This is useful when the CPU memory is the bottleneck, but it may counteract the benefits of using streams and increase the overall execution time. The CPU memory savings come from creating pinned-tensors on-the-fly instead of pre-pinning them. This parameter is better suited for using `leaf_level` offloading.
|
||||
- When using `use_stream=True`, users can additionally specify `record_stream=True` to get better speedups at the expense of slightly increased memory usage. Refer to the [official PyTorch docs](https://pytorch.org/docs/stable/generated/torch.Tensor.record_stream.html) to know more about this.
|
||||
|
||||
For more information about available parameters and an explanation of how group offloading works, refer to [`~hooks.group_offloading.apply_group_offloading`].
|
||||
|
||||
</Tip>
|
||||
|
||||
## FP8 layerwise weight-casting
|
||||
|
||||
PyTorch supports `torch.float8_e4m3fn` and `torch.float8_e5m2` as weight storage dtypes, but they can't be used for computation in many different tensor operations due to unimplemented kernel support. However, you can use these dtypes to store model weights in fp8 precision and upcast them on-the-fly when the layers are used in the forward pass. This is known as layerwise weight-casting.
|
||||
@@ -251,14 +235,6 @@ In the above example, layerwise casting is enabled on the transformer component
|
||||
|
||||
However, you gain more control and flexibility by directly utilizing the [`~hooks.layerwise_casting.apply_layerwise_casting`] function instead of [`~ModelMixin.enable_layerwise_casting`].
|
||||
|
||||
<Tip>
|
||||
|
||||
- Layerwise casting may not work with all models out-of-the-box. Sometimes, the forward implementations of the model might contain internal typecasting of weight values. Such implementations are not supported due to the currently simplistic implementation of layerwise casting, which assumes that the forward pass is independent of the weight precision and that the input dtypes are always in `compute_dtype`. An example of an incompatible implementation can be found [here](https://github.com/huggingface/transformers/blob/7f5077e53682ca855afc826162b204ebf809f1f9/src/transformers/models/t5/modeling_t5.py#L294-L299).
|
||||
- Layerwise casting may fail on custom modeling implementations that make use of [PEFT](https://github.com/huggingface/peft) layers. Some minimal checks to handle this case is implemented but is not extensively tested or guaranteed to work in all cases.
|
||||
- It can be also be applied partially to specific layers of a model. Partially applying layerwise casting can either be done manually by calling the `apply_layerwise_casting` function on specific internal modules, or by specifying the `skip_modules_pattern` and `skip_modules_classes` parameters for a root module. These parameters are particularly useful for layers such as normalization and modulation.
|
||||
|
||||
</Tip>
|
||||
|
||||
## Channels-last memory format
|
||||
|
||||
The channels-last memory format is an alternative way of ordering NCHW tensors in memory to preserve dimension ordering. Channels-last tensors are ordered in such a way that the channels become the densest dimension (storing images pixel-per-pixel). Since not all operators currently support the channels-last format, it may result in worst performance but you should still try and see if it works for your model.
|
||||
|
||||
@@ -12,9 +12,6 @@ specific language governing permissions and limitations under the License.
|
||||
|
||||
# Metal Performance Shaders (MPS)
|
||||
|
||||
> [!TIP]
|
||||
> Pipelines with a <img alt="MPS" src="https://img.shields.io/badge/MPS-000000?style=flat&logo=apple&logoColor=white%22"> badge indicate a model can take advantage of the MPS backend on Apple silicon devices for faster inference. Feel free to open a [Pull Request](https://github.com/huggingface/diffusers/compare) to add this badge to pipelines that are missing it.
|
||||
|
||||
🤗 Diffusers is compatible with Apple silicon (M1/M2 chips) using the PyTorch [`mps`](https://pytorch.org/docs/stable/notes/mps.html) device, which uses the Metal framework to leverage the GPU on MacOS devices. You'll need to have:
|
||||
|
||||
- macOS computer with Apple silicon (M1/M2) hardware
|
||||
@@ -40,7 +37,7 @@ image
|
||||
|
||||
<Tip warning={true}>
|
||||
|
||||
The PyTorch [mps](https://pytorch.org/docs/stable/notes/mps.html) backend does not support NDArray sizes greater than `2**32`. Please open an [Issue](https://github.com/huggingface/diffusers/issues/new/choose) if you encounter this problem so we can investigate.
|
||||
Generating multiple prompts in a batch can [crash](https://github.com/huggingface/diffusers/issues/363) or fail to work reliably. We believe this is related to the [`mps`](https://github.com/pytorch/pytorch/issues/84039) backend in PyTorch. While this is being investigated, you should iterate instead of batching.
|
||||
|
||||
</Tip>
|
||||
|
||||
@@ -62,10 +59,6 @@ If you're using **PyTorch 1.13**, you need to "prime" the pipeline with an addit
|
||||
|
||||
## Troubleshoot
|
||||
|
||||
This section lists some common issues with using the `mps` backend and how to solve them.
|
||||
|
||||
### Attention slicing
|
||||
|
||||
M1/M2 performance is very sensitive to memory pressure. When this occurs, the system automatically swaps if it needs to which significantly degrades performance.
|
||||
|
||||
To prevent this from happening, we recommend *attention slicing* to reduce memory pressure during inference and prevent swapping. This is especially relevant if your computer has less than 64GB of system RAM, or if you generate images at non-standard resolutions larger than 512×512 pixels. Call the [`~DiffusionPipeline.enable_attention_slicing`] function on your pipeline:
|
||||
@@ -79,7 +72,3 @@ pipeline.enable_attention_slicing()
|
||||
```
|
||||
|
||||
Attention slicing performs the costly attention operation in multiple steps instead of all at once. It usually improves performance by ~20% in computers without universal memory, but we've observed *better performance* in most Apple silicon computers unless you have 64GB of RAM or more.
|
||||
|
||||
### Batch inference
|
||||
|
||||
Generating multiple prompts in a batch can crash or fail to work reliably. If this is the case, try iterating instead of batching.
|
||||
@@ -49,7 +49,7 @@ For Ada and higher-series GPUs. we recommend changing `torch_dtype` to `torch.bf
|
||||
from diffusers import BitsAndBytesConfig as DiffusersBitsAndBytesConfig
|
||||
from transformers import BitsAndBytesConfig as TransformersBitsAndBytesConfig
|
||||
|
||||
from diffusers import AutoModel
|
||||
from diffusers import FluxTransformer2DModel
|
||||
from transformers import T5EncoderModel
|
||||
|
||||
quant_config = TransformersBitsAndBytesConfig(load_in_8bit=True,)
|
||||
@@ -63,7 +63,7 @@ text_encoder_2_8bit = T5EncoderModel.from_pretrained(
|
||||
|
||||
quant_config = DiffusersBitsAndBytesConfig(load_in_8bit=True,)
|
||||
|
||||
transformer_8bit = AutoModel.from_pretrained(
|
||||
transformer_8bit = FluxTransformer2DModel.from_pretrained(
|
||||
"black-forest-labs/FLUX.1-dev",
|
||||
subfolder="transformer",
|
||||
quantization_config=quant_config,
|
||||
@@ -74,7 +74,7 @@ transformer_8bit = AutoModel.from_pretrained(
|
||||
By default, all the other modules such as `torch.nn.LayerNorm` are converted to `torch.float16`. You can change the data type of these modules with the `torch_dtype` parameter.
|
||||
|
||||
```diff
|
||||
transformer_8bit = AutoModel.from_pretrained(
|
||||
transformer_8bit = FluxTransformer2DModel.from_pretrained(
|
||||
"black-forest-labs/FLUX.1-dev",
|
||||
subfolder="transformer",
|
||||
quantization_config=quant_config,
|
||||
@@ -133,7 +133,7 @@ For Ada and higher-series GPUs. we recommend changing `torch_dtype` to `torch.bf
|
||||
from diffusers import BitsAndBytesConfig as DiffusersBitsAndBytesConfig
|
||||
from transformers import BitsAndBytesConfig as TransformersBitsAndBytesConfig
|
||||
|
||||
from diffusers import AutoModel
|
||||
from diffusers import FluxTransformer2DModel
|
||||
from transformers import T5EncoderModel
|
||||
|
||||
quant_config = TransformersBitsAndBytesConfig(load_in_4bit=True,)
|
||||
@@ -147,7 +147,7 @@ text_encoder_2_4bit = T5EncoderModel.from_pretrained(
|
||||
|
||||
quant_config = DiffusersBitsAndBytesConfig(load_in_4bit=True,)
|
||||
|
||||
transformer_4bit = AutoModel.from_pretrained(
|
||||
transformer_4bit = FluxTransformer2DModel.from_pretrained(
|
||||
"black-forest-labs/FLUX.1-dev",
|
||||
subfolder="transformer",
|
||||
quantization_config=quant_config,
|
||||
@@ -158,7 +158,7 @@ transformer_4bit = AutoModel.from_pretrained(
|
||||
By default, all the other modules such as `torch.nn.LayerNorm` are converted to `torch.float16`. You can change the data type of these modules with the `torch_dtype` parameter.
|
||||
|
||||
```diff
|
||||
transformer_4bit = AutoModel.from_pretrained(
|
||||
transformer_4bit = FluxTransformer2DModel.from_pretrained(
|
||||
"black-forest-labs/FLUX.1-dev",
|
||||
subfolder="transformer",
|
||||
quantization_config=quant_config,
|
||||
@@ -217,11 +217,11 @@ print(model.get_memory_footprint())
|
||||
Quantized models can be loaded from the [`~ModelMixin.from_pretrained`] method without needing to specify the `quantization_config` parameters:
|
||||
|
||||
```py
|
||||
from diffusers import AutoModel, BitsAndBytesConfig
|
||||
from diffusers import FluxTransformer2DModel, BitsAndBytesConfig
|
||||
|
||||
quantization_config = BitsAndBytesConfig(load_in_4bit=True)
|
||||
|
||||
model_4bit = AutoModel.from_pretrained(
|
||||
model_4bit = FluxTransformer2DModel.from_pretrained(
|
||||
"hf-internal-testing/flux.1-dev-nf4-pkg", subfolder="transformer"
|
||||
)
|
||||
```
|
||||
@@ -243,13 +243,13 @@ An "outlier" is a hidden state value greater than a certain threshold, and these
|
||||
To find the best threshold for your model, we recommend experimenting with the `llm_int8_threshold` parameter in [`BitsAndBytesConfig`]:
|
||||
|
||||
```py
|
||||
from diffusers import AutoModel, BitsAndBytesConfig
|
||||
from diffusers import FluxTransformer2DModel, BitsAndBytesConfig
|
||||
|
||||
quantization_config = BitsAndBytesConfig(
|
||||
load_in_8bit=True, llm_int8_threshold=10,
|
||||
)
|
||||
|
||||
model_8bit = AutoModel.from_pretrained(
|
||||
model_8bit = FluxTransformer2DModel.from_pretrained(
|
||||
"black-forest-labs/FLUX.1-dev",
|
||||
subfolder="transformer",
|
||||
quantization_config=quantization_config,
|
||||
@@ -305,7 +305,7 @@ NF4 is a 4-bit data type from the [QLoRA](https://hf.co/papers/2305.14314) paper
|
||||
from diffusers import BitsAndBytesConfig as DiffusersBitsAndBytesConfig
|
||||
from transformers import BitsAndBytesConfig as TransformersBitsAndBytesConfig
|
||||
|
||||
from diffusers import AutoModel
|
||||
from diffusers import FluxTransformer2DModel
|
||||
from transformers import T5EncoderModel
|
||||
|
||||
quant_config = TransformersBitsAndBytesConfig(
|
||||
@@ -325,7 +325,7 @@ quant_config = DiffusersBitsAndBytesConfig(
|
||||
bnb_4bit_quant_type="nf4",
|
||||
)
|
||||
|
||||
transformer_4bit = AutoModel.from_pretrained(
|
||||
transformer_4bit = FluxTransformer2DModel.from_pretrained(
|
||||
"black-forest-labs/FLUX.1-dev",
|
||||
subfolder="transformer",
|
||||
quantization_config=quant_config,
|
||||
@@ -343,7 +343,7 @@ Nested quantization is a technique that can save additional memory at no additio
|
||||
from diffusers import BitsAndBytesConfig as DiffusersBitsAndBytesConfig
|
||||
from transformers import BitsAndBytesConfig as TransformersBitsAndBytesConfig
|
||||
|
||||
from diffusers import AutoModel
|
||||
from diffusers import FluxTransformer2DModel
|
||||
from transformers import T5EncoderModel
|
||||
|
||||
quant_config = TransformersBitsAndBytesConfig(
|
||||
@@ -363,7 +363,7 @@ quant_config = DiffusersBitsAndBytesConfig(
|
||||
bnb_4bit_use_double_quant=True,
|
||||
)
|
||||
|
||||
transformer_4bit = AutoModel.from_pretrained(
|
||||
transformer_4bit = FluxTransformer2DModel.from_pretrained(
|
||||
"black-forest-labs/FLUX.1-dev",
|
||||
subfolder="transformer",
|
||||
quantization_config=quant_config,
|
||||
@@ -379,7 +379,7 @@ Once quantized, you can dequantize a model to its original precision, but this m
|
||||
from diffusers import BitsAndBytesConfig as DiffusersBitsAndBytesConfig
|
||||
from transformers import BitsAndBytesConfig as TransformersBitsAndBytesConfig
|
||||
|
||||
from diffusers import AutoModel
|
||||
from diffusers import FluxTransformer2DModel
|
||||
from transformers import T5EncoderModel
|
||||
|
||||
quant_config = TransformersBitsAndBytesConfig(
|
||||
@@ -399,7 +399,7 @@ quant_config = DiffusersBitsAndBytesConfig(
|
||||
bnb_4bit_use_double_quant=True,
|
||||
)
|
||||
|
||||
transformer_4bit = AutoModel.from_pretrained(
|
||||
transformer_4bit = FluxTransformer2DModel.from_pretrained(
|
||||
"black-forest-labs/FLUX.1-dev",
|
||||
subfolder="transformer",
|
||||
quantization_config=quant_config,
|
||||
|
||||
@@ -36,6 +36,5 @@ Diffusers currently supports the following quantization methods.
|
||||
- [BitsandBytes](./bitsandbytes)
|
||||
- [TorchAO](./torchao)
|
||||
- [GGUF](./gguf)
|
||||
- [Quanto](./quanto.md)
|
||||
|
||||
[This resource](https://huggingface.co/docs/transformers/main/en/quantization/overview#when-to-use-what) provides a good overview of the pros and cons of different quantization techniques.
|
||||
|
||||
@@ -1,148 +0,0 @@
|
||||
<!--Copyright 2025 The HuggingFace Team. All rights reserved.
|
||||
|
||||
Licensed under the Apache License, Version 2.0 (the "License"); you may not use this file except in compliance with
|
||||
the License. You may obtain a copy of the License at
|
||||
|
||||
http://www.apache.org/licenses/LICENSE-2.0
|
||||
|
||||
Unless required by applicable law or agreed to in writing, software distributed under the License is distributed on
|
||||
an "AS IS" BASIS, WITHOUT WARRANTIES OR CONDITIONS OF ANY KIND, either express or implied. See the License for the
|
||||
specific language governing permissions and limitations under the License.
|
||||
|
||||
-->
|
||||
|
||||
# Quanto
|
||||
|
||||
[Quanto](https://github.com/huggingface/optimum-quanto) is a PyTorch quantization backend for [Optimum](https://huggingface.co/docs/optimum/en/index). It has been designed with versatility and simplicity in mind:
|
||||
|
||||
- All features are available in eager mode (works with non-traceable models)
|
||||
- Supports quantization aware training
|
||||
- Quantized models are compatible with `torch.compile`
|
||||
- Quantized models are Device agnostic (e.g CUDA,XPU,MPS,CPU)
|
||||
|
||||
In order to use the Quanto backend, you will first need to install `optimum-quanto>=0.2.6` and `accelerate`
|
||||
|
||||
```shell
|
||||
pip install optimum-quanto accelerate
|
||||
```
|
||||
|
||||
Now you can quantize a model by passing the `QuantoConfig` object to the `from_pretrained()` method. Although the Quanto library does allow quantizing `nn.Conv2d` and `nn.LayerNorm` modules, currently, Diffusers only supports quantizing the weights in the `nn.Linear` layers of a model. The following snippet demonstrates how to apply `float8` quantization with Quanto.
|
||||
|
||||
```python
|
||||
import torch
|
||||
from diffusers import FluxTransformer2DModel, QuantoConfig
|
||||
|
||||
model_id = "black-forest-labs/FLUX.1-dev"
|
||||
quantization_config = QuantoConfig(weights_dtype="float8")
|
||||
transformer = FluxTransformer2DModel.from_pretrained(
|
||||
model_id,
|
||||
subfolder="transformer",
|
||||
quantization_config=quantization_config,
|
||||
torch_dtype=torch.bfloat16,
|
||||
)
|
||||
|
||||
pipe = FluxPipeline.from_pretrained(model_id, transformer=transformer, torch_dtype=torch_dtype)
|
||||
pipe.to("cuda")
|
||||
|
||||
prompt = "A cat holding a sign that says hello world"
|
||||
image = pipe(
|
||||
prompt, num_inference_steps=50, guidance_scale=4.5, max_sequence_length=512
|
||||
).images[0]
|
||||
image.save("output.png")
|
||||
```
|
||||
|
||||
## Skipping Quantization on specific modules
|
||||
|
||||
It is possible to skip applying quantization on certain modules using the `modules_to_not_convert` argument in the `QuantoConfig`. Please ensure that the modules passed in to this argument match the keys of the modules in the `state_dict`
|
||||
|
||||
```python
|
||||
import torch
|
||||
from diffusers import FluxTransformer2DModel, QuantoConfig
|
||||
|
||||
model_id = "black-forest-labs/FLUX.1-dev"
|
||||
quantization_config = QuantoConfig(weights_dtype="float8", modules_to_not_convert=["proj_out"])
|
||||
transformer = FluxTransformer2DModel.from_pretrained(
|
||||
model_id,
|
||||
subfolder="transformer",
|
||||
quantization_config=quantization_config,
|
||||
torch_dtype=torch.bfloat16,
|
||||
)
|
||||
```
|
||||
|
||||
## Using `from_single_file` with the Quanto Backend
|
||||
|
||||
`QuantoConfig` is compatible with `~FromOriginalModelMixin.from_single_file`.
|
||||
|
||||
```python
|
||||
import torch
|
||||
from diffusers import FluxTransformer2DModel, QuantoConfig
|
||||
|
||||
ckpt_path = "https://huggingface.co/black-forest-labs/FLUX.1-dev/blob/main/flux1-dev.safetensors"
|
||||
quantization_config = QuantoConfig(weights_dtype="float8")
|
||||
transformer = FluxTransformer2DModel.from_single_file(ckpt_path, quantization_config=quantization_config, torch_dtype=torch.bfloat16)
|
||||
```
|
||||
|
||||
## Saving Quantized models
|
||||
|
||||
Diffusers supports serializing Quanto models using the `~ModelMixin.save_pretrained` method.
|
||||
|
||||
The serialization and loading requirements are different for models quantized directly with the Quanto library and models quantized
|
||||
with Diffusers using Quanto as the backend. It is currently not possible to load models quantized directly with Quanto into Diffusers using `~ModelMixin.from_pretrained`
|
||||
|
||||
```python
|
||||
import torch
|
||||
from diffusers import FluxTransformer2DModel, QuantoConfig
|
||||
|
||||
model_id = "black-forest-labs/FLUX.1-dev"
|
||||
quantization_config = QuantoConfig(weights_dtype="float8")
|
||||
transformer = FluxTransformer2DModel.from_pretrained(
|
||||
model_id,
|
||||
subfolder="transformer",
|
||||
quantization_config=quantization_config,
|
||||
torch_dtype=torch.bfloat16,
|
||||
)
|
||||
# save quantized model to reuse
|
||||
transformer.save_pretrained("<your quantized model save path>")
|
||||
|
||||
# you can reload your quantized model with
|
||||
model = FluxTransformer2DModel.from_pretrained("<your quantized model save path>")
|
||||
```
|
||||
|
||||
## Using `torch.compile` with Quanto
|
||||
|
||||
Currently the Quanto backend supports `torch.compile` for the following quantization types:
|
||||
|
||||
- `int8` weights
|
||||
|
||||
```python
|
||||
import torch
|
||||
from diffusers import FluxPipeline, FluxTransformer2DModel, QuantoConfig
|
||||
|
||||
model_id = "black-forest-labs/FLUX.1-dev"
|
||||
quantization_config = QuantoConfig(weights_dtype="int8")
|
||||
transformer = FluxTransformer2DModel.from_pretrained(
|
||||
model_id,
|
||||
subfolder="transformer",
|
||||
quantization_config=quantization_config,
|
||||
torch_dtype=torch.bfloat16,
|
||||
)
|
||||
transformer = torch.compile(transformer, mode="max-autotune", fullgraph=True)
|
||||
|
||||
pipe = FluxPipeline.from_pretrained(
|
||||
model_id, transformer=transformer, torch_dtype=torch_dtype
|
||||
)
|
||||
pipe.to("cuda")
|
||||
images = pipe("A cat holding a sign that says hello").images[0]
|
||||
images.save("flux-quanto-compile.png")
|
||||
```
|
||||
|
||||
## Supported Quantization Types
|
||||
|
||||
### Weights
|
||||
|
||||
- float8
|
||||
- int8
|
||||
- int4
|
||||
- int2
|
||||
|
||||
|
||||
@@ -26,13 +26,13 @@ The example below only quantizes the weights to int8.
|
||||
|
||||
```python
|
||||
import torch
|
||||
from diffusers import FluxPipeline, AutoModel, TorchAoConfig
|
||||
from diffusers import FluxPipeline, FluxTransformer2DModel, TorchAoConfig
|
||||
|
||||
model_id = "black-forest-labs/FLUX.1-dev"
|
||||
dtype = torch.bfloat16
|
||||
|
||||
quantization_config = TorchAoConfig("int8wo")
|
||||
transformer = AutoModel.from_pretrained(
|
||||
transformer = FluxTransformer2DModel.from_pretrained(
|
||||
model_id,
|
||||
subfolder="transformer",
|
||||
quantization_config=quantization_config,
|
||||
@@ -99,10 +99,10 @@ To serialize a quantized model in a given dtype, first load the model with the d
|
||||
|
||||
```python
|
||||
import torch
|
||||
from diffusers import AutoModel, TorchAoConfig
|
||||
from diffusers import FluxTransformer2DModel, TorchAoConfig
|
||||
|
||||
quantization_config = TorchAoConfig("int8wo")
|
||||
transformer = AutoModel.from_pretrained(
|
||||
transformer = FluxTransformer2DModel.from_pretrained(
|
||||
"black-forest-labs/Flux.1-Dev",
|
||||
subfolder="transformer",
|
||||
quantization_config=quantization_config,
|
||||
@@ -115,9 +115,9 @@ To load a serialized quantized model, use the [`~ModelMixin.from_pretrained`] me
|
||||
|
||||
```python
|
||||
import torch
|
||||
from diffusers import FluxPipeline, AutoModel
|
||||
from diffusers import FluxPipeline, FluxTransformer2DModel
|
||||
|
||||
transformer = AutoModel.from_pretrained("/path/to/flux_int8wo", torch_dtype=torch.bfloat16, use_safetensors=False)
|
||||
transformer = FluxTransformer2DModel.from_pretrained("/path/to/flux_int8wo", torch_dtype=torch.bfloat16, use_safetensors=False)
|
||||
pipe = FluxPipeline.from_pretrained("black-forest-labs/Flux.1-Dev", transformer=transformer, torch_dtype=torch.bfloat16)
|
||||
pipe.to("cuda")
|
||||
|
||||
@@ -126,15 +126,15 @@ image = pipe(prompt, num_inference_steps=30, guidance_scale=7.0).images[0]
|
||||
image.save("output.png")
|
||||
```
|
||||
|
||||
If you are using `torch<=2.6.0`, some quantization methods, such as `uint4wo`, cannot be loaded directly and may result in an `UnpicklingError` when trying to load the models, but work as expected when saving them. In order to work around this, one can load the state dict manually into the model. Note, however, that this requires using `weights_only=False` in `torch.load`, so it should be run only if the weights were obtained from a trustable source.
|
||||
Some quantization methods, such as `uint4wo`, cannot be loaded directly and may result in an `UnpicklingError` when trying to load the models, but work as expected when saving them. In order to work around this, one can load the state dict manually into the model. Note, however, that this requires using `weights_only=False` in `torch.load`, so it should be run only if the weights were obtained from a trustable source.
|
||||
|
||||
```python
|
||||
import torch
|
||||
from accelerate import init_empty_weights
|
||||
from diffusers import FluxPipeline, AutoModel, TorchAoConfig
|
||||
from diffusers import FluxPipeline, FluxTransformer2DModel, TorchAoConfig
|
||||
|
||||
# Serialize the model
|
||||
transformer = AutoModel.from_pretrained(
|
||||
transformer = FluxTransformer2DModel.from_pretrained(
|
||||
"black-forest-labs/Flux.1-Dev",
|
||||
subfolder="transformer",
|
||||
quantization_config=TorchAoConfig("uint4wo"),
|
||||
@@ -146,13 +146,10 @@ transformer.save_pretrained("/path/to/flux_uint4wo", safe_serialization=False, m
|
||||
# Load the model
|
||||
state_dict = torch.load("/path/to/flux_uint4wo/diffusion_pytorch_model.bin", weights_only=False, map_location="cpu")
|
||||
with init_empty_weights():
|
||||
transformer = AutoModel.from_config("/path/to/flux_uint4wo/config.json")
|
||||
transformer = FluxTransformer2DModel.from_config("/path/to/flux_uint4wo/config.json")
|
||||
transformer.load_state_dict(state_dict, strict=True, assign=True)
|
||||
```
|
||||
|
||||
> [!TIP]
|
||||
> The [`AutoModel`] API is supported for PyTorch >= 2.6 as shown in the examples below.
|
||||
|
||||
## Resources
|
||||
|
||||
- [TorchAO Quantization API](https://github.com/pytorch/ao/blob/main/torchao/quantization/README.md)
|
||||
|
||||
@@ -163,9 +163,6 @@ Models are initiated with the [`~ModelMixin.from_pretrained`] method which also
|
||||
>>> model = UNet2DModel.from_pretrained(repo_id, use_safetensors=True)
|
||||
```
|
||||
|
||||
> [!TIP]
|
||||
> Use the [`AutoModel`] API to automatically select a model class if you're unsure of which one to use.
|
||||
|
||||
To access the model parameters, call `model.config`:
|
||||
|
||||
```py
|
||||
|
||||
@@ -31,10 +31,10 @@ To adapt your text-to-image model for inpainting, you'll need to change the numb
|
||||
Initialize a [`UNet2DConditionModel`] with the pretrained text-to-image model weights, and change `in_channels` to 9. Changing the number of `in_channels` means you need to set `ignore_mismatched_sizes=True` and `low_cpu_mem_usage=False` to avoid a size mismatch error because the shape is different now.
|
||||
|
||||
```py
|
||||
from diffusers import AutoModel
|
||||
from diffusers import UNet2DConditionModel
|
||||
|
||||
model_id = "stable-diffusion-v1-5/stable-diffusion-v1-5"
|
||||
unet = AutoModel.from_pretrained(
|
||||
unet = UNet2DConditionModel.from_pretrained(
|
||||
model_id,
|
||||
subfolder="unet",
|
||||
in_channels=9,
|
||||
|
||||
@@ -216,7 +216,7 @@ Setting the `<ID_TOKEN>` is not necessary. From some limited experimentation, we
|
||||
> - The original repository uses a `lora_alpha` of `1`. We found this not suitable in many runs, possibly due to difference in modeling backends and training settings. Our recommendation is to set to the `lora_alpha` to either `rank` or `rank // 2`.
|
||||
> - If you're training on data whose captions generate bad results with the original model, a `rank` of 64 and above is good and also the recommendation by the team behind CogVideoX. If the generations are already moderately good on your training captions, a `rank` of 16/32 should work. We found that setting the rank too low, say `4`, is not ideal and doesn't produce promising results.
|
||||
> - The authors of CogVideoX recommend 4000 training steps and 100 training videos overall to achieve the best result. While that might yield the best results, we found from our limited experimentation that 2000 steps and 25 videos could also be sufficient.
|
||||
> - When using the Prodigy optimizer for training, one can follow the recommendations from [this](https://huggingface.co/blog/sdxl_lora_advanced_script) blog. Prodigy tends to overfit quickly. From my very limited testing, I found a learning rate of `0.5` to be suitable in addition to `--prodigy_use_bias_correction`, `prodigy_safeguard_warmup` and `--prodigy_decouple`.
|
||||
> - When using the Prodigy opitimizer for training, one can follow the recommendations from [this](https://huggingface.co/blog/sdxl_lora_advanced_script) blog. Prodigy tends to overfit quickly. From my very limited testing, I found a learning rate of `0.5` to be suitable in addition to `--prodigy_use_bias_correction`, `prodigy_safeguard_warmup` and `--prodigy_decouple`.
|
||||
> - The recommended learning rate by the CogVideoX authors and from our experimentation with Adam/AdamW is between `1e-3` and `1e-4` for a dataset of 25+ videos.
|
||||
>
|
||||
> Note that our testing is not exhaustive due to limited time for exploration. Our recommendation would be to play around with the different knobs and dials to find the best settings for your data.
|
||||
|
||||
@@ -165,10 +165,10 @@ flush()
|
||||
Load the diffusion transformer next which has 12.5B parameters. This time, set `device_map="auto"` to automatically distribute the model across two 16GB GPUs. The `auto` strategy is backed by [Accelerate](https://hf.co/docs/accelerate/index) and available as a part of the [Big Model Inference](https://hf.co/docs/accelerate/concept_guides/big_model_inference) feature. It starts by distributing a model across the fastest device first (GPU) before moving to slower devices like the CPU and hard drive if needed. The trade-off of storing model parameters on slower devices is slower inference latency.
|
||||
|
||||
```py
|
||||
from diffusers import AutoModel
|
||||
from diffusers import FluxTransformer2DModel
|
||||
import torch
|
||||
|
||||
transformer = AutoModel.from_pretrained(
|
||||
transformer = FluxTransformer2DModel.from_pretrained(
|
||||
"black-forest-labs/FLUX.1-dev",
|
||||
subfolder="transformer",
|
||||
device_map="auto",
|
||||
|
||||
@@ -589,7 +589,7 @@ For stage 2 of DeepFloyd IF with DreamBooth, pay attention to these parameters:
|
||||
|
||||
* `--learning_rate=5e-6`, use a lower learning rate with a smaller effective batch size
|
||||
* `--resolution=256`, the expected resolution for the upscaler
|
||||
* `--train_batch_size=2` and `--gradient_accumulation_steps=6`, to effectively train on images with faces requires larger batch sizes
|
||||
* `--train_batch_size=2` and `--gradient_accumulation_steps=6`, to effectively train on images wiht faces requires larger batch sizes
|
||||
|
||||
```bash
|
||||
export MODEL_NAME="DeepFloyd/IF-II-L-v1.0"
|
||||
|
||||
@@ -89,7 +89,7 @@ Many of the basic and important parameters are described in the [Text-to-image](
|
||||
|
||||
As with the script parameters, a walkthrough of the training script is provided in the [Text-to-image](text2image#training-script) training guide. Instead, this guide takes a look at the T2I-Adapter relevant parts of the script.
|
||||
|
||||
The training script begins by preparing the dataset. This includes [tokenizing](https://github.com/huggingface/diffusers/blob/aab6de22c33cc01fb7bc81c0807d6109e2c998c9/examples/t2i_adapter/train_t2i_adapter_sdxl.py#L674) the prompt and [applying transforms](https://github.com/huggingface/diffusers/blob/aab6de22c33cc01fb7bc81c0807d6109e2c998c9/examples/t2i_adapter/train_t2i_adapter_sdxl.py#L714) to the images and conditioning images.
|
||||
The training script begins by preparing the dataset. This incudes [tokenizing](https://github.com/huggingface/diffusers/blob/aab6de22c33cc01fb7bc81c0807d6109e2c998c9/examples/t2i_adapter/train_t2i_adapter_sdxl.py#L674) the prompt and [applying transforms](https://github.com/huggingface/diffusers/blob/aab6de22c33cc01fb7bc81c0807d6109e2c998c9/examples/t2i_adapter/train_t2i_adapter_sdxl.py#L714) to the images and conditioning images.
|
||||
|
||||
```py
|
||||
conditioning_image_transforms = transforms.Compose(
|
||||
|
||||
@@ -32,9 +32,9 @@ The denoiser checkpoint can also have multiple shards and supports inference tha
|
||||
For example, let's save a sharded checkpoint for the [SDXL UNet](https://huggingface.co/stabilityai/stable-diffusion-xl-base-1.0/tree/main/unet):
|
||||
|
||||
```python
|
||||
from diffusers import AutoModel
|
||||
from diffusers import UNet2DConditionModel
|
||||
|
||||
unet = AutoModel.from_pretrained(
|
||||
unet = UNet2DConditionModel.from_pretrained(
|
||||
"stabilityai/stable-diffusion-xl-base-1.0", subfolder="unet"
|
||||
)
|
||||
unet.save_pretrained("sdxl-unet-sharded", max_shard_size="5GB")
|
||||
@@ -43,10 +43,10 @@ unet.save_pretrained("sdxl-unet-sharded", max_shard_size="5GB")
|
||||
The size of the fp32 variant of the SDXL UNet checkpoint is ~10.4GB. Set the `max_shard_size` parameter to 5GB to create 3 shards. After saving, you can load them in [`StableDiffusionXLPipeline`]:
|
||||
|
||||
```python
|
||||
from diffusers import AutoModel, StableDiffusionXLPipeline
|
||||
from diffusers import UNet2DConditionModel, StableDiffusionXLPipeline
|
||||
import torch
|
||||
|
||||
unet = AutoModel.from_pretrained(
|
||||
unet = UNet2DConditionModel.from_pretrained(
|
||||
"sayakpaul/sdxl-unet-sharded", torch_dtype=torch.float16
|
||||
)
|
||||
pipeline = StableDiffusionXLPipeline.from_pretrained(
|
||||
|
||||
@@ -157,84 +157,6 @@ pipeline(
|
||||
)
|
||||
```
|
||||
|
||||
## IP Adapter Cutoff
|
||||
|
||||
IP Adapter is an image prompt adapter that can be used for diffusion models without any changes to the underlying model. We can use the IP Adapter Cutoff Callback to disable the IP Adapter after a certain number of steps. To set up the callback, you need to specify the number of denoising steps after which the callback comes into effect. You can do so by using either one of these two arguments:
|
||||
|
||||
- `cutoff_step_ratio`: Float number with the ratio of the steps.
|
||||
- `cutoff_step_index`: Integer number with the exact number of the step.
|
||||
|
||||
We need to download the diffusion model and load the ip_adapter for it as follows:
|
||||
|
||||
```py
|
||||
from diffusers import AutoPipelineForText2Image
|
||||
from diffusers.utils import load_image
|
||||
import torch
|
||||
|
||||
pipeline = AutoPipelineForText2Image.from_pretrained("stabilityai/stable-diffusion-xl-base-1.0", torch_dtype=torch.float16).to("cuda")
|
||||
pipeline.load_ip_adapter("h94/IP-Adapter", subfolder="sdxl_models", weight_name="ip-adapter_sdxl.bin")
|
||||
pipeline.set_ip_adapter_scale(0.6)
|
||||
```
|
||||
The setup for the callback should look something like this:
|
||||
|
||||
```py
|
||||
|
||||
from diffusers import AutoPipelineForText2Image
|
||||
from diffusers.callbacks import IPAdapterScaleCutoffCallback
|
||||
from diffusers.utils import load_image
|
||||
import torch
|
||||
|
||||
|
||||
pipeline = AutoPipelineForText2Image.from_pretrained(
|
||||
"stabilityai/stable-diffusion-xl-base-1.0",
|
||||
torch_dtype=torch.float16
|
||||
).to("cuda")
|
||||
|
||||
|
||||
pipeline.load_ip_adapter(
|
||||
"h94/IP-Adapter",
|
||||
subfolder="sdxl_models",
|
||||
weight_name="ip-adapter_sdxl.bin"
|
||||
)
|
||||
|
||||
pipeline.set_ip_adapter_scale(0.6)
|
||||
|
||||
|
||||
callback = IPAdapterScaleCutoffCallback(
|
||||
cutoff_step_ratio=None,
|
||||
cutoff_step_index=5
|
||||
)
|
||||
|
||||
image = load_image(
|
||||
"https://huggingface.co/datasets/huggingface/documentation-images/resolve/main/diffusers/ip_adapter_diner.png"
|
||||
)
|
||||
|
||||
generator = torch.Generator(device="cuda").manual_seed(2628670641)
|
||||
|
||||
images = pipeline(
|
||||
prompt="a tiger sitting in a chair drinking orange juice",
|
||||
ip_adapter_image=image,
|
||||
negative_prompt="deformed, ugly, wrong proportion, low res, bad anatomy, worst quality, low quality",
|
||||
generator=generator,
|
||||
num_inference_steps=50,
|
||||
callback_on_step_end=callback,
|
||||
).images
|
||||
|
||||
images[0].save("custom_callback_img.png")
|
||||
```
|
||||
|
||||
<div class="flex gap-4">
|
||||
<div>
|
||||
<img class="rounded-xl" src="https://huggingface.co/datasets/huggingface/documentation-images/resolve/main/diffusers/without_callback.png" alt="generated image of a tiger sitting in a chair drinking orange juice" />
|
||||
<figcaption class="mt-2 text-center text-sm text-gray-500">without IPAdapterScaleCutoffCallback</figcaption>
|
||||
</div>
|
||||
<div>
|
||||
<img class="rounded-xl" src="https://huggingface.co/datasets/huggingface/documentation-images/resolve/main/diffusers/with_callback2.png" alt="generated image of a tiger sitting in a chair drinking orange juice with ip adapter callback" />
|
||||
<figcaption class="mt-2 text-center text-sm text-gray-500">with IPAdapterScaleCutoffCallback</figcaption>
|
||||
</div>
|
||||
</div>
|
||||
|
||||
|
||||
## Display image after each generation step
|
||||
|
||||
> [!TIP]
|
||||
|
||||
@@ -95,23 +95,6 @@ Use the Space below to gauge a pipeline's memory requirements before you downloa
|
||||
></iframe>
|
||||
</div>
|
||||
|
||||
### Specifying Component-Specific Data Types
|
||||
|
||||
You can customize the data types for individual sub-models by passing a dictionary to the `torch_dtype` parameter. This allows you to load different components of a pipeline in different floating point precisions. For instance, if you want to load the transformer with `torch.bfloat16` and all other components with `torch.float16`, you can pass a dictionary mapping:
|
||||
|
||||
```python
|
||||
from diffusers import HunyuanVideoPipeline
|
||||
import torch
|
||||
|
||||
pipe = HunyuanVideoPipeline.from_pretrained(
|
||||
"hunyuanvideo-community/HunyuanVideo",
|
||||
torch_dtype={"transformer": torch.bfloat16, "default": torch.float16},
|
||||
)
|
||||
print(pipe.transformer.dtype, pipe.vae.dtype) # (torch.bfloat16, torch.float16)
|
||||
```
|
||||
|
||||
If a component is not explicitly specified in the dictionary and no `default` is provided, it will be loaded with `torch.float32`.
|
||||
|
||||
### Local pipeline
|
||||
|
||||
To load a pipeline locally, use [git-lfs](https://git-lfs.github.com/) to manually download a checkpoint to your local disk.
|
||||
|
||||
@@ -134,7 +134,7 @@ The [`~loaders.StableDiffusionLoraLoaderMixin.load_lora_weights`] method loads L
|
||||
- the LoRA weights don't have separate identifiers for the UNet and text encoder
|
||||
- the LoRA weights have separate identifiers for the UNet and text encoder
|
||||
|
||||
To directly load (and save) a LoRA adapter at the *model-level*, use [`~loaders.PeftAdapterMixin.load_lora_adapter`], which builds and prepares the necessary model configuration for the adapter. Like [`~loaders.StableDiffusionLoraLoaderMixin.load_lora_weights`], [`~loaders.PeftAdapterMixin.load_lora_adapter`] can load LoRAs for both the UNet and text encoder. For example, if you're loading a LoRA for the UNet, [`~loaders.PeftAdapterMixin.load_lora_adapter`] ignores the keys for the text encoder.
|
||||
To directly load (and save) a LoRA adapter at the *model-level*, use [`~PeftAdapterMixin.load_lora_adapter`], which builds and prepares the necessary model configuration for the adapter. Like [`~loaders.StableDiffusionLoraLoaderMixin.load_lora_weights`], [`PeftAdapterMixin.load_lora_adapter`] can load LoRAs for both the UNet and text encoder. For example, if you're loading a LoRA for the UNet, [`PeftAdapterMixin.load_lora_adapter`] ignores the keys for the text encoder.
|
||||
|
||||
Use the `weight_name` parameter to specify the specific weight file and the `prefix` parameter to filter for the appropriate state dicts (`"unet"` in this case) to load.
|
||||
|
||||
@@ -155,7 +155,7 @@ image
|
||||
<img src="https://huggingface.co/datasets/huggingface/documentation-images/resolve/main/diffusers/load_attn_proc.png" />
|
||||
</div>
|
||||
|
||||
Save an adapter with [`~loaders.PeftAdapterMixin.save_lora_adapter`].
|
||||
Save an adapter with [`~PeftAdapterMixin.save_lora_adapter`].
|
||||
|
||||
To unload the LoRA weights, use the [`~loaders.StableDiffusionLoraLoaderMixin.unload_lora_weights`] method to discard the LoRA weights and restore the model to its original weights:
|
||||
|
||||
@@ -194,59 +194,6 @@ Currently, [`~loaders.StableDiffusionLoraLoaderMixin.set_adapters`] only support
|
||||
|
||||
</Tip>
|
||||
|
||||
### Hotswapping LoRA adapters
|
||||
|
||||
A common use case when serving multiple adapters is to load one adapter first, generate images, load another adapter, generate more images, load another adapter, etc. This workflow normally requires calling [`~loaders.StableDiffusionLoraLoaderMixin.load_lora_weights`], [`~loaders.StableDiffusionLoraLoaderMixin.set_adapters`], and possibly [`~loaders.peft.PeftAdapterMixin.delete_adapters`] to save memory. Moreover, if the model is compiled using `torch.compile`, performing these steps requires recompilation, which takes time.
|
||||
|
||||
To better support this common workflow, you can "hotswap" a LoRA adapter, to avoid accumulating memory and in some cases, recompilation. It requires an adapter to already be loaded, and the new adapter weights are swapped in-place for the existing adapter.
|
||||
|
||||
Pass `hotswap=True` when loading a LoRA adapter to enable this feature. It is important to indicate the name of the existing adapter, (`default_0` is the default adapter name), to be swapped. If you loaded the first adapter with a different name, use that name instead.
|
||||
|
||||
```python
|
||||
pipe = ...
|
||||
# load adapter 1 as normal
|
||||
pipeline.load_lora_weights(file_name_adapter_1)
|
||||
# generate some images with adapter 1
|
||||
...
|
||||
# now hot swap the 2nd adapter
|
||||
pipeline.load_lora_weights(file_name_adapter_2, hotswap=True, adapter_name="default_0")
|
||||
# generate images with adapter 2
|
||||
```
|
||||
|
||||
|
||||
<Tip warning={true}>
|
||||
|
||||
Hotswapping is not currently supported for LoRA adapters that target the text encoder.
|
||||
|
||||
</Tip>
|
||||
|
||||
For compiled models, it is often (though not always if the second adapter targets identical LoRA ranks and scales) necessary to call [`~loaders.lora_base.LoraBaseMixin.enable_lora_hotswap`] to avoid recompilation. Use [`~loaders.lora_base.LoraBaseMixin.enable_lora_hotswap`] _before_ loading the first adapter, and `torch.compile` should be called _after_ loading the first adapter.
|
||||
|
||||
```python
|
||||
pipe = ...
|
||||
# call this extra method
|
||||
pipe.enable_lora_hotswap(target_rank=max_rank)
|
||||
# now load adapter 1
|
||||
pipe.load_lora_weights(file_name_adapter_1)
|
||||
# now compile the unet of the pipeline
|
||||
pipe.unet = torch.compile(pipeline.unet, ...)
|
||||
# generate some images with adapter 1
|
||||
...
|
||||
# now hot swap adapter 2
|
||||
pipeline.load_lora_weights(file_name_adapter_2, hotswap=True, adapter_name="default_0")
|
||||
# generate images with adapter 2
|
||||
```
|
||||
|
||||
The `target_rank=max_rank` argument is important for setting the maximum rank among all LoRA adapters that will be loaded. If you have one adapter with rank 8 and another with rank 16, pass `target_rank=16`. You should use a higher value if in doubt. By default, this value is 128.
|
||||
|
||||
However, there can be situations where recompilation is unavoidable. For example, if the hotswapped adapter targets more layers than the initial adapter, then recompilation is triggered. Try to load the adapter that targets the most layers first. Refer to the PEFT docs on [hotswapping](https://huggingface.co/docs/peft/main/en/package_reference/hotswap#peft.utils.hotswap.hotswap_adapter) for more details about the limitations of this feature.
|
||||
|
||||
<Tip>
|
||||
|
||||
Move your code inside the `with torch._dynamo.config.patch(error_on_recompile=True)` context manager to detect if a model was recompiled. If you detect recompilation despite following all the steps above, please open an issue with [Diffusers](https://github.com/huggingface/diffusers/issues) with a reproducible example.
|
||||
|
||||
</Tip>
|
||||
|
||||
### Kohya and TheLastBen
|
||||
|
||||
Other popular LoRA trainers from the community include those by [Kohya](https://github.com/kohya-ss/sd-scripts/) and [TheLastBen](https://github.com/TheLastBen/fast-stable-diffusion). These trainers create different LoRA checkpoints than those trained by 🤗 Diffusers, but they can still be loaded in the same way.
|
||||
|
||||
@@ -1,6 +1,4 @@
|
||||
<!--
|
||||
Copyright 2023-2025 Marigold Team, ETH Zürich. All rights reserved.
|
||||
Copyright 2024-2025 The HuggingFace Team. All rights reserved.
|
||||
<!--Copyright 2024 Marigold authors and The HuggingFace Team. All rights reserved.
|
||||
|
||||
Licensed under the Apache License, Version 2.0 (the "License"); you may not use this file except in compliance with
|
||||
the License. You may obtain a copy of the License at
|
||||
@@ -12,38 +10,31 @@ an "AS IS" BASIS, WITHOUT WARRANTIES OR CONDITIONS OF ANY KIND, either express o
|
||||
specific language governing permissions and limitations under the License.
|
||||
-->
|
||||
|
||||
# Marigold Computer Vision
|
||||
# Marigold Pipelines for Computer Vision Tasks
|
||||
|
||||
**Marigold** is a diffusion-based [method](https://huggingface.co/papers/2312.02145) and a collection of [pipelines](../api/pipelines/marigold) designed for
|
||||
dense computer vision tasks, including **monocular depth prediction**, **surface normals estimation**, and **intrinsic
|
||||
image decomposition**.
|
||||
[Marigold](../api/pipelines/marigold) is a novel diffusion-based dense prediction approach, and a set of pipelines for various computer vision tasks, such as monocular depth estimation.
|
||||
|
||||
This guide will walk you through using Marigold to generate fast and high-quality predictions for images and videos.
|
||||
This guide will show you how to use Marigold to obtain fast and high-quality predictions for images and videos.
|
||||
|
||||
Each pipeline is tailored for a specific computer vision task, processing an input RGB image and generating a
|
||||
corresponding prediction.
|
||||
Currently, the following computer vision tasks are implemented:
|
||||
Each pipeline supports one Computer Vision task, which takes an input RGB image as input and produces a *prediction* of the modality of interest, such as a depth map of the input image.
|
||||
Currently, the following tasks are implemented:
|
||||
|
||||
| Pipeline | Recommended Model Checkpoints | Spaces (Interactive Apps) | Predicted Modalities |
|
||||
|---------------------------------------------------------------------------------------------------------------------------------------------------|---------------------------------------------------------------------------------------------------------------------------------------------------------------------------------------------------------|:------------------------------------------------------------------------------------:|------------------------------------------------------------------------------------------------------------------------------------------------------------------------------------|
|
||||
| [MarigoldDepthPipeline](https://github.com/huggingface/diffusers/blob/main/src/diffusers/pipelines/marigold/pipeline_marigold_depth.py) | [prs-eth/marigold-depth-v1-1](https://huggingface.co/prs-eth/marigold-depth-v1-1) | [Depth Estimation](https://huggingface.co/spaces/prs-eth/marigold) | [Depth](https://en.wikipedia.org/wiki/Depth_map), [Disparity](https://en.wikipedia.org/wiki/Binocular_disparity) |
|
||||
| [MarigoldNormalsPipeline](https://github.com/huggingface/diffusers/blob/main/src/diffusers/pipelines/marigold/pipeline_marigold_normals.py) | [prs-eth/marigold-normals-v1-1](https://huggingface.co/prs-eth/marigold-normals-v1-1) | [Surface Normals Estimation](https://huggingface.co/spaces/prs-eth/marigold-normals) | [Surface normals](https://en.wikipedia.org/wiki/Normal_mapping) |
|
||||
| [MarigoldIntrinsicsPipeline](https://github.com/huggingface/diffusers/blob/main/src/diffusers/pipelines/marigold/pipeline_marigold_intrinsics.py) | [prs-eth/marigold-iid-appearance-v1-1](https://huggingface.co/prs-eth/marigold-iid-appearance-v1-1),<br>[prs-eth/marigold-iid-lighting-v1-1](https://huggingface.co/prs-eth/marigold-iid-lighting-v1-1) | [Intrinsic Image Decomposition](https://huggingface.co/spaces/prs-eth/marigold-iid) | [Albedo](https://en.wikipedia.org/wiki/Albedo), [Materials](https://www.n.aiq3d.com/wiki/roughnessmetalnessao-map), [Lighting](https://en.wikipedia.org/wiki/Diffuse_reflection) |
|
||||
| Pipeline | Predicted Modalities | Demos |
|
||||
|---------------------------------------------------------------------------------------------------------------------------------------------|------------------------------------------------------------------------------------------------------------------|:--------------------------------------------------------------------------------------------------------------------------------------------------:|
|
||||
| [MarigoldDepthPipeline](https://github.com/huggingface/diffusers/blob/main/src/diffusers/pipelines/marigold/pipeline_marigold_depth.py) | [Depth](https://en.wikipedia.org/wiki/Depth_map), [Disparity](https://en.wikipedia.org/wiki/Binocular_disparity) | [Fast Demo (LCM)](https://huggingface.co/spaces/prs-eth/marigold-lcm), [Slow Original Demo (DDIM)](https://huggingface.co/spaces/prs-eth/marigold) |
|
||||
| [MarigoldNormalsPipeline](https://github.com/huggingface/diffusers/blob/main/src/diffusers/pipelines/marigold/pipeline_marigold_normals.py) | [Surface normals](https://en.wikipedia.org/wiki/Normal_mapping) | [Fast Demo (LCM)](https://huggingface.co/spaces/prs-eth/marigold-normals-lcm) |
|
||||
|
||||
All original checkpoints are available under the [PRS-ETH](https://huggingface.co/prs-eth/) organization on Hugging Face.
|
||||
They are designed for use with diffusers pipelines and the [original codebase](https://github.com/prs-eth/marigold), which can also be used to train
|
||||
new model checkpoints.
|
||||
The following is a summary of the recommended checkpoints, all of which produce reliable results with 1 to 4 steps.
|
||||
The original checkpoints can be found under the [PRS-ETH](https://huggingface.co/prs-eth/) Hugging Face organization.
|
||||
These checkpoints are meant to work with diffusers pipelines and the [original codebase](https://github.com/prs-eth/marigold).
|
||||
The original code can also be used to train new checkpoints.
|
||||
|
||||
| Checkpoint | Modality | Comment |
|
||||
|-----------------------------------------------------------------------------------------------------|--------------|-------------------------------------------------------------------------------------------------------------------------------------------------------------------|
|
||||
| [prs-eth/marigold-depth-v1-1](https://huggingface.co/prs-eth/marigold-depth-v1-1) | Depth | Affine-invariant depth prediction assigns each pixel a value between 0 (near plane) and 1 (far plane), with both planes determined by the model during inference. |
|
||||
| [prs-eth/marigold-normals-v0-1](https://huggingface.co/prs-eth/marigold-normals-v0-1) | Normals | The surface normals predictions are unit-length 3D vectors in the screen space camera, with values in the range from -1 to 1. |
|
||||
| [prs-eth/marigold-iid-appearance-v1-1](https://huggingface.co/prs-eth/marigold-iid-appearance-v1-1) | Intrinsics | InteriorVerse decomposition is comprised of Albedo and two BRDF material properties: Roughness and Metallicity. |
|
||||
| [prs-eth/marigold-iid-lighting-v1-1](https://huggingface.co/prs-eth/marigold-iid-lighting-v1-1) | Intrinsics | HyperSim decomposition of an image \\(I\\) is comprised of Albedo \\(A\\), Diffuse shading \\(S\\), and Non-diffuse residual \\(R\\): \\(I = A*S+R\\). |
|
||||
|
||||
The examples below are mostly given for depth prediction, but they can be universally applied to other supported
|
||||
modalities.
|
||||
| Checkpoint | Modality | Comment |
|
||||
|-----------------------------------------------------------------------------------------------|----------|--------------------------------------------------------------------------------------------------------------------------------------------------------------------------------------------------------------------------------------------------------------------------------------------------------------------------------------------------------------------------------------------------------------------------------------------------------------------------------------------------------------------------------------------------------------------------------------------------------|
|
||||
| [prs-eth/marigold-v1-0](https://huggingface.co/prs-eth/marigold-v1-0) | Depth | The first Marigold Depth checkpoint, which predicts *affine-invariant depth* maps. The performance of this checkpoint in benchmarks was studied in the original [paper](https://huggingface.co/papers/2312.02145). Designed to be used with the `DDIMScheduler` at inference, it requires at least 10 steps to get reliable predictions. Affine-invariant depth prediction has a range of values in each pixel between 0 (near plane) and 1 (far plane); both planes are chosen by the model as part of the inference process. See the `MarigoldImageProcessor` reference for visualization utilities. |
|
||||
| [prs-eth/marigold-depth-lcm-v1-0](https://huggingface.co/prs-eth/marigold-depth-lcm-v1-0) | Depth | The fast Marigold Depth checkpoint, fine-tuned from `prs-eth/marigold-v1-0`. Designed to be used with the `LCMScheduler` at inference, it requires as little as 1 step to get reliable predictions. The prediction reliability saturates at 4 steps and declines after that. |
|
||||
| [prs-eth/marigold-normals-v0-1](https://huggingface.co/prs-eth/marigold-normals-v0-1) | Normals | A preview checkpoint for the Marigold Normals pipeline. Designed to be used with the `DDIMScheduler` at inference, it requires at least 10 steps to get reliable predictions. The surface normals predictions are unit-length 3D vectors with values in the range from -1 to 1. *This checkpoint will be phased out after the release of `v1-0` version.* |
|
||||
| [prs-eth/marigold-normals-lcm-v0-1](https://huggingface.co/prs-eth/marigold-normals-lcm-v0-1) | Normals | The fast Marigold Normals checkpoint, fine-tuned from `prs-eth/marigold-normals-v0-1`. Designed to be used with the `LCMScheduler` at inference, it requires as little as 1 step to get reliable predictions. The prediction reliability saturates at 4 steps and declines after that. *This checkpoint will be phased out after the release of `v1-0` version.* |
|
||||
The examples below are mostly given for depth prediction, but they can be universally applied with other supported modalities.
|
||||
We showcase the predictions using the same input image of Albert Einstein generated by Midjourney.
|
||||
This makes it easier to compare visualizations of the predictions across various modalities and checkpoints.
|
||||
|
||||
@@ -56,21 +47,19 @@ This makes it easier to compare visualizations of the predictions across various
|
||||
</div>
|
||||
</div>
|
||||
|
||||
## Depth Prediction
|
||||
### Depth Prediction Quick Start
|
||||
|
||||
To get a depth prediction, load the `prs-eth/marigold-depth-v1-1` checkpoint into [`MarigoldDepthPipeline`],
|
||||
put the image through the pipeline, and save the predictions:
|
||||
To get the first depth prediction, load `prs-eth/marigold-depth-lcm-v1-0` checkpoint into `MarigoldDepthPipeline` pipeline, put the image through the pipeline, and save the predictions:
|
||||
|
||||
```python
|
||||
import diffusers
|
||||
import torch
|
||||
|
||||
pipe = diffusers.MarigoldDepthPipeline.from_pretrained(
|
||||
"prs-eth/marigold-depth-v1-1", variant="fp16", torch_dtype=torch.float16
|
||||
"prs-eth/marigold-depth-lcm-v1-0", variant="fp16", torch_dtype=torch.float16
|
||||
).to("cuda")
|
||||
|
||||
image = diffusers.utils.load_image("https://marigoldmonodepth.github.io/images/einstein.jpg")
|
||||
|
||||
depth = pipe(image)
|
||||
|
||||
vis = pipe.image_processor.visualize_depth(depth.prediction)
|
||||
@@ -80,13 +69,10 @@ depth_16bit = pipe.image_processor.export_depth_to_16bit_png(depth.prediction)
|
||||
depth_16bit[0].save("einstein_depth_16bit.png")
|
||||
```
|
||||
|
||||
The [`~pipelines.marigold.marigold_image_processing.MarigoldImageProcessor.visualize_depth`] function applies one of
|
||||
[matplotlib's colormaps](https://matplotlib.org/stable/users/explain/colors/colormaps.html) (`Spectral` by default) to map the predicted pixel values from a single-channel `[0, 1]`
|
||||
depth range into an RGB image.
|
||||
With the `Spectral` colormap, pixels with near depth are painted red, and far pixels are blue.
|
||||
The visualization function for depth [`~pipelines.marigold.marigold_image_processing.MarigoldImageProcessor.visualize_depth`] applies one of [matplotlib's colormaps](https://matplotlib.org/stable/users/explain/colors/colormaps.html) (`Spectral` by default) to map the predicted pixel values from a single-channel `[0, 1]` depth range into an RGB image.
|
||||
With the `Spectral` colormap, pixels with near depth are painted red, and far pixels are assigned blue color.
|
||||
The 16-bit PNG file stores the single channel values mapped linearly from the `[0, 1]` range into `[0, 65535]`.
|
||||
Below are the raw and the visualized predictions. The darker and closer areas (mustache) are easier to distinguish in
|
||||
the visualization.
|
||||
Below are the raw and the visualized predictions; as can be seen, dark areas (mustache) are easier to distinguish in the visualization:
|
||||
|
||||
<div class="flex gap-4">
|
||||
<div style="flex: 1 1 50%; max-width: 50%;">
|
||||
@@ -103,33 +89,28 @@ the visualization.
|
||||
</div>
|
||||
</div>
|
||||
|
||||
## Surface Normals Estimation
|
||||
### Surface Normals Prediction Quick Start
|
||||
|
||||
Load the `prs-eth/marigold-normals-v1-1` checkpoint into [`MarigoldNormalsPipeline`], put the image through the
|
||||
pipeline, and save the predictions:
|
||||
Load `prs-eth/marigold-normals-lcm-v0-1` checkpoint into `MarigoldNormalsPipeline` pipeline, put the image through the pipeline, and save the predictions:
|
||||
|
||||
```python
|
||||
import diffusers
|
||||
import torch
|
||||
|
||||
pipe = diffusers.MarigoldNormalsPipeline.from_pretrained(
|
||||
"prs-eth/marigold-normals-v1-1", variant="fp16", torch_dtype=torch.float16
|
||||
"prs-eth/marigold-normals-lcm-v0-1", variant="fp16", torch_dtype=torch.float16
|
||||
).to("cuda")
|
||||
|
||||
image = diffusers.utils.load_image("https://marigoldmonodepth.github.io/images/einstein.jpg")
|
||||
|
||||
normals = pipe(image)
|
||||
|
||||
vis = pipe.image_processor.visualize_normals(normals.prediction)
|
||||
vis[0].save("einstein_normals.png")
|
||||
```
|
||||
|
||||
The [`~pipelines.marigold.marigold_image_processing.MarigoldImageProcessor.visualize_normals`] maps the three-dimensional
|
||||
prediction with pixel values in the range `[-1, 1]` into an RGB image.
|
||||
The visualization function supports flipping surface normals axes to make the visualization compatible with other
|
||||
choices of the frame of reference.
|
||||
Conceptually, each pixel is painted according to the surface normal vector in the frame of reference, where `X` axis
|
||||
points right, `Y` axis points up, and `Z` axis points at the viewer.
|
||||
The visualization function for normals [`~pipelines.marigold.marigold_image_processing.MarigoldImageProcessor.visualize_normals`] maps the three-dimensional prediction with pixel values in the range `[-1, 1]` into an RGB image.
|
||||
The visualization function supports flipping surface normals axes to make the visualization compatible with other choices of the frame of reference.
|
||||
Conceptually, each pixel is painted according to the surface normal vector in the frame of reference, where `X` axis points right, `Y` axis points up, and `Z` axis points at the viewer.
|
||||
Below is the visualized prediction:
|
||||
|
||||
<div class="flex gap-4" style="justify-content: center; width: 100%;">
|
||||
@@ -141,121 +122,25 @@ Below is the visualized prediction:
|
||||
</div>
|
||||
</div>
|
||||
|
||||
In this example, the nose tip almost certainly has a point on the surface, in which the surface normal vector points
|
||||
straight at the viewer, meaning that its coordinates are `[0, 0, 1]`.
|
||||
In this example, the nose tip almost certainly has a point on the surface, in which the surface normal vector points straight at the viewer, meaning that its coordinates are `[0, 0, 1]`.
|
||||
This vector maps to the RGB `[128, 128, 255]`, which corresponds to the violet-blue color.
|
||||
Similarly, a surface normal on the cheek in the right part of the image has a large `X` component, which increases the
|
||||
red hue.
|
||||
Similarly, a surface normal on the cheek in the right part of the image has a large `X` component, which increases the red hue.
|
||||
Points on the shoulders pointing up with a large `Y` promote green color.
|
||||
|
||||
## Intrinsic Image Decomposition
|
||||
### Speeding up inference
|
||||
|
||||
Marigold provides two models for Intrinsic Image Decomposition (IID): "Appearance" and "Lighting".
|
||||
Each model produces Albedo maps, derived from InteriorVerse and Hypersim annotations, respectively.
|
||||
|
||||
- The "Appearance" model also estimates Material properties: Roughness and Metallicity.
|
||||
- The "Lighting" model generates Diffuse Shading and Non-diffuse Residual.
|
||||
|
||||
Here is the sample code saving predictions made by the "Appearance" model:
|
||||
|
||||
```python
|
||||
import diffusers
|
||||
import torch
|
||||
|
||||
pipe = diffusers.MarigoldIntrinsicsPipeline.from_pretrained(
|
||||
"prs-eth/marigold-iid-appearance-v1-1", variant="fp16", torch_dtype=torch.float16
|
||||
).to("cuda")
|
||||
|
||||
image = diffusers.utils.load_image("https://marigoldmonodepth.github.io/images/einstein.jpg")
|
||||
|
||||
intrinsics = pipe(image)
|
||||
|
||||
vis = pipe.image_processor.visualize_intrinsics(intrinsics.prediction, pipe.target_properties)
|
||||
vis[0]["albedo"].save("einstein_albedo.png")
|
||||
vis[0]["roughness"].save("einstein_roughness.png")
|
||||
vis[0]["metallicity"].save("einstein_metallicity.png")
|
||||
```
|
||||
|
||||
Another example demonstrating the predictions made by the "Lighting" model:
|
||||
|
||||
```python
|
||||
import diffusers
|
||||
import torch
|
||||
|
||||
pipe = diffusers.MarigoldIntrinsicsPipeline.from_pretrained(
|
||||
"prs-eth/marigold-iid-lighting-v1-1", variant="fp16", torch_dtype=torch.float16
|
||||
).to("cuda")
|
||||
|
||||
image = diffusers.utils.load_image("https://marigoldmonodepth.github.io/images/einstein.jpg")
|
||||
|
||||
intrinsics = pipe(image)
|
||||
|
||||
vis = pipe.image_processor.visualize_intrinsics(intrinsics.prediction, pipe.target_properties)
|
||||
vis[0]["albedo"].save("einstein_albedo.png")
|
||||
vis[0]["shading"].save("einstein_shading.png")
|
||||
vis[0]["residual"].save("einstein_residual.png")
|
||||
```
|
||||
|
||||
Both models share the same pipeline while supporting different decomposition types.
|
||||
The exact decomposition parameterization (e.g., sRGB vs. linear space) is stored in the
|
||||
`pipe.target_properties` dictionary, which is passed into the
|
||||
[`~pipelines.marigold.marigold_image_processing.MarigoldImageProcessor.visualize_intrinsics`] function.
|
||||
|
||||
Below are some examples showcasing the predicted decomposition outputs.
|
||||
All modalities can be inspected in the
|
||||
[Intrinsic Image Decomposition](https://huggingface.co/spaces/prs-eth/marigold-iid) Space.
|
||||
|
||||
<div class="flex gap-4">
|
||||
<div style="flex: 1 1 50%; max-width: 50%;">
|
||||
<img class="rounded-xl" src="https://huggingface.co/datasets/huggingface/documentation-images/resolve/8c7986eaaab5eb9604eb88336311f46a7b0ff5ab/marigold/marigold_einstein_albedo.png"/>
|
||||
<figcaption class="mt-1 text-center text-sm text-gray-500">
|
||||
Predicted albedo ("Appearance" model)
|
||||
</figcaption>
|
||||
</div>
|
||||
<div style="flex: 1 1 50%; max-width: 50%;">
|
||||
<img class="rounded-xl" src="https://huggingface.co/datasets/huggingface/documentation-images/resolve/8c7986eaaab5eb9604eb88336311f46a7b0ff5ab/marigold/marigold_einstein_diffuse.png"/>
|
||||
<figcaption class="mt-1 text-center text-sm text-gray-500">
|
||||
Predicted diffuse shading ("Lighting" model)
|
||||
</figcaption>
|
||||
</div>
|
||||
</div>
|
||||
|
||||
## Speeding up inference
|
||||
|
||||
The above quick start snippets are already optimized for quality and speed, loading the checkpoint, utilizing the
|
||||
`fp16` variant of weights and computation, and performing the default number (4) of denoising diffusion steps.
|
||||
The first step to accelerate inference, at the expense of prediction quality, is to reduce the denoising diffusion
|
||||
steps to the minimum:
|
||||
The above quick start snippets are already optimized for speed: they load the LCM checkpoint, use the `fp16` variant of weights and computation, and perform just one denoising diffusion step.
|
||||
The `pipe(image)` call completes in 280ms on RTX 3090 GPU.
|
||||
Internally, the input image is encoded with the Stable Diffusion VAE encoder, then the U-Net performs one denoising step, and finally, the prediction latent is decoded with the VAE decoder into pixel space.
|
||||
In this case, two out of three module calls are dedicated to converting between pixel and latent space of LDM.
|
||||
Because Marigold's latent space is compatible with the base Stable Diffusion, it is possible to speed up the pipeline call by more than 3x (85ms on RTX 3090) by using a [lightweight replacement of the SD VAE](../api/models/autoencoder_tiny):
|
||||
|
||||
```diff
|
||||
import diffusers
|
||||
import torch
|
||||
|
||||
pipe = diffusers.MarigoldDepthPipeline.from_pretrained(
|
||||
"prs-eth/marigold-depth-v1-1", variant="fp16", torch_dtype=torch.float16
|
||||
).to("cuda")
|
||||
|
||||
image = diffusers.utils.load_image("https://marigoldmonodepth.github.io/images/einstein.jpg")
|
||||
|
||||
- depth = pipe(image)
|
||||
+ depth = pipe(image, num_inference_steps=1)
|
||||
```
|
||||
|
||||
With this change, the `pipe` call completes in 280ms on RTX 3090 GPU.
|
||||
Internally, the input image is first encoded using the Stable Diffusion VAE encoder, followed by a single denoising
|
||||
step performed by the U-Net.
|
||||
Finally, the prediction latent is decoded with the VAE decoder into pixel space.
|
||||
In this setup, two out of three module calls are dedicated to converting between the pixel and latent spaces of the LDM.
|
||||
Since Marigold's latent space is compatible with Stable Diffusion 2.0, inference can be accelerated by more than 3x,
|
||||
reducing the call time to 85ms on an RTX 3090, by using a [lightweight replacement of the SD VAE](../api/models/autoencoder_tiny).
|
||||
Note that using a lightweight VAE may slightly reduce the visual quality of the predictions.
|
||||
|
||||
```diff
|
||||
import diffusers
|
||||
import torch
|
||||
|
||||
pipe = diffusers.MarigoldDepthPipeline.from_pretrained(
|
||||
"prs-eth/marigold-depth-v1-1", variant="fp16", torch_dtype=torch.float16
|
||||
"prs-eth/marigold-depth-lcm-v1-0", variant="fp16", torch_dtype=torch.float16
|
||||
).to("cuda")
|
||||
|
||||
+ pipe.vae = diffusers.AutoencoderTiny.from_pretrained(
|
||||
@@ -263,77 +148,78 @@ Note that using a lightweight VAE may slightly reduce the visual quality of the
|
||||
+ ).cuda()
|
||||
|
||||
image = diffusers.utils.load_image("https://marigoldmonodepth.github.io/images/einstein.jpg")
|
||||
|
||||
depth = pipe(image, num_inference_steps=1)
|
||||
depth = pipe(image)
|
||||
```
|
||||
|
||||
So far, we have optimized the number of diffusion steps and model components. Self-attention operations account for a
|
||||
significant portion of computations.
|
||||
Speeding them up can be achieved by using a more efficient attention processor:
|
||||
As suggested in [Optimizations](../optimization/torch2.0#torch.compile), adding `torch.compile` may squeeze extra performance depending on the target hardware:
|
||||
|
||||
```diff
|
||||
import diffusers
|
||||
import torch
|
||||
+ from diffusers.models.attention_processor import AttnProcessor2_0
|
||||
|
||||
pipe = diffusers.MarigoldDepthPipeline.from_pretrained(
|
||||
"prs-eth/marigold-depth-v1-1", variant="fp16", torch_dtype=torch.float16
|
||||
"prs-eth/marigold-depth-lcm-v1-0", variant="fp16", torch_dtype=torch.float16
|
||||
).to("cuda")
|
||||
|
||||
+ pipe.vae.set_attn_processor(AttnProcessor2_0())
|
||||
+ pipe.unet.set_attn_processor(AttnProcessor2_0())
|
||||
|
||||
image = diffusers.utils.load_image("https://marigoldmonodepth.github.io/images/einstein.jpg")
|
||||
|
||||
depth = pipe(image, num_inference_steps=1)
|
||||
```
|
||||
|
||||
Finally, as suggested in [Optimizations](../optimization/torch2.0#torch.compile), enabling `torch.compile` can further enhance performance depending on
|
||||
the target hardware.
|
||||
However, compilation incurs a significant overhead during the first pipeline invocation, making it beneficial only when
|
||||
the same pipeline instance is called repeatedly, such as within a loop.
|
||||
|
||||
```diff
|
||||
import diffusers
|
||||
import torch
|
||||
from diffusers.models.attention_processor import AttnProcessor2_0
|
||||
|
||||
pipe = diffusers.MarigoldDepthPipeline.from_pretrained(
|
||||
"prs-eth/marigold-depth-v1-1", variant="fp16", torch_dtype=torch.float16
|
||||
).to("cuda")
|
||||
|
||||
pipe.vae.set_attn_processor(AttnProcessor2_0())
|
||||
pipe.unet.set_attn_processor(AttnProcessor2_0())
|
||||
|
||||
+ pipe.vae = torch.compile(pipe.vae, mode="reduce-overhead", fullgraph=True)
|
||||
+ pipe.unet = torch.compile(pipe.unet, mode="reduce-overhead", fullgraph=True)
|
||||
|
||||
image = diffusers.utils.load_image("https://marigoldmonodepth.github.io/images/einstein.jpg")
|
||||
|
||||
depth = pipe(image, num_inference_steps=1)
|
||||
depth = pipe(image)
|
||||
```
|
||||
|
||||
## Qualitative Comparison with Depth Anything
|
||||
|
||||
With the above speed optimizations, Marigold delivers predictions with more details and faster than [Depth Anything](https://huggingface.co/docs/transformers/main/en/model_doc/depth_anything) with the largest checkpoint [LiheYoung/depth-anything-large-hf](https://huggingface.co/LiheYoung/depth-anything-large-hf):
|
||||
|
||||
<div class="flex gap-4">
|
||||
<div style="flex: 1 1 50%; max-width: 50%;">
|
||||
<img class="rounded-xl" src="https://huggingface.co/datasets/huggingface/documentation-images/resolve/main/marigold/marigold_einstein_lcm_depth.png"/>
|
||||
<figcaption class="mt-1 text-center text-sm text-gray-500">
|
||||
Marigold LCM fp16 with Tiny AutoEncoder
|
||||
</figcaption>
|
||||
</div>
|
||||
<div style="flex: 1 1 50%; max-width: 50%;">
|
||||
<img class="rounded-xl" src="https://huggingface.co/datasets/huggingface/documentation-images/resolve/main/marigold/einstein_depthanything_large.png"/>
|
||||
<figcaption class="mt-1 text-center text-sm text-gray-500">
|
||||
Depth Anything Large
|
||||
</figcaption>
|
||||
</div>
|
||||
</div>
|
||||
|
||||
## Maximizing Precision and Ensembling
|
||||
|
||||
Marigold pipelines have a built-in ensembling mechanism combining multiple predictions from different random latents.
|
||||
This is a brute-force way of improving the precision of predictions, capitalizing on the generative nature of diffusion.
|
||||
The ensembling path is activated automatically when the `ensemble_size` argument is set greater or equal than `3`.
|
||||
The ensembling path is activated automatically when the `ensemble_size` argument is set greater than `1`.
|
||||
When aiming for maximum precision, it makes sense to adjust `num_inference_steps` simultaneously with `ensemble_size`.
|
||||
The recommended values vary across checkpoints but primarily depend on the scheduler type.
|
||||
The effect of ensembling is particularly well-seen with surface normals:
|
||||
|
||||
```diff
|
||||
import diffusers
|
||||
```python
|
||||
import diffusers
|
||||
|
||||
pipe = diffusers.MarigoldNormalsPipeline.from_pretrained("prs-eth/marigold-normals-v1-1").to("cuda")
|
||||
model_path = "prs-eth/marigold-normals-v1-0"
|
||||
|
||||
image = diffusers.utils.load_image("https://marigoldmonodepth.github.io/images/einstein.jpg")
|
||||
model_paper_kwargs = {
|
||||
diffusers.schedulers.DDIMScheduler: {
|
||||
"num_inference_steps": 10,
|
||||
"ensemble_size": 10,
|
||||
},
|
||||
diffusers.schedulers.LCMScheduler: {
|
||||
"num_inference_steps": 4,
|
||||
"ensemble_size": 5,
|
||||
},
|
||||
}
|
||||
|
||||
- depth = pipe(image)
|
||||
+ depth = pipe(image, num_inference_steps=10, ensemble_size=5)
|
||||
image = diffusers.utils.load_image("https://marigoldmonodepth.github.io/images/einstein.jpg")
|
||||
|
||||
vis = pipe.image_processor.visualize_normals(depth.prediction)
|
||||
vis[0].save("einstein_normals.png")
|
||||
pipe = diffusers.MarigoldNormalsPipeline.from_pretrained(model_path).to("cuda")
|
||||
pipe_kwargs = model_paper_kwargs[type(pipe.scheduler)]
|
||||
|
||||
depth = pipe(image, **pipe_kwargs)
|
||||
|
||||
vis = pipe.image_processor.visualize_normals(depth.prediction)
|
||||
vis[0].save("einstein_normals.png")
|
||||
```
|
||||
|
||||
<div class="flex gap-4">
|
||||
@@ -351,16 +237,93 @@ The effect of ensembling is particularly well-seen with surface normals:
|
||||
</div>
|
||||
</div>
|
||||
|
||||
As can be seen, all areas with fine-grained structurers, such as hair, got more conservative and on average more
|
||||
correct predictions.
|
||||
As can be seen, all areas with fine-grained structurers, such as hair, got more conservative and on average more correct predictions.
|
||||
Such a result is more suitable for precision-sensitive downstream tasks, such as 3D reconstruction.
|
||||
|
||||
## Quantitative Evaluation
|
||||
|
||||
To evaluate Marigold quantitatively in standard leaderboards and benchmarks (such as NYU, KITTI, and other datasets), follow the evaluation protocol outlined in the paper: load the full precision fp32 model and use appropriate values for `num_inference_steps` and `ensemble_size`.
|
||||
Optionally seed randomness to ensure reproducibility. Maximizing `batch_size` will deliver maximum device utilization.
|
||||
|
||||
```python
|
||||
import diffusers
|
||||
import torch
|
||||
|
||||
device = "cuda"
|
||||
seed = 2024
|
||||
model_path = "prs-eth/marigold-v1-0"
|
||||
|
||||
model_paper_kwargs = {
|
||||
diffusers.schedulers.DDIMScheduler: {
|
||||
"num_inference_steps": 50,
|
||||
"ensemble_size": 10,
|
||||
},
|
||||
diffusers.schedulers.LCMScheduler: {
|
||||
"num_inference_steps": 4,
|
||||
"ensemble_size": 10,
|
||||
},
|
||||
}
|
||||
|
||||
image = diffusers.utils.load_image("https://marigoldmonodepth.github.io/images/einstein.jpg")
|
||||
|
||||
generator = torch.Generator(device=device).manual_seed(seed)
|
||||
pipe = diffusers.MarigoldDepthPipeline.from_pretrained(model_path).to(device)
|
||||
pipe_kwargs = model_paper_kwargs[type(pipe.scheduler)]
|
||||
|
||||
depth = pipe(image, generator=generator, **pipe_kwargs)
|
||||
|
||||
# evaluate metrics
|
||||
```
|
||||
|
||||
## Using Predictive Uncertainty
|
||||
|
||||
The ensembling mechanism built into Marigold pipelines combines multiple predictions obtained from different random latents.
|
||||
As a side effect, it can be used to quantify epistemic (model) uncertainty; simply specify `ensemble_size` greater than 1 and set `output_uncertainty=True`.
|
||||
The resulting uncertainty will be available in the `uncertainty` field of the output.
|
||||
It can be visualized as follows:
|
||||
|
||||
```python
|
||||
import diffusers
|
||||
import torch
|
||||
|
||||
pipe = diffusers.MarigoldDepthPipeline.from_pretrained(
|
||||
"prs-eth/marigold-depth-lcm-v1-0", variant="fp16", torch_dtype=torch.float16
|
||||
).to("cuda")
|
||||
|
||||
image = diffusers.utils.load_image("https://marigoldmonodepth.github.io/images/einstein.jpg")
|
||||
depth = pipe(
|
||||
image,
|
||||
ensemble_size=10, # any number greater than 1; higher values yield higher precision
|
||||
output_uncertainty=True,
|
||||
)
|
||||
|
||||
uncertainty = pipe.image_processor.visualize_uncertainty(depth.uncertainty)
|
||||
uncertainty[0].save("einstein_depth_uncertainty.png")
|
||||
```
|
||||
|
||||
<div class="flex gap-4">
|
||||
<div style="flex: 1 1 50%; max-width: 50%;">
|
||||
<img class="rounded-xl" src="https://huggingface.co/datasets/huggingface/documentation-images/resolve/main/marigold/marigold_einstein_depth_uncertainty.png"/>
|
||||
<figcaption class="mt-1 text-center text-sm text-gray-500">
|
||||
Depth uncertainty
|
||||
</figcaption>
|
||||
</div>
|
||||
<div style="flex: 1 1 50%; max-width: 50%;">
|
||||
<img class="rounded-xl" src="https://huggingface.co/datasets/huggingface/documentation-images/resolve/main/marigold/marigold_einstein_normals_uncertainty.png"/>
|
||||
<figcaption class="mt-1 text-center text-sm text-gray-500">
|
||||
Surface normals uncertainty
|
||||
</figcaption>
|
||||
</div>
|
||||
</div>
|
||||
|
||||
The interpretation of uncertainty is easy: higher values (white) correspond to pixels, where the model struggles to make consistent predictions.
|
||||
Evidently, the depth model is the least confident around edges with discontinuity, where the object depth changes drastically.
|
||||
The surface normals model is the least confident in fine-grained structures, such as hair, and dark areas, such as the collar.
|
||||
|
||||
## Frame-by-frame Video Processing with Temporal Consistency
|
||||
|
||||
Due to Marigold's generative nature, each prediction is unique and defined by the random noise sampled for the latent
|
||||
initialization.
|
||||
This becomes an obvious drawback compared to traditional end-to-end dense regression networks, as exemplified in the
|
||||
following videos:
|
||||
Due to Marigold's generative nature, each prediction is unique and defined by the random noise sampled for the latent initialization.
|
||||
This becomes an obvious drawback compared to traditional end-to-end dense regression networks, as exemplified in the following videos:
|
||||
|
||||
<div class="flex gap-4">
|
||||
<div style="flex: 1 1 50%; max-width: 50%;">
|
||||
@@ -373,32 +336,26 @@ following videos:
|
||||
</div>
|
||||
</div>
|
||||
|
||||
To address this issue, it is possible to pass `latents` argument to the pipelines, which defines the starting point of
|
||||
diffusion.
|
||||
Empirically, we found that a convex combination of the very same starting point noise latent and the latent
|
||||
corresponding to the previous frame prediction give sufficiently smooth results, as implemented in the snippet below:
|
||||
To address this issue, it is possible to pass `latents` argument to the pipelines, which defines the starting point of diffusion.
|
||||
Empirically, we found that a convex combination of the very same starting point noise latent and the latent corresponding to the previous frame prediction give sufficiently smooth results, as implemented in the snippet below:
|
||||
|
||||
```python
|
||||
import imageio
|
||||
import diffusers
|
||||
import torch
|
||||
from diffusers.models.attention_processor import AttnProcessor2_0
|
||||
from PIL import Image
|
||||
from tqdm import tqdm
|
||||
import diffusers
|
||||
import torch
|
||||
|
||||
device = "cuda"
|
||||
path_in = "https://huggingface.co/spaces/prs-eth/marigold-lcm/resolve/c7adb5427947d2680944f898cd91d386bf0d4924/files/video/obama.mp4"
|
||||
path_in = "obama.mp4"
|
||||
path_out = "obama_depth.gif"
|
||||
|
||||
pipe = diffusers.MarigoldDepthPipeline.from_pretrained(
|
||||
"prs-eth/marigold-depth-v1-1", variant="fp16", torch_dtype=torch.float16
|
||||
"prs-eth/marigold-depth-lcm-v1-0", variant="fp16", torch_dtype=torch.float16
|
||||
).to(device)
|
||||
pipe.vae = diffusers.AutoencoderTiny.from_pretrained(
|
||||
"madebyollin/taesd", torch_dtype=torch.float16
|
||||
).to(device)
|
||||
pipe.unet.set_attn_processor(AttnProcessor2_0())
|
||||
pipe.vae = torch.compile(pipe.vae, mode="reduce-overhead", fullgraph=True)
|
||||
pipe.unet = torch.compile(pipe.unet, mode="reduce-overhead", fullgraph=True)
|
||||
pipe.set_progress_bar_config(disable=True)
|
||||
|
||||
with imageio.get_reader(path_in) as reader:
|
||||
@@ -416,11 +373,7 @@ with imageio.get_reader(path_in) as reader:
|
||||
latents = 0.9 * latents + 0.1 * last_frame_latent
|
||||
|
||||
depth = pipe(
|
||||
frame,
|
||||
num_inference_steps=1,
|
||||
match_input_resolution=False,
|
||||
latents=latents,
|
||||
output_latent=True,
|
||||
frame, match_input_resolution=False, latents=latents, output_latent=True
|
||||
)
|
||||
last_frame_latent = depth.latent
|
||||
out.append(pipe.image_processor.visualize_depth(depth.prediction)[0])
|
||||
@@ -429,8 +382,7 @@ with imageio.get_reader(path_in) as reader:
|
||||
```
|
||||
|
||||
Here, the diffusion process starts from the given computed latent.
|
||||
The pipeline sets `output_latent=True` to access `out.latent` and computes its contribution to the next frame's latent
|
||||
initialization.
|
||||
The pipeline sets `output_latent=True` to access `out.latent` and computes its contribution to the next frame's latent initialization.
|
||||
The result is much more stable now:
|
||||
|
||||
<div class="flex gap-4">
|
||||
@@ -462,7 +414,7 @@ image = diffusers.utils.load_image(
|
||||
)
|
||||
|
||||
pipe = diffusers.MarigoldDepthPipeline.from_pretrained(
|
||||
"prs-eth/marigold-depth-v1-1", torch_dtype=torch.float16, variant="fp16"
|
||||
"prs-eth/marigold-depth-lcm-v1-0", torch_dtype=torch.float16, variant="fp16"
|
||||
).to(device)
|
||||
|
||||
depth_image = pipe(image, generator=generator).prediction
|
||||
@@ -511,95 +463,4 @@ controlnet_out[0].save("motorcycle_controlnet_out.png")
|
||||
</div>
|
||||
</div>
|
||||
|
||||
## Quantitative Evaluation
|
||||
|
||||
To evaluate Marigold quantitatively in standard leaderboards and benchmarks (such as NYU, KITTI, and other datasets),
|
||||
follow the evaluation protocol outlined in the paper: load the full precision fp32 model and use appropriate values
|
||||
for `num_inference_steps` and `ensemble_size`.
|
||||
Optionally seed randomness to ensure reproducibility.
|
||||
Maximizing `batch_size` will deliver maximum device utilization.
|
||||
|
||||
```python
|
||||
import diffusers
|
||||
import torch
|
||||
|
||||
device = "cuda"
|
||||
seed = 2024
|
||||
|
||||
generator = torch.Generator(device=device).manual_seed(seed)
|
||||
pipe = diffusers.MarigoldDepthPipeline.from_pretrained("prs-eth/marigold-depth-v1-1").to(device)
|
||||
|
||||
image = diffusers.utils.load_image("https://marigoldmonodepth.github.io/images/einstein.jpg")
|
||||
|
||||
depth = pipe(
|
||||
image,
|
||||
num_inference_steps=4, # set according to the evaluation protocol from the paper
|
||||
ensemble_size=10, # set according to the evaluation protocol from the paper
|
||||
generator=generator,
|
||||
)
|
||||
|
||||
# evaluate metrics
|
||||
```
|
||||
|
||||
## Using Predictive Uncertainty
|
||||
|
||||
The ensembling mechanism built into Marigold pipelines combines multiple predictions obtained from different random
|
||||
latents.
|
||||
As a side effect, it can be used to quantify epistemic (model) uncertainty; simply specify `ensemble_size` greater
|
||||
or equal than 3 and set `output_uncertainty=True`.
|
||||
The resulting uncertainty will be available in the `uncertainty` field of the output.
|
||||
It can be visualized as follows:
|
||||
|
||||
```python
|
||||
import diffusers
|
||||
import torch
|
||||
|
||||
pipe = diffusers.MarigoldDepthPipeline.from_pretrained(
|
||||
"prs-eth/marigold-depth-v1-1", variant="fp16", torch_dtype=torch.float16
|
||||
).to("cuda")
|
||||
|
||||
image = diffusers.utils.load_image("https://marigoldmonodepth.github.io/images/einstein.jpg")
|
||||
|
||||
depth = pipe(
|
||||
image,
|
||||
ensemble_size=10, # any number >= 3
|
||||
output_uncertainty=True,
|
||||
)
|
||||
|
||||
uncertainty = pipe.image_processor.visualize_uncertainty(depth.uncertainty)
|
||||
uncertainty[0].save("einstein_depth_uncertainty.png")
|
||||
```
|
||||
|
||||
<div class="flex gap-4">
|
||||
<div style="flex: 1 1 33%; max-width: 33%;">
|
||||
<img class="rounded-xl" src="https://huggingface.co/datasets/huggingface/documentation-images/resolve/main/marigold/marigold_einstein_depth_uncertainty.png"/>
|
||||
<figcaption class="mt-1 text-center text-sm text-gray-500">
|
||||
Depth uncertainty
|
||||
</figcaption>
|
||||
</div>
|
||||
<div style="flex: 1 1 33%; max-width: 33%;">
|
||||
<img class="rounded-xl" src="https://huggingface.co/datasets/huggingface/documentation-images/resolve/main/marigold/marigold_einstein_normals_uncertainty.png"/>
|
||||
<figcaption class="mt-1 text-center text-sm text-gray-500">
|
||||
Surface normals uncertainty
|
||||
</figcaption>
|
||||
</div>
|
||||
<div style="flex: 1 1 33%; max-width: 33%;">
|
||||
<img class="rounded-xl" src="https://huggingface.co/datasets/huggingface/documentation-images/resolve/4f83035d84a24e5ec44fdda129b1d51eba12ce04/marigold/marigold_einstein_albedo_uncertainty.png"/>
|
||||
<figcaption class="mt-1 text-center text-sm text-gray-500">
|
||||
Albedo uncertainty
|
||||
</figcaption>
|
||||
</div>
|
||||
</div>
|
||||
|
||||
The interpretation of uncertainty is easy: higher values (white) correspond to pixels, where the model struggles to
|
||||
make consistent predictions.
|
||||
- The depth model exhibits the most uncertainty around discontinuities, where object depth changes abruptly.
|
||||
- The surface normals model is least confident in fine-grained structures like hair and in dark regions such as the
|
||||
collar area.
|
||||
- Albedo uncertainty is represented as an RGB image, as it captures uncertainty independently for each color channel,
|
||||
unlike depth and surface normals. It is also higher in shaded regions and at discontinuities.
|
||||
|
||||
## Conclusion
|
||||
|
||||
We hope Marigold proves valuable for your downstream tasks, whether as part of a broader generative workflow or for
|
||||
perception-based applications like 3D reconstruction.
|
||||
Hopefully, you will find Marigold useful for solving your downstream tasks, be it a part of a more broad generative workflow, or a perception task, such as 3D reconstruction.
|
||||
|
||||
@@ -66,10 +66,10 @@ Let's dive deeper into what these steps entail.
|
||||
1. Load a UNet that corresponds to the UNet in the LoRA checkpoint. In this case, both LoRAs use the SDXL UNet as their base model.
|
||||
|
||||
```python
|
||||
from diffusers import AutoModel
|
||||
from diffusers import UNet2DConditionModel
|
||||
import torch
|
||||
|
||||
unet = AutoModel.from_pretrained(
|
||||
unet = UNet2DConditionModel.from_pretrained(
|
||||
"stabilityai/stable-diffusion-xl-base-1.0",
|
||||
torch_dtype=torch.float16,
|
||||
use_safetensors=True,
|
||||
@@ -136,7 +136,7 @@ feng_peft_model.load_state_dict(original_state_dict, strict=True)
|
||||
```python
|
||||
from peft import PeftModel
|
||||
|
||||
base_unet = AutoModel.from_pretrained(
|
||||
base_unet = UNet2DConditionModel.from_pretrained(
|
||||
"stabilityai/stable-diffusion-xl-base-1.0",
|
||||
torch_dtype=torch.float16,
|
||||
use_safetensors=True,
|
||||
|
||||
@@ -215,7 +215,7 @@ image
|
||||
|
||||
Prompt weighting provides a way to emphasize or de-emphasize certain parts of a prompt, allowing for more control over the generated image. A prompt can include several concepts, which gets turned into contextualized text embeddings. The embeddings are used by the model to condition its cross-attention layers to generate an image (read the Stable Diffusion [blog post](https://huggingface.co/blog/stable_diffusion) to learn more about how it works).
|
||||
|
||||
Prompt weighting works by increasing or decreasing the scale of the text embedding vector that corresponds to its concept in the prompt because you may not necessarily want the model to focus on all concepts equally. The easiest way to prepare the prompt embeddings is to use [Stable Diffusion Long Prompt Weighted Embedding](https://github.com/xhinker/sd_embed) (sd_embed). Once you have the prompt-weighted embeddings, you can pass them to any pipeline that has a [prompt_embeds](https://huggingface.co/docs/diffusers/en/api/pipelines/stable_diffusion/text2img#diffusers.StableDiffusionPipeline.__call__.prompt_embeds) (and optionally [negative_prompt_embeds](https://huggingface.co/docs/diffusers/en/api/pipelines/stable_diffusion/text2img#diffusers.StableDiffusionPipeline.__call__.negative_prompt_embeds)) parameter, such as [`StableDiffusionPipeline`], [`StableDiffusionControlNetPipeline`], and [`StableDiffusionXLPipeline`].
|
||||
Prompt weighting works by increasing or decreasing the scale of the text embedding vector that corresponds to its concept in the prompt because you may not necessarily want the model to focus on all concepts equally. The easiest way to prepare the prompt-weighted embeddings is to use [Compel](https://github.com/damian0815/compel), a text prompt-weighting and blending library. Once you have the prompt-weighted embeddings, you can pass them to any pipeline that has a [`prompt_embeds`](https://huggingface.co/docs/diffusers/en/api/pipelines/stable_diffusion/text2img#diffusers.StableDiffusionPipeline.__call__.prompt_embeds) (and optionally [`negative_prompt_embeds`](https://huggingface.co/docs/diffusers/en/api/pipelines/stable_diffusion/text2img#diffusers.StableDiffusionPipeline.__call__.negative_prompt_embeds)) parameter, such as [`StableDiffusionPipeline`], [`StableDiffusionControlNetPipeline`], and [`StableDiffusionXLPipeline`].
|
||||
|
||||
<Tip>
|
||||
|
||||
@@ -223,99 +223,136 @@ If your favorite pipeline doesn't have a `prompt_embeds` parameter, please open
|
||||
|
||||
</Tip>
|
||||
|
||||
This guide will show you how to weight your prompts with sd_embed.
|
||||
This guide will show you how to weight and blend your prompts with Compel in 🤗 Diffusers.
|
||||
|
||||
Before you begin, make sure you have the latest version of sd_embed installed:
|
||||
|
||||
```bash
|
||||
pip install git+https://github.com/xhinker/sd_embed.git@main
|
||||
```
|
||||
|
||||
For this example, let's use [`StableDiffusionXLPipeline`].
|
||||
Before you begin, make sure you have the latest version of Compel installed:
|
||||
|
||||
```py
|
||||
from diffusers import StableDiffusionXLPipeline, UniPCMultistepScheduler
|
||||
# uncomment to install in Colab
|
||||
#!pip install compel --upgrade
|
||||
```
|
||||
|
||||
For this guide, let's generate an image with the prompt `"a red cat playing with a ball"` using the [`StableDiffusionPipeline`]:
|
||||
|
||||
```py
|
||||
from diffusers import StableDiffusionPipeline, UniPCMultistepScheduler
|
||||
import torch
|
||||
|
||||
pipe = StableDiffusionXLPipeline.from_pretrained("Lykon/dreamshaper-xl-1-0", torch_dtype=torch.float16)
|
||||
pipe = StableDiffusionPipeline.from_pretrained("CompVis/stable-diffusion-v1-4", use_safetensors=True)
|
||||
pipe.scheduler = UniPCMultistepScheduler.from_config(pipe.scheduler.config)
|
||||
pipe.to("cuda")
|
||||
```
|
||||
|
||||
To upweight or downweight a concept, surround the text with parentheses. More parentheses applies a heavier weight on the text. You can also append a numerical multiplier to the text to indicate how much you want to increase or decrease its weights by.
|
||||
prompt = "a red cat playing with a ball"
|
||||
|
||||
| format | multiplier |
|
||||
|---|---|
|
||||
| `(hippo)` | increase by 1.1x |
|
||||
| `((hippo))` | increase by 1.21x |
|
||||
| `(hippo:1.5)` | increase by 1.5x |
|
||||
| `(hippo:0.5)` | decrease by 4x |
|
||||
generator = torch.Generator(device="cpu").manual_seed(33)
|
||||
|
||||
Create a prompt and use a combination of parentheses and numerical multipliers to upweight various text.
|
||||
|
||||
```py
|
||||
from sd_embed.embedding_funcs import get_weighted_text_embeddings_sdxl
|
||||
|
||||
prompt = """A whimsical and creative image depicting a hybrid creature that is a mix of a waffle and a hippopotamus.
|
||||
This imaginative creature features the distinctive, bulky body of a hippo,
|
||||
but with a texture and appearance resembling a golden-brown, crispy waffle.
|
||||
The creature might have elements like waffle squares across its skin and a syrup-like sheen.
|
||||
It's set in a surreal environment that playfully combines a natural water habitat of a hippo with elements of a breakfast table setting,
|
||||
possibly including oversized utensils or plates in the background.
|
||||
The image should evoke a sense of playful absurdity and culinary fantasy.
|
||||
"""
|
||||
|
||||
neg_prompt = """\
|
||||
skin spots,acnes,skin blemishes,age spot,(ugly:1.2),(duplicate:1.2),(morbid:1.21),(mutilated:1.2),\
|
||||
(tranny:1.2),mutated hands,(poorly drawn hands:1.5),blurry,(bad anatomy:1.2),(bad proportions:1.3),\
|
||||
extra limbs,(disfigured:1.2),(missing arms:1.2),(extra legs:1.2),(fused fingers:1.5),\
|
||||
(too many fingers:1.5),(unclear eyes:1.2),lowers,bad hands,missing fingers,extra digit,\
|
||||
bad hands,missing fingers,(extra arms and legs),(worst quality:2),(low quality:2),\
|
||||
(normal quality:2),lowres,((monochrome)),((grayscale))
|
||||
"""
|
||||
```
|
||||
|
||||
Use the `get_weighted_text_embeddings_sdxl` function to generate the prompt embeddings and the negative prompt embeddings. It'll also generated the pooled and negative pooled prompt embeddings since you're using the SDXL model.
|
||||
|
||||
> [!TIP]
|
||||
> You can safely ignore the error message below about the token index length exceeding the models maximum sequence length. All your tokens will be used in the embedding process.
|
||||
>
|
||||
> ```
|
||||
> Token indices sequence length is longer than the specified maximum sequence length for this model
|
||||
> ```
|
||||
|
||||
```py
|
||||
(
|
||||
prompt_embeds,
|
||||
prompt_neg_embeds,
|
||||
pooled_prompt_embeds,
|
||||
negative_pooled_prompt_embeds
|
||||
) = get_weighted_text_embeddings_sdxl(
|
||||
pipe,
|
||||
prompt=prompt,
|
||||
neg_prompt=neg_prompt
|
||||
)
|
||||
|
||||
image = pipe(
|
||||
prompt_embeds=prompt_embeds,
|
||||
negative_prompt_embeds=prompt_neg_embeds,
|
||||
pooled_prompt_embeds=pooled_prompt_embeds,
|
||||
negative_pooled_prompt_embeds=negative_pooled_prompt_embeds,
|
||||
num_inference_steps=30,
|
||||
height=1024,
|
||||
width=1024 + 512,
|
||||
guidance_scale=4.0,
|
||||
generator=torch.Generator("cuda").manual_seed(2)
|
||||
).images[0]
|
||||
image = pipe(prompt, generator=generator, num_inference_steps=20).images[0]
|
||||
image
|
||||
```
|
||||
|
||||
<div class="flex justify-center">
|
||||
<img src="https://huggingface.co/datasets/huggingface/documentation-images/resolve/main/diffusers/sd_embed_sdxl.png"/>
|
||||
<img class="rounded-xl" src="https://huggingface.co/datasets/hf-internal-testing/diffusers-images/resolve/main/compel/forest_0.png"/>
|
||||
</div>
|
||||
|
||||
> [!TIP]
|
||||
> Refer to the [sd_embed](https://github.com/xhinker/sd_embed) repository for additional details about long prompt weighting for FLUX.1, Stable Cascade, and Stable Diffusion 1.5.
|
||||
### Weighting
|
||||
|
||||
You'll notice there is no "ball" in the image! Let's use compel to upweight the concept of "ball" in the prompt. Create a [`Compel`](https://github.com/damian0815/compel/blob/main/doc/compel.md#compel-objects) object, and pass it a tokenizer and text encoder:
|
||||
|
||||
```py
|
||||
from compel import Compel
|
||||
|
||||
compel_proc = Compel(tokenizer=pipe.tokenizer, text_encoder=pipe.text_encoder)
|
||||
```
|
||||
|
||||
compel uses `+` or `-` to increase or decrease the weight of a word in the prompt. To increase the weight of "ball":
|
||||
|
||||
<Tip>
|
||||
|
||||
`+` corresponds to the value `1.1`, `++` corresponds to `1.1^2`, and so on. Similarly, `-` corresponds to `0.9` and `--` corresponds to `0.9^2`. Feel free to experiment with adding more `+` or `-` in your prompt!
|
||||
|
||||
</Tip>
|
||||
|
||||
```py
|
||||
prompt = "a red cat playing with a ball++"
|
||||
```
|
||||
|
||||
Pass the prompt to `compel_proc` to create the new prompt embeddings which are passed to the pipeline:
|
||||
|
||||
```py
|
||||
prompt_embeds = compel_proc(prompt)
|
||||
generator = torch.manual_seed(33)
|
||||
|
||||
image = pipe(prompt_embeds=prompt_embeds, generator=generator, num_inference_steps=20).images[0]
|
||||
image
|
||||
```
|
||||
|
||||
<div class="flex justify-center">
|
||||
<img class="rounded-xl" src="https://huggingface.co/datasets/hf-internal-testing/diffusers-images/resolve/main/compel/forest_1.png"/>
|
||||
</div>
|
||||
|
||||
To downweight parts of the prompt, use the `-` suffix:
|
||||
|
||||
```py
|
||||
prompt = "a red------- cat playing with a ball"
|
||||
prompt_embeds = compel_proc(prompt)
|
||||
|
||||
generator = torch.manual_seed(33)
|
||||
|
||||
image = pipe(prompt_embeds=prompt_embeds, generator=generator, num_inference_steps=20).images[0]
|
||||
image
|
||||
```
|
||||
|
||||
<div class="flex justify-center">
|
||||
<img class="rounded-xl" src="https://huggingface.co/datasets/huggingface/documentation-images/resolve/main/diffusers/compel-neg.png"/>
|
||||
</div>
|
||||
|
||||
You can even up or downweight multiple concepts in the same prompt:
|
||||
|
||||
```py
|
||||
prompt = "a red cat++ playing with a ball----"
|
||||
prompt_embeds = compel_proc(prompt)
|
||||
|
||||
generator = torch.manual_seed(33)
|
||||
|
||||
image = pipe(prompt_embeds=prompt_embeds, generator=generator, num_inference_steps=20).images[0]
|
||||
image
|
||||
```
|
||||
|
||||
<div class="flex justify-center">
|
||||
<img class="rounded-xl" src="https://huggingface.co/datasets/huggingface/documentation-images/resolve/main/diffusers/compel-pos-neg.png"/>
|
||||
</div>
|
||||
|
||||
### Blending
|
||||
|
||||
You can also create a weighted *blend* of prompts by adding `.blend()` to a list of prompts and passing it some weights. Your blend may not always produce the result you expect because it breaks some assumptions about how the text encoder functions, so just have fun and experiment with it!
|
||||
|
||||
```py
|
||||
prompt_embeds = compel_proc('("a red cat playing with a ball", "jungle").blend(0.7, 0.8)')
|
||||
generator = torch.Generator(device="cuda").manual_seed(33)
|
||||
|
||||
image = pipe(prompt_embeds=prompt_embeds, generator=generator, num_inference_steps=20).images[0]
|
||||
image
|
||||
```
|
||||
|
||||
<div class="flex justify-center">
|
||||
<img class="rounded-xl" src="https://huggingface.co/datasets/huggingface/documentation-images/resolve/main/diffusers/compel-blend.png"/>
|
||||
</div>
|
||||
|
||||
### Conjunction
|
||||
|
||||
A conjunction diffuses each prompt independently and concatenates their results by their weighted sum. Add `.and()` to the end of a list of prompts to create a conjunction:
|
||||
|
||||
```py
|
||||
prompt_embeds = compel_proc('["a red cat", "playing with a", "ball"].and()')
|
||||
generator = torch.Generator(device="cuda").manual_seed(55)
|
||||
|
||||
image = pipe(prompt_embeds=prompt_embeds, generator=generator, num_inference_steps=20).images[0]
|
||||
image
|
||||
```
|
||||
|
||||
<div class="flex justify-center">
|
||||
<img class="rounded-xl" src="https://huggingface.co/datasets/huggingface/documentation-images/resolve/main/diffusers/compel-conj.png"/>
|
||||
</div>
|
||||
|
||||
### Textual inversion
|
||||
|
||||
@@ -326,63 +363,35 @@ Create a pipeline and use the [`~loaders.TextualInversionLoaderMixin.load_textua
|
||||
```py
|
||||
import torch
|
||||
from diffusers import StableDiffusionPipeline
|
||||
from compel import Compel, DiffusersTextualInversionManager
|
||||
|
||||
pipe = StableDiffusionPipeline.from_pretrained(
|
||||
"stable-diffusion-v1-5/stable-diffusion-v1-5",
|
||||
torch_dtype=torch.float16,
|
||||
).to("cuda")
|
||||
"stable-diffusion-v1-5/stable-diffusion-v1-5", torch_dtype=torch.float16,
|
||||
use_safetensors=True, variant="fp16").to("cuda")
|
||||
pipe.load_textual_inversion("sd-concepts-library/midjourney-style")
|
||||
```
|
||||
|
||||
Add the `<midjourney-style>` text to the prompt to trigger the textual inversion.
|
||||
Compel provides a `DiffusersTextualInversionManager` class to simplify prompt weighting with textual inversion. Instantiate `DiffusersTextualInversionManager` and pass it to the `Compel` class:
|
||||
|
||||
```py
|
||||
from sd_embed.embedding_funcs import get_weighted_text_embeddings_sd15
|
||||
|
||||
prompt = """<midjourney-style> A whimsical and creative image depicting a hybrid creature that is a mix of a waffle and a hippopotamus.
|
||||
This imaginative creature features the distinctive, bulky body of a hippo,
|
||||
but with a texture and appearance resembling a golden-brown, crispy waffle.
|
||||
The creature might have elements like waffle squares across its skin and a syrup-like sheen.
|
||||
It's set in a surreal environment that playfully combines a natural water habitat of a hippo with elements of a breakfast table setting,
|
||||
possibly including oversized utensils or plates in the background.
|
||||
The image should evoke a sense of playful absurdity and culinary fantasy.
|
||||
"""
|
||||
|
||||
neg_prompt = """\
|
||||
skin spots,acnes,skin blemishes,age spot,(ugly:1.2),(duplicate:1.2),(morbid:1.21),(mutilated:1.2),\
|
||||
(tranny:1.2),mutated hands,(poorly drawn hands:1.5),blurry,(bad anatomy:1.2),(bad proportions:1.3),\
|
||||
extra limbs,(disfigured:1.2),(missing arms:1.2),(extra legs:1.2),(fused fingers:1.5),\
|
||||
(too many fingers:1.5),(unclear eyes:1.2),lowers,bad hands,missing fingers,extra digit,\
|
||||
bad hands,missing fingers,(extra arms and legs),(worst quality:2),(low quality:2),\
|
||||
(normal quality:2),lowres,((monochrome)),((grayscale))
|
||||
"""
|
||||
textual_inversion_manager = DiffusersTextualInversionManager(pipe)
|
||||
compel_proc = Compel(
|
||||
tokenizer=pipe.tokenizer,
|
||||
text_encoder=pipe.text_encoder,
|
||||
textual_inversion_manager=textual_inversion_manager)
|
||||
```
|
||||
|
||||
Use the `get_weighted_text_embeddings_sd15` function to generate the prompt embeddings and the negative prompt embeddings.
|
||||
Incorporate the concept to condition a prompt with using the `<concept>` syntax:
|
||||
|
||||
```py
|
||||
(
|
||||
prompt_embeds,
|
||||
prompt_neg_embeds,
|
||||
) = get_weighted_text_embeddings_sd15(
|
||||
pipe,
|
||||
prompt=prompt,
|
||||
neg_prompt=neg_prompt
|
||||
)
|
||||
prompt_embeds = compel_proc('("A red cat++ playing with a ball <midjourney-style>")')
|
||||
|
||||
image = pipe(
|
||||
prompt_embeds=prompt_embeds,
|
||||
negative_prompt_embeds=prompt_neg_embeds,
|
||||
height=768,
|
||||
width=896,
|
||||
guidance_scale=4.0,
|
||||
generator=torch.Generator("cuda").manual_seed(2)
|
||||
).images[0]
|
||||
image = pipe(prompt_embeds=prompt_embeds).images[0]
|
||||
image
|
||||
```
|
||||
|
||||
<div class="flex justify-center">
|
||||
<img src="https://huggingface.co/datasets/huggingface/documentation-images/resolve/main/diffusers/sd_embed_textual_inversion.png"/>
|
||||
<img class="rounded-xl" src="https://huggingface.co/datasets/huggingface/documentation-images/resolve/main/diffusers/compel-text-inversion.png"/>
|
||||
</div>
|
||||
|
||||
### DreamBooth
|
||||
@@ -392,44 +401,70 @@ image
|
||||
```py
|
||||
import torch
|
||||
from diffusers import DiffusionPipeline, UniPCMultistepScheduler
|
||||
from compel import Compel
|
||||
|
||||
pipe = DiffusionPipeline.from_pretrained("sd-dreambooth-library/dndcoverart-v1", torch_dtype=torch.float16).to("cuda")
|
||||
pipe.scheduler = UniPCMultistepScheduler.from_config(pipe.scheduler.config)
|
||||
```
|
||||
|
||||
Depending on the model you use, you'll need to incorporate the model's unique identifier into your prompt. For example, the `dndcoverart-v1` model uses the identifier `dndcoverart`:
|
||||
Create a `Compel` class with a tokenizer and text encoder, and pass your prompt to it. Depending on the model you use, you'll need to incorporate the model's unique identifier into your prompt. For example, the `dndcoverart-v1` model uses the identifier `dndcoverart`:
|
||||
|
||||
```py
|
||||
from sd_embed.embedding_funcs import get_weighted_text_embeddings_sd15
|
||||
|
||||
prompt = """dndcoverart of A whimsical and creative image depicting a hybrid creature that is a mix of a waffle and a hippopotamus.
|
||||
This imaginative creature features the distinctive, bulky body of a hippo,
|
||||
but with a texture and appearance resembling a golden-brown, crispy waffle.
|
||||
The creature might have elements like waffle squares across its skin and a syrup-like sheen.
|
||||
It's set in a surreal environment that playfully combines a natural water habitat of a hippo with elements of a breakfast table setting,
|
||||
possibly including oversized utensils or plates in the background.
|
||||
The image should evoke a sense of playful absurdity and culinary fantasy.
|
||||
"""
|
||||
|
||||
neg_prompt = """\
|
||||
skin spots,acnes,skin blemishes,age spot,(ugly:1.2),(duplicate:1.2),(morbid:1.21),(mutilated:1.2),\
|
||||
(tranny:1.2),mutated hands,(poorly drawn hands:1.5),blurry,(bad anatomy:1.2),(bad proportions:1.3),\
|
||||
extra limbs,(disfigured:1.2),(missing arms:1.2),(extra legs:1.2),(fused fingers:1.5),\
|
||||
(too many fingers:1.5),(unclear eyes:1.2),lowers,bad hands,missing fingers,extra digit,\
|
||||
bad hands,missing fingers,(extra arms and legs),(worst quality:2),(low quality:2),\
|
||||
(normal quality:2),lowres,((monochrome)),((grayscale))
|
||||
"""
|
||||
|
||||
(
|
||||
prompt_embeds
|
||||
, prompt_neg_embeds
|
||||
) = get_weighted_text_embeddings_sd15(
|
||||
pipe
|
||||
, prompt = prompt
|
||||
, neg_prompt = neg_prompt
|
||||
)
|
||||
compel_proc = Compel(tokenizer=pipe.tokenizer, text_encoder=pipe.text_encoder)
|
||||
prompt_embeds = compel_proc('("magazine cover of a dndcoverart dragon, high quality, intricate details, larry elmore art style").and()')
|
||||
image = pipe(prompt_embeds=prompt_embeds).images[0]
|
||||
image
|
||||
```
|
||||
|
||||
<div class="flex justify-center">
|
||||
<img src="https://huggingface.co/datasets/huggingface/documentation-images/resolve/main/diffusers/sd_embed_dreambooth.png"/>
|
||||
<img class="rounded-xl" src="https://huggingface.co/datasets/huggingface/documentation-images/resolve/main/diffusers/compel-dreambooth.png"/>
|
||||
</div>
|
||||
|
||||
### Stable Diffusion XL
|
||||
|
||||
Stable Diffusion XL (SDXL) has two tokenizers and text encoders so it's usage is a bit different. To address this, you should pass both tokenizers and encoders to the `Compel` class:
|
||||
|
||||
```py
|
||||
from compel import Compel, ReturnedEmbeddingsType
|
||||
from diffusers import DiffusionPipeline
|
||||
from diffusers.utils import make_image_grid
|
||||
import torch
|
||||
|
||||
pipeline = DiffusionPipeline.from_pretrained(
|
||||
"stabilityai/stable-diffusion-xl-base-1.0",
|
||||
variant="fp16",
|
||||
use_safetensors=True,
|
||||
torch_dtype=torch.float16
|
||||
).to("cuda")
|
||||
|
||||
compel = Compel(
|
||||
tokenizer=[pipeline.tokenizer, pipeline.tokenizer_2] ,
|
||||
text_encoder=[pipeline.text_encoder, pipeline.text_encoder_2],
|
||||
returned_embeddings_type=ReturnedEmbeddingsType.PENULTIMATE_HIDDEN_STATES_NON_NORMALIZED,
|
||||
requires_pooled=[False, True]
|
||||
)
|
||||
```
|
||||
|
||||
This time, let's upweight "ball" by a factor of 1.5 for the first prompt, and downweight "ball" by 0.6 for the second prompt. The [`StableDiffusionXLPipeline`] also requires [`pooled_prompt_embeds`](https://huggingface.co/docs/diffusers/en/api/pipelines/stable_diffusion/stable_diffusion_xl#diffusers.StableDiffusionXLInpaintPipeline.__call__.pooled_prompt_embeds) (and optionally [`negative_pooled_prompt_embeds`](https://huggingface.co/docs/diffusers/en/api/pipelines/stable_diffusion/stable_diffusion_xl#diffusers.StableDiffusionXLInpaintPipeline.__call__.negative_pooled_prompt_embeds)) so you should pass those to the pipeline along with the conditioning tensors:
|
||||
|
||||
```py
|
||||
# apply weights
|
||||
prompt = ["a red cat playing with a (ball)1.5", "a red cat playing with a (ball)0.6"]
|
||||
conditioning, pooled = compel(prompt)
|
||||
|
||||
# generate image
|
||||
generator = [torch.Generator().manual_seed(33) for _ in range(len(prompt))]
|
||||
images = pipeline(prompt_embeds=conditioning, pooled_prompt_embeds=pooled, generator=generator, num_inference_steps=30).images
|
||||
make_image_grid(images, rows=1, cols=2)
|
||||
```
|
||||
|
||||
<div class="flex gap-4">
|
||||
<div>
|
||||
<img class="rounded-xl" src="https://huggingface.co/datasets/hf-internal-testing/diffusers-images/resolve/main/compel/sdxl_ball1.png"/>
|
||||
<figcaption class="mt-2 text-center text-sm text-gray-500">"a red cat playing with a (ball)1.5"</figcaption>
|
||||
</div>
|
||||
<div>
|
||||
<img class="rounded-xl" src="https://huggingface.co/datasets/hf-internal-testing/diffusers-images/resolve/main/compel/sdxl_ball2.png"/>
|
||||
<figcaption class="mt-2 text-center text-sm text-gray-500">"a red cat playing with a (ball)0.6"</figcaption>
|
||||
</div>
|
||||
</div>
|
||||
|
||||
@@ -66,6 +66,12 @@ from accelerate.utils import write_basic_config
|
||||
write_basic_config()
|
||||
```
|
||||
|
||||
## 원을 채우는 데이터셋
|
||||
|
||||
원본 데이터셋은 ControlNet [repo](https://huggingface.co/lllyasviel/ControlNet/blob/main/training/fill50k.zip)에 올라와있지만, 우리는 [여기](https://huggingface.co/datasets/fusing/fill50k)에 새롭게 다시 올려서 🤗 Datasets 과 호환가능합니다. 그래서 학습 스크립트 상에서 데이터 불러오기를 다룰 수 있습니다.
|
||||
|
||||
우리의 학습 예시는 원래 ControlNet의 학습에 쓰였던 [`stable-diffusion-v1-5/stable-diffusion-v1-5`](https://huggingface.co/stable-diffusion-v1-5/stable-diffusion-v1-5)을 사용합니다. 그렇지만 ControlNet은 대응되는 어느 Stable Diffusion 모델([`CompVis/stable-diffusion-v1-4`](https://huggingface.co/CompVis/stable-diffusion-v1-4)) 혹은 [`stabilityai/stable-diffusion-2-1`](https://huggingface.co/stabilityai/stable-diffusion-2-1)의 증가를 위해 학습될 수 있습니다.
|
||||
|
||||
자체 데이터셋을 사용하기 위해서는 [학습을 위한 데이터셋 생성하기](create_dataset) 가이드를 확인하세요.
|
||||
|
||||
## 학습
|
||||
|
||||
@@ -79,13 +79,13 @@ This command will prompt you for a token. Copy-paste yours from your [settings/t
|
||||
### Target Modules
|
||||
When LoRA was first adapted from language models to diffusion models, it was applied to the cross-attention layers in the Unet that relate the image representations with the prompts that describe them.
|
||||
More recently, SOTA text-to-image diffusion models replaced the Unet with a diffusion Transformer(DiT). With this change, we may also want to explore
|
||||
applying LoRA training onto different types of layers and blocks. To allow more flexibility and control over the targeted modules we added `--lora_layers`- in which you can specify in a comma separated string
|
||||
applying LoRA training onto different types of layers and blocks. To allow more flexibility and control over the targeted modules we added `--lora_layers`- in which you can specify in a comma seperated string
|
||||
the exact modules for LoRA training. Here are some examples of target modules you can provide:
|
||||
- for attention only layers: `--lora_layers="attn.to_k,attn.to_q,attn.to_v,attn.to_out.0"`
|
||||
- to train the same modules as in the fal trainer: `--lora_layers="attn.to_k,attn.to_q,attn.to_v,attn.to_out.0,attn.add_k_proj,attn.add_q_proj,attn.add_v_proj,attn.to_add_out,ff.net.0.proj,ff.net.2,ff_context.net.0.proj,ff_context.net.2"`
|
||||
- to train the same modules as in ostris ai-toolkit / replicate trainer: `--lora_blocks="attn.to_k,attn.to_q,attn.to_v,attn.to_out.0,attn.add_k_proj,attn.add_q_proj,attn.add_v_proj,attn.to_add_out,ff.net.0.proj,ff.net.2,ff_context.net.0.proj,ff_context.net.2,norm1_context.linear, norm1.linear,norm.linear,proj_mlp,proj_out"`
|
||||
> [!NOTE]
|
||||
> `--lora_layers` can also be used to specify which **blocks** to apply LoRA training to. To do so, simply add a block prefix to each layer in the comma separated string:
|
||||
> `--lora_layers` can also be used to specify which **blocks** to apply LoRA training to. To do so, simply add a block prefix to each layer in the comma seperated string:
|
||||
> **single DiT blocks**: to target the ith single transformer block, add the prefix `single_transformer_blocks.i`, e.g. - `single_transformer_blocks.i.attn.to_k`
|
||||
> **MMDiT blocks**: to target the ith MMDiT block, add the prefix `transformer_blocks.i`, e.g. - `transformer_blocks.i.attn.to_k`
|
||||
> [!NOTE]
|
||||
|
||||
@@ -1,8 +1,7 @@
|
||||
accelerate>=0.31.0
|
||||
accelerate>=0.16.0
|
||||
torchvision
|
||||
transformers>=4.41.2
|
||||
transformers>=4.25.1
|
||||
ftfy
|
||||
tensorboard
|
||||
Jinja2
|
||||
peft>=0.11.1
|
||||
sentencepiece
|
||||
peft==0.7.0
|
||||
@@ -24,7 +24,7 @@ import re
|
||||
import shutil
|
||||
from contextlib import nullcontext
|
||||
from pathlib import Path
|
||||
from typing import List, Optional
|
||||
from typing import List, Optional, Union
|
||||
|
||||
import numpy as np
|
||||
import torch
|
||||
@@ -74,7 +74,7 @@ if is_wandb_available():
|
||||
import wandb
|
||||
|
||||
# Will error if the minimal version of diffusers is not installed. Remove at your own risks.
|
||||
check_min_version("0.34.0.dev0")
|
||||
check_min_version("0.33.0.dev0")
|
||||
|
||||
logger = get_logger(__name__)
|
||||
|
||||
@@ -227,21 +227,11 @@ def log_validation(
|
||||
pipeline.set_progress_bar_config(disable=True)
|
||||
|
||||
# run inference
|
||||
generator = torch.Generator(device=accelerator.device).manual_seed(args.seed) if args.seed is not None else None
|
||||
autocast_ctx = torch.autocast(accelerator.device.type) if not is_final_validation else nullcontext()
|
||||
generator = torch.Generator(device=accelerator.device).manual_seed(args.seed) if args.seed else None
|
||||
autocast_ctx = nullcontext()
|
||||
|
||||
# pre-calculate prompt embeds, pooled prompt embeds, text ids because t5 does not support autocast
|
||||
with torch.no_grad():
|
||||
prompt_embeds, pooled_prompt_embeds, text_ids = pipeline.encode_prompt(
|
||||
pipeline_args["prompt"], prompt_2=pipeline_args["prompt"]
|
||||
)
|
||||
images = []
|
||||
for _ in range(args.num_validation_images):
|
||||
with autocast_ctx:
|
||||
image = pipeline(
|
||||
prompt_embeds=prompt_embeds, pooled_prompt_embeds=pooled_prompt_embeds, generator=generator
|
||||
).images[0]
|
||||
images.append(image)
|
||||
with autocast_ctx:
|
||||
images = [pipeline(**pipeline_args, generator=generator).images[0] for _ in range(args.num_validation_images)]
|
||||
|
||||
for tracker in accelerator.trackers:
|
||||
phase_name = "test" if is_final_validation else "validation"
|
||||
@@ -388,7 +378,7 @@ def parse_args(input_args=None):
|
||||
default=None,
|
||||
help="the concept to use to initialize the new inserted tokens when training with "
|
||||
"--train_text_encoder_ti = True. By default, new tokens (<si><si+1>) are initialized with random value. "
|
||||
"Alternatively, you could specify a different word/words whose value will be used as the starting point for the new inserted tokens. "
|
||||
"Alternatively, you could specify a different word/words whos value will be used as the starting point for the new inserted tokens. "
|
||||
"--num_new_tokens_per_abstraction is ignored when initializer_concept is provided",
|
||||
)
|
||||
parser.add_argument(
|
||||
@@ -667,17 +657,15 @@ def parse_args(input_args=None):
|
||||
parser.add_argument(
|
||||
"--adam_weight_decay_text_encoder", type=float, default=1e-03, help="Weight decay to use for text_encoder"
|
||||
)
|
||||
|
||||
parser.add_argument(
|
||||
"--lora_layers",
|
||||
type=str,
|
||||
default=None,
|
||||
help=(
|
||||
"The transformer modules to apply LoRA training on. Please specify the layers in a comma separated. "
|
||||
"The transformer modules to apply LoRA training on. Please specify the layers in a comma seperated. "
|
||||
'E.g. - "to_k,to_q,to_v,to_out.0" will result in lora training of attention layers only. For more examples refer to https://github.com/huggingface/diffusers/blob/main/examples/advanced_diffusion_training/README_flux.md'
|
||||
),
|
||||
)
|
||||
|
||||
parser.add_argument(
|
||||
"--adam_epsilon",
|
||||
type=float,
|
||||
@@ -750,15 +738,6 @@ def parse_args(input_args=None):
|
||||
" flag passed with the `accelerate.launch` command. Use this argument to override the accelerate config."
|
||||
),
|
||||
)
|
||||
parser.add_argument(
|
||||
"--upcast_before_saving",
|
||||
action="store_true",
|
||||
default=False,
|
||||
help=(
|
||||
"Whether to upcast the trained transformer layers to float32 before saving (at the end of training). "
|
||||
"Defaults to precision dtype used for training to save memory"
|
||||
),
|
||||
)
|
||||
parser.add_argument(
|
||||
"--prior_generation_precision",
|
||||
type=str,
|
||||
@@ -839,9 +818,9 @@ class TokenEmbeddingsHandler:
|
||||
idx = 0
|
||||
for tokenizer, text_encoder in zip(self.tokenizers, self.text_encoders):
|
||||
assert isinstance(inserting_toks, list), "inserting_toks should be a list of strings."
|
||||
assert all(isinstance(tok, str) for tok in inserting_toks), (
|
||||
"All elements in inserting_toks should be strings."
|
||||
)
|
||||
assert all(
|
||||
isinstance(tok, str) for tok in inserting_toks
|
||||
), "All elements in inserting_toks should be strings."
|
||||
|
||||
self.inserting_toks = inserting_toks
|
||||
special_tokens_dict = {"additional_special_tokens": self.inserting_toks}
|
||||
@@ -901,7 +880,9 @@ class TokenEmbeddingsHandler:
|
||||
idx_to_text_encoder_name = {0: "clip_l", 1: "t5"}
|
||||
for idx, text_encoder in enumerate(self.text_encoders):
|
||||
train_ids = self.train_ids if idx == 0 else self.train_ids_t5
|
||||
embeds = text_encoder.text_model.embeddings.token_embedding if idx == 0 else text_encoder.shared
|
||||
embeds = (
|
||||
text_encoder.text_model.embeddings.token_embedding if idx == 0 else text_encoder.encoder.embed_tokens
|
||||
)
|
||||
assert embeds.weight.data.shape[0] == len(self.tokenizers[idx]), "Tokenizers should be the same."
|
||||
new_token_embeddings = embeds.weight.data[train_ids]
|
||||
|
||||
@@ -923,7 +904,9 @@ class TokenEmbeddingsHandler:
|
||||
@torch.no_grad()
|
||||
def retract_embeddings(self):
|
||||
for idx, text_encoder in enumerate(self.text_encoders):
|
||||
embeds = text_encoder.text_model.embeddings.token_embedding if idx == 0 else text_encoder.shared
|
||||
embeds = (
|
||||
text_encoder.text_model.embeddings.token_embedding if idx == 0 else text_encoder.encoder.embed_tokens
|
||||
)
|
||||
index_no_updates = self.embeddings_settings[f"index_no_updates_{idx}"]
|
||||
embeds.weight.data[index_no_updates] = (
|
||||
self.embeddings_settings[f"original_embeddings_{idx}"][index_no_updates]
|
||||
@@ -1168,7 +1151,7 @@ def tokenize_prompt(tokenizer, prompt, max_sequence_length, add_special_tokens=F
|
||||
return text_input_ids
|
||||
|
||||
|
||||
def _encode_prompt_with_t5(
|
||||
def _get_t5_prompt_embeds(
|
||||
text_encoder,
|
||||
tokenizer,
|
||||
max_sequence_length=512,
|
||||
@@ -1197,10 +1180,7 @@ def _encode_prompt_with_t5(
|
||||
|
||||
prompt_embeds = text_encoder(text_input_ids.to(device))[0]
|
||||
|
||||
if hasattr(text_encoder, "module"):
|
||||
dtype = text_encoder.module.dtype
|
||||
else:
|
||||
dtype = text_encoder.dtype
|
||||
dtype = text_encoder.dtype
|
||||
prompt_embeds = prompt_embeds.to(dtype=dtype, device=device)
|
||||
|
||||
_, seq_len, _ = prompt_embeds.shape
|
||||
@@ -1212,7 +1192,7 @@ def _encode_prompt_with_t5(
|
||||
return prompt_embeds
|
||||
|
||||
|
||||
def _encode_prompt_with_clip(
|
||||
def _get_clip_prompt_embeds(
|
||||
text_encoder,
|
||||
tokenizer,
|
||||
prompt: str,
|
||||
@@ -1241,13 +1221,9 @@ def _encode_prompt_with_clip(
|
||||
|
||||
prompt_embeds = text_encoder(text_input_ids.to(device), output_hidden_states=False)
|
||||
|
||||
if hasattr(text_encoder, "module"):
|
||||
dtype = text_encoder.module.dtype
|
||||
else:
|
||||
dtype = text_encoder.dtype
|
||||
# Use pooled output of CLIPTextModel
|
||||
prompt_embeds = prompt_embeds.pooler_output
|
||||
prompt_embeds = prompt_embeds.to(dtype=dtype, device=device)
|
||||
prompt_embeds = prompt_embeds.to(dtype=text_encoder.dtype, device=device)
|
||||
|
||||
# duplicate text embeddings for each generation per prompt, using mps friendly method
|
||||
prompt_embeds = prompt_embeds.repeat(1, num_images_per_prompt, 1)
|
||||
@@ -1266,35 +1242,136 @@ def encode_prompt(
|
||||
text_input_ids_list=None,
|
||||
):
|
||||
prompt = [prompt] if isinstance(prompt, str) else prompt
|
||||
if hasattr(text_encoders[0], "module"):
|
||||
dtype = text_encoders[0].module.dtype
|
||||
else:
|
||||
dtype = text_encoders[0].dtype
|
||||
batch_size = len(prompt)
|
||||
dtype = text_encoders[0].dtype
|
||||
|
||||
pooled_prompt_embeds = _encode_prompt_with_clip(
|
||||
pooled_prompt_embeds = _get_clip_prompt_embeds(
|
||||
text_encoder=text_encoders[0],
|
||||
tokenizer=tokenizers[0],
|
||||
prompt=prompt,
|
||||
device=device if device is not None else text_encoders[0].device,
|
||||
num_images_per_prompt=num_images_per_prompt,
|
||||
text_input_ids=text_input_ids_list[0] if text_input_ids_list else None,
|
||||
text_input_ids=text_input_ids_list[0] if text_input_ids_list is not None else None,
|
||||
)
|
||||
|
||||
prompt_embeds = _encode_prompt_with_t5(
|
||||
prompt_embeds = _get_t5_prompt_embeds(
|
||||
text_encoder=text_encoders[1],
|
||||
tokenizer=tokenizers[1],
|
||||
max_sequence_length=max_sequence_length,
|
||||
prompt=prompt,
|
||||
num_images_per_prompt=num_images_per_prompt,
|
||||
device=device if device is not None else text_encoders[1].device,
|
||||
text_input_ids=text_input_ids_list[1] if text_input_ids_list else None,
|
||||
text_input_ids=text_input_ids_list[1] if text_input_ids_list is not None else None,
|
||||
)
|
||||
|
||||
text_ids = torch.zeros(prompt_embeds.shape[1], 3).to(device=device, dtype=dtype)
|
||||
text_ids = torch.zeros(batch_size, prompt_embeds.shape[1], 3).to(device=device, dtype=dtype)
|
||||
text_ids = text_ids.repeat(num_images_per_prompt, 1, 1)
|
||||
|
||||
return prompt_embeds, pooled_prompt_embeds, text_ids
|
||||
|
||||
|
||||
# CustomFlowMatchEulerDiscreteScheduler was taken from ostris ai-toolkit trainer:
|
||||
# https://github.com/ostris/ai-toolkit/blob/9ee1ef2a0a2a9a02b92d114a95f21312e5906e54/toolkit/samplers/custom_flowmatch_sampler.py#L95
|
||||
class CustomFlowMatchEulerDiscreteScheduler(FlowMatchEulerDiscreteScheduler):
|
||||
def __init__(self, *args, **kwargs):
|
||||
super().__init__(*args, **kwargs)
|
||||
|
||||
with torch.no_grad():
|
||||
# create weights for timesteps
|
||||
num_timesteps = 1000
|
||||
|
||||
# generate the multiplier based on cosmap loss weighing
|
||||
# this is only used on linear timesteps for now
|
||||
|
||||
# cosine map weighing is higher in the middle and lower at the ends
|
||||
# bot = 1 - 2 * self.sigmas + 2 * self.sigmas ** 2
|
||||
# cosmap_weighing = 2 / (math.pi * bot)
|
||||
|
||||
# sigma sqrt weighing is significantly higher at the end and lower at the beginning
|
||||
sigma_sqrt_weighing = (self.sigmas**-2.0).float()
|
||||
# clip at 1e4 (1e6 is too high)
|
||||
sigma_sqrt_weighing = torch.clamp(sigma_sqrt_weighing, max=1e4)
|
||||
# bring to a mean of 1
|
||||
sigma_sqrt_weighing = sigma_sqrt_weighing / sigma_sqrt_weighing.mean()
|
||||
|
||||
# Create linear timesteps from 1000 to 0
|
||||
timesteps = torch.linspace(1000, 0, num_timesteps, device="cpu")
|
||||
|
||||
self.linear_timesteps = timesteps
|
||||
# self.linear_timesteps_weights = cosmap_weighing
|
||||
self.linear_timesteps_weights = sigma_sqrt_weighing
|
||||
|
||||
# self.sigmas = self.get_sigmas(timesteps, n_dim=1, dtype=torch.float32, device='cpu')
|
||||
pass
|
||||
|
||||
def get_weights_for_timesteps(self, timesteps: torch.Tensor) -> torch.Tensor:
|
||||
# Get the indices of the timesteps
|
||||
step_indices = [(self.timesteps == t).nonzero().item() for t in timesteps]
|
||||
|
||||
# Get the weights for the timesteps
|
||||
weights = self.linear_timesteps_weights[step_indices].flatten()
|
||||
|
||||
return weights
|
||||
|
||||
def get_sigmas(self, timesteps: torch.Tensor, n_dim, dtype, device) -> torch.Tensor:
|
||||
sigmas = self.sigmas.to(device=device, dtype=dtype)
|
||||
schedule_timesteps = self.timesteps.to(device)
|
||||
timesteps = timesteps.to(device)
|
||||
step_indices = [(schedule_timesteps == t).nonzero().item() for t in timesteps]
|
||||
|
||||
sigma = sigmas[step_indices].flatten()
|
||||
while len(sigma.shape) < n_dim:
|
||||
sigma = sigma.unsqueeze(-1)
|
||||
|
||||
return sigma
|
||||
|
||||
def add_noise(
|
||||
self,
|
||||
original_samples: torch.Tensor,
|
||||
noise: torch.Tensor,
|
||||
timesteps: torch.Tensor,
|
||||
) -> torch.Tensor:
|
||||
## ref https://github.com/huggingface/diffusers/blob/fbe29c62984c33c6cf9cf7ad120a992fe6d20854/examples/dreambooth/train_dreambooth_sd3.py#L1578
|
||||
## Add noise according to flow matching.
|
||||
## zt = (1 - texp) * x + texp * z1
|
||||
|
||||
# sigmas = get_sigmas(timesteps, n_dim=model_input.ndim, dtype=model_input.dtype)
|
||||
# noisy_model_input = (1.0 - sigmas) * model_input + sigmas * noise
|
||||
|
||||
# timestep needs to be in [0, 1], we store them in [0, 1000]
|
||||
# noisy_sample = (1 - timestep) * latent + timestep * noise
|
||||
t_01 = (timesteps / 1000).to(original_samples.device)
|
||||
noisy_model_input = (1 - t_01) * original_samples + t_01 * noise
|
||||
|
||||
# n_dim = original_samples.ndim
|
||||
# sigmas = self.get_sigmas(timesteps, n_dim, original_samples.dtype, original_samples.device)
|
||||
# noisy_model_input = (1.0 - sigmas) * original_samples + sigmas * noise
|
||||
return noisy_model_input
|
||||
|
||||
def scale_model_input(self, sample: torch.Tensor, timestep: Union[float, torch.Tensor]) -> torch.Tensor:
|
||||
return sample
|
||||
|
||||
def set_train_timesteps(self, num_timesteps, device, linear=False):
|
||||
if linear:
|
||||
timesteps = torch.linspace(1000, 0, num_timesteps, device=device)
|
||||
self.timesteps = timesteps
|
||||
return timesteps
|
||||
else:
|
||||
# distribute them closer to center. Inference distributes them as a bias toward first
|
||||
# Generate values from 0 to 1
|
||||
t = torch.sigmoid(torch.randn((num_timesteps,), device=device))
|
||||
|
||||
# Scale and reverse the values to go from 1000 to 0
|
||||
timesteps = (1 - t) * 1000
|
||||
|
||||
# Sort the timesteps in descending order
|
||||
timesteps, _ = torch.sort(timesteps, descending=True)
|
||||
|
||||
self.timesteps = timesteps.to(device=device)
|
||||
|
||||
return timesteps
|
||||
|
||||
|
||||
def main(args):
|
||||
if args.report_to == "wandb" and args.hub_token is not None:
|
||||
raise ValueError(
|
||||
@@ -1426,7 +1503,7 @@ def main(args):
|
||||
)
|
||||
|
||||
# Load scheduler and models
|
||||
noise_scheduler = FlowMatchEulerDiscreteScheduler.from_pretrained(
|
||||
noise_scheduler = CustomFlowMatchEulerDiscreteScheduler.from_pretrained(
|
||||
args.pretrained_model_name_or_path, subfolder="scheduler"
|
||||
)
|
||||
noise_scheduler_copy = copy.deepcopy(noise_scheduler)
|
||||
@@ -1546,6 +1623,7 @@ def main(args):
|
||||
target_modules=target_modules,
|
||||
)
|
||||
transformer.add_adapter(transformer_lora_config)
|
||||
|
||||
if args.train_text_encoder:
|
||||
text_lora_config = LoraConfig(
|
||||
r=args.rank,
|
||||
@@ -1605,7 +1683,7 @@ def main(args):
|
||||
lora_state_dict = FluxPipeline.lora_state_dict(input_dir)
|
||||
|
||||
transformer_state_dict = {
|
||||
f"{k.replace('transformer.', '')}": v for k, v in lora_state_dict.items() if k.startswith("transformer.")
|
||||
f'{k.replace("transformer.", "")}': v for k, v in lora_state_dict.items() if k.startswith("transformer.")
|
||||
}
|
||||
transformer_state_dict = convert_unet_state_dict_to_peft(transformer_state_dict)
|
||||
incompatible_keys = set_peft_model_state_dict(transformer_, transformer_state_dict, adapter_name="default")
|
||||
@@ -1653,6 +1731,7 @@ def main(args):
|
||||
cast_training_params(models, dtype=torch.float32)
|
||||
|
||||
transformer_lora_parameters = list(filter(lambda p: p.requires_grad, transformer.parameters()))
|
||||
|
||||
if args.train_text_encoder:
|
||||
text_lora_parameters_one = list(filter(lambda p: p.requires_grad, text_encoder_one.parameters()))
|
||||
# if we use textual inversion, we freeze all parameters except for the token embeddings
|
||||
@@ -1662,8 +1741,7 @@ def main(args):
|
||||
for name, param in text_encoder_one.named_parameters():
|
||||
if "token_embedding" in name:
|
||||
# ensure that dtype is float32, even if rest of the model that isn't trained is loaded in fp16
|
||||
if args.mixed_precision == "fp16":
|
||||
param.data = param.to(dtype=torch.float32)
|
||||
param.data = param.to(dtype=torch.float32)
|
||||
param.requires_grad = True
|
||||
text_lora_parameters_one.append(param)
|
||||
else:
|
||||
@@ -1671,10 +1749,9 @@ def main(args):
|
||||
if args.enable_t5_ti: # whether to do pivotal tuning/textual inversion for T5 as well
|
||||
text_lora_parameters_two = []
|
||||
for name, param in text_encoder_two.named_parameters():
|
||||
if "shared" in name:
|
||||
if "token_embedding" in name:
|
||||
# ensure that dtype is float32, even if rest of the model that isn't trained is loaded in fp16
|
||||
if args.mixed_precision == "fp16":
|
||||
param.data = param.to(dtype=torch.float32)
|
||||
param.data = param.to(dtype=torch.float32)
|
||||
param.requires_grad = True
|
||||
text_lora_parameters_two.append(param)
|
||||
else:
|
||||
@@ -1755,7 +1832,6 @@ def main(args):
|
||||
optimizer_class = bnb.optim.AdamW8bit
|
||||
else:
|
||||
optimizer_class = torch.optim.AdamW
|
||||
|
||||
optimizer = optimizer_class(
|
||||
params_to_optimize,
|
||||
betas=(args.adam_beta1, args.adam_beta2),
|
||||
@@ -1915,22 +1991,17 @@ def main(args):
|
||||
free_memory()
|
||||
|
||||
# Scheduler and math around the number of training steps.
|
||||
# Check the PR https://github.com/huggingface/diffusers/pull/8312 for detailed explanation.
|
||||
num_warmup_steps_for_scheduler = args.lr_warmup_steps * accelerator.num_processes
|
||||
overrode_max_train_steps = False
|
||||
num_update_steps_per_epoch = math.ceil(len(train_dataloader) / args.gradient_accumulation_steps)
|
||||
if args.max_train_steps is None:
|
||||
len_train_dataloader_after_sharding = math.ceil(len(train_dataloader) / accelerator.num_processes)
|
||||
num_update_steps_per_epoch = math.ceil(len_train_dataloader_after_sharding / args.gradient_accumulation_steps)
|
||||
num_training_steps_for_scheduler = (
|
||||
args.num_train_epochs * accelerator.num_processes * num_update_steps_per_epoch
|
||||
)
|
||||
else:
|
||||
num_training_steps_for_scheduler = args.max_train_steps * accelerator.num_processes
|
||||
args.max_train_steps = args.num_train_epochs * num_update_steps_per_epoch
|
||||
overrode_max_train_steps = True
|
||||
|
||||
lr_scheduler = get_scheduler(
|
||||
args.lr_scheduler,
|
||||
optimizer=optimizer,
|
||||
num_warmup_steps=num_warmup_steps_for_scheduler,
|
||||
num_training_steps=num_training_steps_for_scheduler,
|
||||
num_warmup_steps=args.lr_warmup_steps * accelerator.num_processes,
|
||||
num_training_steps=args.max_train_steps * accelerator.num_processes,
|
||||
num_cycles=args.lr_num_cycles,
|
||||
power=args.lr_power,
|
||||
)
|
||||
@@ -1965,14 +2036,8 @@ def main(args):
|
||||
|
||||
# We need to recalculate our total training steps as the size of the training dataloader may have changed.
|
||||
num_update_steps_per_epoch = math.ceil(len(train_dataloader) / args.gradient_accumulation_steps)
|
||||
if args.max_train_steps is None:
|
||||
if overrode_max_train_steps:
|
||||
args.max_train_steps = args.num_train_epochs * num_update_steps_per_epoch
|
||||
if num_training_steps_for_scheduler != args.max_train_steps:
|
||||
logger.warning(
|
||||
f"The length of the 'train_dataloader' after 'accelerator.prepare' ({len(train_dataloader)}) does not match "
|
||||
f"the expected length ({len_train_dataloader_after_sharding}) when the learning rate scheduler was created. "
|
||||
f"This inconsistency may result in the learning rate scheduler not functioning properly."
|
||||
)
|
||||
# Afterwards we recalculate our number of training epochs
|
||||
args.num_train_epochs = math.ceil(args.max_train_steps / num_update_steps_per_epoch)
|
||||
|
||||
@@ -2064,7 +2129,7 @@ def main(args):
|
||||
if args.train_text_encoder:
|
||||
text_encoder_one.train()
|
||||
# set top parameter requires_grad = True for gradient checkpointing works
|
||||
unwrap_model(text_encoder_one).text_model.embeddings.requires_grad_(True)
|
||||
accelerator.unwrap_model(text_encoder_one).text_model.embeddings.requires_grad_(True)
|
||||
elif args.train_text_encoder_ti: # textual inversion / pivotal tuning
|
||||
text_encoder_one.train()
|
||||
if args.enable_t5_ti:
|
||||
@@ -2076,11 +2141,6 @@ def main(args):
|
||||
pivoted_tr = True
|
||||
|
||||
for step, batch in enumerate(train_dataloader):
|
||||
models_to_accumulate = [transformer]
|
||||
if not freeze_text_encoder:
|
||||
models_to_accumulate.extend([text_encoder_one])
|
||||
if args.enable_t5_ti:
|
||||
models_to_accumulate.extend([text_encoder_two])
|
||||
if pivoted_te:
|
||||
# stopping optimization of text_encoder params
|
||||
optimizer.param_groups[te_idx]["lr"] = 0.0
|
||||
@@ -2089,7 +2149,7 @@ def main(args):
|
||||
logger.info(f"PIVOT TRANSFORMER {epoch}")
|
||||
optimizer.param_groups[0]["lr"] = 0.0
|
||||
|
||||
with accelerator.accumulate(models_to_accumulate):
|
||||
with accelerator.accumulate(transformer):
|
||||
prompts = batch["prompts"]
|
||||
|
||||
# encode batch prompts when custom prompts are provided for each image -
|
||||
@@ -2133,7 +2193,7 @@ def main(args):
|
||||
model_input = (model_input - vae_config_shift_factor) * vae_config_scaling_factor
|
||||
model_input = model_input.to(dtype=weight_dtype)
|
||||
|
||||
vae_scale_factor = 2 ** (len(vae_config_block_out_channels) - 1)
|
||||
vae_scale_factor = 2 ** (len(vae_config_block_out_channels))
|
||||
|
||||
latent_image_ids = FluxPipeline._prepare_latent_image_ids(
|
||||
model_input.shape[0],
|
||||
@@ -2172,7 +2232,7 @@ def main(args):
|
||||
)
|
||||
|
||||
# handle guidance
|
||||
if unwrap_model(transformer).config.guidance_embeds:
|
||||
if transformer.config.guidance_embeds:
|
||||
guidance = torch.tensor([args.guidance_scale], device=accelerator.device)
|
||||
guidance = guidance.expand(model_input.shape[0])
|
||||
else:
|
||||
@@ -2181,7 +2241,7 @@ def main(args):
|
||||
# Predict the noise residual
|
||||
model_pred = transformer(
|
||||
hidden_states=packed_noisy_model_input,
|
||||
# YiYi notes: divide it by 1000 for now because we scale it by 1000 in the transformer model (we should not keep it but I want to keep the inputs same for the model for testing)
|
||||
# YiYi notes: divide it by 1000 for now because we scale it by 1000 in the transforme rmodel (we should not keep it but I want to keep the inputs same for the model for testing)
|
||||
timestep=timesteps / 1000,
|
||||
guidance=guidance,
|
||||
pooled_projections=pooled_prompt_embeds,
|
||||
@@ -2232,26 +2292,16 @@ def main(args):
|
||||
accelerator.backward(loss)
|
||||
if accelerator.sync_gradients:
|
||||
if not freeze_text_encoder:
|
||||
if args.train_text_encoder: # text encoder tuning
|
||||
if args.train_text_encoder:
|
||||
params_to_clip = itertools.chain(transformer.parameters(), text_encoder_one.parameters())
|
||||
elif pure_textual_inversion:
|
||||
if args.enable_t5_ti:
|
||||
params_to_clip = itertools.chain(
|
||||
text_encoder_one.parameters(), text_encoder_two.parameters()
|
||||
)
|
||||
else:
|
||||
params_to_clip = itertools.chain(text_encoder_one.parameters())
|
||||
params_to_clip = itertools.chain(
|
||||
text_encoder_one.parameters(), text_encoder_two.parameters()
|
||||
)
|
||||
else:
|
||||
if args.enable_t5_ti:
|
||||
params_to_clip = itertools.chain(
|
||||
transformer.parameters(),
|
||||
text_encoder_one.parameters(),
|
||||
text_encoder_two.parameters(),
|
||||
)
|
||||
else:
|
||||
params_to_clip = itertools.chain(
|
||||
transformer.parameters(), text_encoder_one.parameters()
|
||||
)
|
||||
params_to_clip = itertools.chain(
|
||||
transformer.parameters(), text_encoder_one.parameters(), text_encoder_two.parameters()
|
||||
)
|
||||
else:
|
||||
params_to_clip = itertools.chain(transformer.parameters())
|
||||
accelerator.clip_grad_norm_(params_to_clip, args.max_grad_norm)
|
||||
@@ -2293,10 +2343,6 @@ def main(args):
|
||||
|
||||
save_path = os.path.join(args.output_dir, f"checkpoint-{global_step}")
|
||||
accelerator.save_state(save_path)
|
||||
if args.train_text_encoder_ti:
|
||||
embedding_handler.save_embeddings(
|
||||
f"{args.output_dir}/{Path(args.output_dir).name}_emb_checkpoint_{global_step}.safetensors"
|
||||
)
|
||||
logger.info(f"Saved state to {save_path}")
|
||||
|
||||
logs = {"loss": loss.detach().item(), "lr": lr_scheduler.get_last_lr()[0]}
|
||||
@@ -2309,16 +2355,14 @@ def main(args):
|
||||
if accelerator.is_main_process:
|
||||
if args.validation_prompt is not None and epoch % args.validation_epochs == 0:
|
||||
# create pipeline
|
||||
if freeze_text_encoder: # no text encoder one, two optimizations
|
||||
if freeze_text_encoder:
|
||||
text_encoder_one, text_encoder_two = load_text_encoders(text_encoder_cls_one, text_encoder_cls_two)
|
||||
text_encoder_one.to(weight_dtype)
|
||||
text_encoder_two.to(weight_dtype)
|
||||
pipeline = FluxPipeline.from_pretrained(
|
||||
args.pretrained_model_name_or_path,
|
||||
vae=vae,
|
||||
text_encoder=unwrap_model(text_encoder_one),
|
||||
text_encoder_2=unwrap_model(text_encoder_two),
|
||||
transformer=unwrap_model(transformer),
|
||||
text_encoder=accelerator.unwrap_model(text_encoder_one),
|
||||
text_encoder_2=accelerator.unwrap_model(text_encoder_two),
|
||||
transformer=accelerator.unwrap_model(transformer),
|
||||
revision=args.revision,
|
||||
variant=args.variant,
|
||||
torch_dtype=weight_dtype,
|
||||
@@ -2332,21 +2376,21 @@ def main(args):
|
||||
epoch=epoch,
|
||||
torch_dtype=weight_dtype,
|
||||
)
|
||||
images = None
|
||||
del pipeline
|
||||
|
||||
if freeze_text_encoder:
|
||||
del text_encoder_one, text_encoder_two
|
||||
free_memory()
|
||||
|
||||
images = None
|
||||
del pipeline
|
||||
elif args.train_text_encoder:
|
||||
del text_encoder_two
|
||||
free_memory()
|
||||
|
||||
# Save the lora layers
|
||||
accelerator.wait_for_everyone()
|
||||
if accelerator.is_main_process:
|
||||
transformer = unwrap_model(transformer)
|
||||
if args.upcast_before_saving:
|
||||
transformer.to(torch.float32)
|
||||
else:
|
||||
transformer = transformer.to(weight_dtype)
|
||||
transformer = transformer.to(weight_dtype)
|
||||
transformer_lora_layers = get_peft_model_state_dict(transformer)
|
||||
|
||||
if args.train_text_encoder:
|
||||
@@ -2388,8 +2432,8 @@ def main(args):
|
||||
accelerator=accelerator,
|
||||
pipeline_args=pipeline_args,
|
||||
epoch=epoch,
|
||||
is_final_validation=True,
|
||||
torch_dtype=weight_dtype,
|
||||
is_final_validation=True,
|
||||
)
|
||||
|
||||
save_model_card(
|
||||
@@ -2412,7 +2456,6 @@ def main(args):
|
||||
commit_message="End of training",
|
||||
ignore_patterns=["step_*", "epoch_*"],
|
||||
)
|
||||
|
||||
images = None
|
||||
del pipeline
|
||||
|
||||
|
||||
Some files were not shown because too many files have changed in this diff Show More
Reference in New Issue
Block a user